
They’re vintage because I made them for Noilette, when she was very little. Years ago, before Mattel bought American Girl, the dolls (and their clothing) were excellent quality (unlike the books, which, despite their “educational” pretensions, are pretty weak all around). The size of these girl-shaped dolls makes sewing for them fast and rewarding; you get a lot of bang for your sewing efforts.
Running across various posts about others’ AG sewing prompted me to finally get out the camera and immortalize Noilette’s collection. Here are the garments I made for her AG dolls a long time ago. (And, at the bottom of the post, pictures of the trunk and bed I made for her, too.)

First up, a sou-wester slicker and hat, made from a flannel-backed table cloth, and lined (badly, I’m sorry to say) in navy nylon. The dark nylon is why the coat looks darker than the unlined hat. You can’t tell here, but the brim of the hat is elongated, just as it would be in a proper, full-sized version. The coat’s collar is a very, very fine pinwale cord, in brown. Much more comfortable than PVC next to the chin!
The back of the slicker has a little vent:
 The little chrome “snaps” are fake; there’s hook-and-loop underneath. All of these items were made on my Pfaff 1229, and most of what I’m posting here was made from American Girl patterns. Does Mattel still sell them? They were quite wonderful.
Here’s a prairie dress, complete with bonnet, simple bloomers, an apron (with pocket) and a floating pocket that also wrapped around the waist. I’m not sure why I made a pocket on the apron, since it’s a bit redundant. Because I could?
 You can barely see the “growth tuck” about an inch above the hem. That’s so frugal mamas could let the skirt down as the child grew taller. The hem is faced with blue gingham; I did that on a couple of the garments, probably just because it seemed like fun.
Moving forward to Victorian times, here’s a very badly wrinkled little cotton pinafore, trimmed in rick-rack, with a pink gingham dress underneath, complete with mini leg o’mutton sleeves:
 My iron and I are not getting along these days. I have a vague recollection that I made Noilette a matching outfit.
Naturally, I made a full-circle poodle skirt, though it’s very much the worse for fuzz. This wasn’t the best quality felt around.
 Here’s a surprisingly badly-made tutu. I’m not a fan of pink, and I see that I managed to find a rather mauve-y shade for the leotard:
 There was only one slipper in the trunk when I unpacked it today. If these little treasures get passed down someday, I’ll have to make a new pair.
Here’s another dress; a generic drop-waist style that, I think, was also supposed to be from around the turn of the century:

I know; wrinkle city. It’s all-cotton. Those are little, tiny, woven checks. Lovely stuff!
This little sweater set was supposed to have matching mittens, and may yet acquire them:
 I didn’t use a pattern for these, just copied some larger ones. Fitting was not much of an issue, so they worked up very quickly. I think the checkerboard pattern on the hat may be traditional; anyway, I liked it a lot. The figure on the hat is skirted, wiht doubel stripes between, all around the crown.
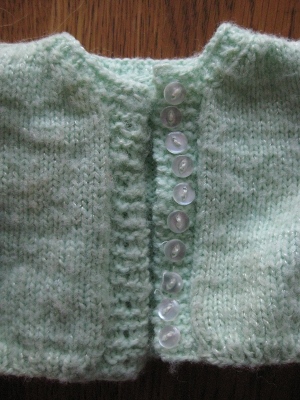
I’d forgotten about this little sweater:
 It was also a very quick knit, but I was surprised at the infinitesimal button holes. Easy to do, though, since you just drop a stitch, and then pick it back up.

I’m not sure what possessed me to use quite so many buttons. Probably an attempt at miniature verisimilitude.
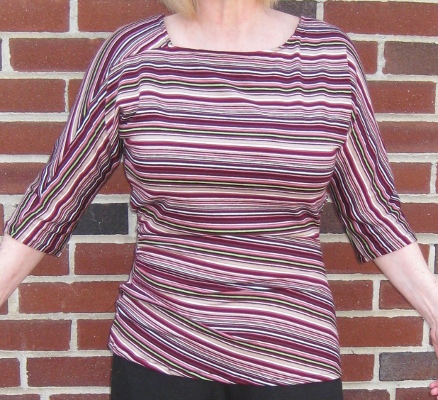
This is my favorite outfit:
 It’s a separate blouse and skirt, with a little Russian flair. The hem is faced with red-and-white gingham checks.
This Victorian cape set, complete with beret and gaiters, is made of practical polar fleece, and lined with the same navy nylon I used to line the sou-wester. Wool would have been authentic, though probably not if it were white.
 The collar has a lovely shape, only part of which can you see here:

Little corduroy overalls, with a pocket on the bib, and the same faux snaps as on the slicker:
 The turtleneck is open down the back, and closes with hook-and-loop fasteners. It’s not very inspirational, but a necessary accessory.
Naturally, there are nighties in the collection. This one is of a lovely heavyweight all-cotton flannel, with ruffles at the shoulder, wrist and neck, as well as mauve ribbon woven through lace trim on the bodice:

Everyone needs a cloud nightie, don’t you think? Noilette had a matching one, of course:
 I made the wooden trunk Noilette’s doll wardrobe is store in, as well as the wooden bed that fits inside. I love unexpected challenges, and, at the time, my father was handling the plumbing, so I had to look elsewhere for projects, unlike these days.
 The bedding is just a ticking mattress, with matching pillow, and a little quilt — a thin quilt, like the ones my great-grandmother used to make. She used flannel for the batt, so that’s what I did, too.
 Naturally, I used scraps for the patchwork, and the doll’s doll is wearing a copy, sort of, of the white flannel nightie. Yes, those are miniature Little Golden Books. I hate them, and wouldn’t allow them in Noilette’s library (not that the issue came up), but apparently I thought they were good enough for dolls!

I’m no pro at stencilling; I was very relieved when this turned out. However, I think that was because I faked it, and pencilled the design, then painted it.
The trunk lid is made of extremely thin plywood, like that used on vintage plane wings, and nailed and glued into place.
 Because we had cats, I made a cozy for the lid; the elastic needs replacing, but it still provides protection from the depredations of the current herd of cats:

As it turned out, Noilette was never very fond of dolls, possibly because, unlike her mother, she has always been very social and very fond of living, breathing people. Nonetheless, she still appreciates handmade things, and one day may pass all this stuff down to a child of her own. If not, it may eventually become someone else’s treasure. Or not . . . regardless, her mother had a great time constructing every piece, and that’s quite enough, all on its own.


