
I think this view of this pattern has gotten a bum rap. (It’s View B, the wrap top.) Yes, it has a huge error — the instructions tell you to attach the ties to the hem, not the sides, but once that’s straightened out, the top works fine, if you wrap it correctly, and use one other little tip, which I describe below.

My version is made from a jersey I saw last summer at a PR weekend. We were standing in line to get coffee, and right there, in Robin’s bag, was fabric in a print I liked, in the exact colors I had been looking for! I’d missed the bolt at Spandex House. Robin very kindly let me run back to SH with her fabric in hand, and I was able to buy my own yardage before racing back to have coffee with the gang. (See the wrap dress Robin made from this fabric here Scroll down; it’s the second dress in the post.)
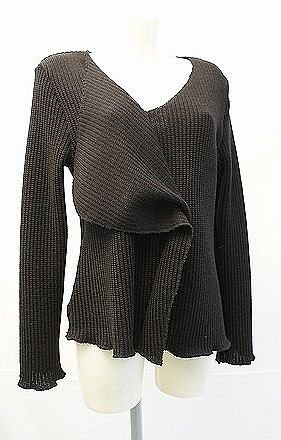
The top is reversible, and, except for the ties, is cut all in one piece. (I do love me some wonky design!). Here’s the V-necked version:

Instead of attaching my ties to the sides of the wrap, I attached them about three inches up. I didn’t want it to wrap below my waist. This does give a little peplum effect to the area below the wrap, but I kind of like that. Do not attach the ties to the hem, as the pattern instructions tell you to!
(The fabric looks like chocolate-and-teal here, but it’s really black, not brown, by the way.)
Here’s the cowl side:

Some people have noted that the wrap would go more smoothly if there were side slits on the top. This is undoubtedly true, and there’s no reason not to add them. Unless, of course, you’re speed-mad, and want to blitz thorough the construction on your serger, which is what I’m all about these days. If you want the openings, they’re easy to do; just leave the seams open where desired, fold allowances under, and edge- stitch around the opening.
Here’s what you need to know about wearing this top:
- Remember that, no matter which side is front, the seams run from your underarms to your waist. I can’t tell you how many times I’ve tried to put this top on upside down. Remember the seam orientation, and you’ll be fine.
- To ensure successful wearing, attach bra strap holders to the top of the armhole openings, directly above the underarm seams at the shoulder. This bouse looks awful if the top of the armholes slip off onto your arms; it becomes a shapeless blob, and looks like one hot mess! You can buy the bra strap holders at fabric stores for a ridiculous price, or you can make your own, as I did, by sewing clear nylon snaps to twill tape. Takes two minutes.
- I lengthened the ties by cutting them to the correct length for a size three or four sizes up from mine. I prefer the flexibility of slightly longer ties.
Here are the two back views (apparently, I only took one; I’ll add the other later). This one shows the back when you’re wearing the cowl side forward:

Contrary to some other reviews I read, I had no trouble at all making sure my bra didn’t show when wearing the cowl forward. The trick is making sure that the armholes stay where they belong. Wrapping so that the back is covered is no problem if the top isn’t slipping all over the place.
One last note: The instructions have the sewist finish the garment by gluing the hem with iron-on tape. What??? Hey, if I wanted to use stick-um, this hobby would be called “scrapbooking”, not “sewing”. I finished everything by the standard methods.
*Hey, Vogue (and other patternmakers), isn’t it high time you had a corrections page? Communication is what the Internet is all about; it would involve minimum effort, and gain you great good will. How about it? Even the New York Times publishes daily corrections. Surely Vogue can manage corrections for seasonal releases of patterns, no???


