SewStylish Tunic

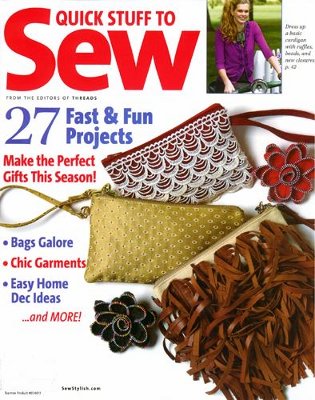
There’s  nothing like the phrase “month-long trip with one suitcase” for getting my attention, so I took one look at the “Comfy Cowl Top” article in the Winter 2010 SewStylish/Quick Stuff to Sew or Whatever — see note below and ran with it.

The idea is that the top in question (really a tunic), made in an interesting fabric, would work as a top layer, and equally well all by itself, covering a multitude of temperature/social situations.  Perfect!  I”d show you a picture of theirs, but I can’t find one online, and I’m not going to go through the hassle of scanning it.   Too bad — theirs is cute in a gold mesh.

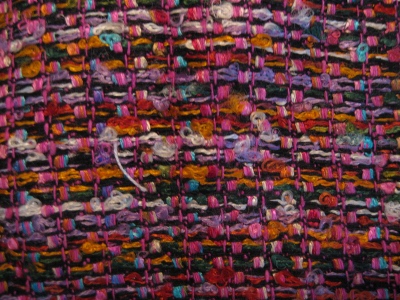
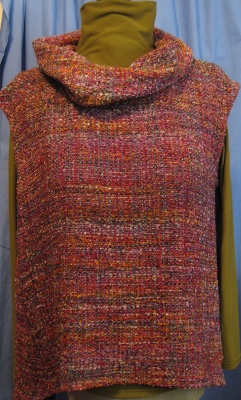
I knew that I had just the right fabric for my version — A couple of years ago, I bought this light silk bouclé from Kashi at Metro Textile:

It was an unusual purchase for me (so bright!), but the colors were wonderful, so I couldn’t resist.  My mother-in-law also bought a length, which was quite adventuresome for her, as she leads an utterly monochromatic life, clotheswise.  The wonderful thing about this fabric was that it looked terrific on me (rosy skin tones) and just as wonderful on my  mother-in-law (for whom orange shades are most flattering).

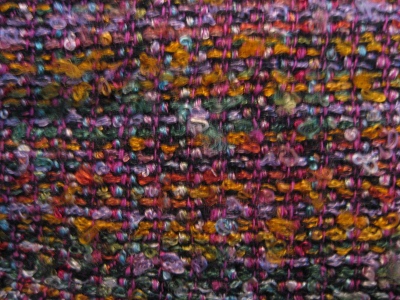
My mother-in-law’s monochrome tendencies reasserted themselves once she got home, so I ended up buying her yardage, which meant that I had so much that I didn’t have to feel at all badly about experimenting with any of it!    So I took a yard, and washed it in the machine.  It’s the law in the Noile household:  silks must be washable.  Ditto for anything with which I travel.  This was the result:

A denser weave, deepened colors, and oooh-la-la!  I loved it, and quickly tossed another couple of yards into the machine.  (Delicate, of course, and cold water wash always.)

I was lucky that the fabric was wide to begin with, and that I had lots, because, of course, there was a bunch of shrinkage.  I have notes somewhere, but the loss was probably a good 15%, maybe even a little more.  If Kashi’s prices hadn’t been so reasonable, this tunic would never have seen life!

The SewStylish pattern is very simple, and there are only three pieces:  the front, the back, and the cowl.  You either scale it up by hand using graph paper, or you take it to a copy shop and get it enlarged by 800 per cent.   I didn’t bother to scale the cowl, as all you really need for a rectangle are the dimensions.  There’s a center back seam, which I’d just eliminate whenever possible; there’s no good reason for it if your fabric is wide enough to accommodate the piece.

Construction couldn’t be simpler:  Make the cowl; sew the center back seam; sew the shoulder seams (I added twill tape to limit stretching);

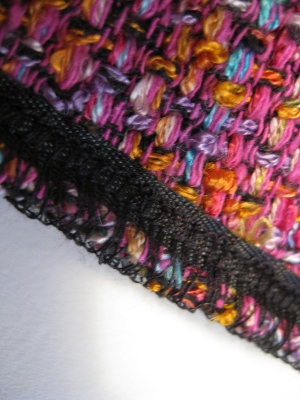
sew the side seams; finish the armholes; hem.  The instructions call for finishing the armholes with “Seams Great”, but I couldn’t figure out why I’d ever want to do that, so I settled for serging and turning the edge under, then hand-stitching so that nothing showed on the right side.  (I used four threads to serge; this is a very ravelly fabric, and that fourth thread was extra security.)

The result was kind of cool:


(Forgive my poor duct tape dummy — she’s lopsided, too big, and needs replacing.  Not to mention that I’ve not perfectly arranged the tunic, which isn’t helping.)

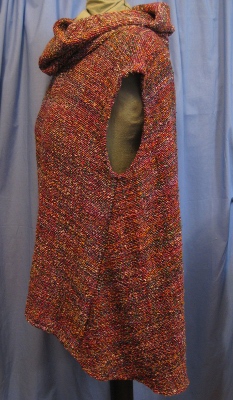
The tunic fit nicely, and it was a lot of fun to wear (lighter than a sweater, a really nifty shell on its own, goes with everything, etc.), but there was a problem.  Here’s a side view of the original version, which hints at what’s at issue.  (Unfortunately, I didn’t take a picture of the original back):

You can’t tell for sure in this picture, or in the one published in the magazine, but the back is voluminous — really, really full.  Too full by waaay too much to ignore.  It traveled the distance from “interesting” to “baffling”, so I made a radical change.  After the fact.  Which, of course, destroyed the structural integrity of the garment, but, hey, it’s not as if I had a choice.

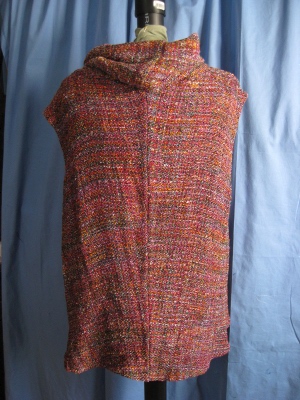
Rather than pick stitches out of the tiny, tiny bouclé loops, I simply cut up the back, and took in a pie-shaped wedge, beginning at nothing where the center back met the cowl, and ending by removing a full five-and-a-half inches from each side of the center back.

The center back, of course, is supposed to be cut on grain.  Sigh.  I’m going to wear this around a bit in the privacy of my own home, and if I love it, I’ll make it all over again (I can probably salvage the cowl).  There’s a huge incentive for making it right:

It just happens to coordinate with every one of my Burda polos!  Next time, though, I’ll eliminate the center back seam completely (now that the pattern piece is narrower, that should work fine).  Others should beware the armholes — they look impossibly small on the pattern, but aren’t quite as small as they seem because the tunic falls off the shoulders, and arms exit lower than with a conventional armhole.  These fit perfectly on me (I wouldn’t want them bigger when wearing the tunic without a shirt underneath), but this would be worth checking, as I’m on the small side.

Other notes:

SewStylish seems to be having an identity crisis.  I almost missed this issue on the stands because “SewStylish” is nowhere in the header on the cover.  (It is in small print — “SewStylish.com” — on the lower edge of the cover, and on the spine, neither of which are visible when scanning hundreds of magazines in a rack.)

I went to the SewStylish website, but it’s an awful mess, and finding information about the current issue was an exercise in futility.  Except that I learned that this is Vol. 4, even though there’s nothing in the magazine that identifies it that way.  Which is too bad, because this issue is great, and it would be nice if it were more findable, on-line or in-store.  I’d call this a branding failure.

Posted in Adventure/Travel, Tops | 8 Comments

Case Mod

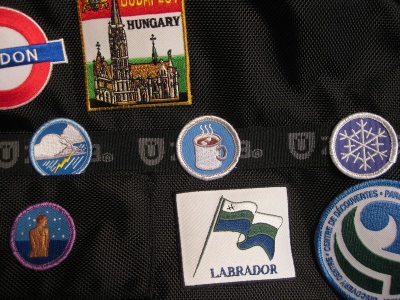
Apparently my mania for adorning my suitcase is unstoppable.  I’ve added little, personal, “de-merit” badges to the cover to complement my “destination” souvenirs:
The three small circular badges running across the center of the picture represent (left to right):  storms at sea; rum in cocoa afterward (incredible!); and snow, glorious snow — three totems of my favorite travel experiences.
These quirky badges are from Demeritwear.  I love the clarity of their designs, and the quality is also really impressive, which isn’t something you can say about a lot of this type of thing (see Budapest badge, above, for example!).

Demeritwear shows only a few uses for their clever embroidered patches on their website.  They suggest adding them across tee-shirts, or to baseball caps, and they’ll even sell you the shirts or caps in question, if you like.  I probably wouldn’t use them this way myself, but I’ve managed to find a few things to do with them.   If, like me, you don’t own an embroidery machine, but sometimes want a little something along those lines to spruce up a project, you might like these.
Disclosure:  As a result of a communication unrelated to this or any other blog, Demeritwear added several unsolicited patches to an order I made with them, along with a great note.  It’s easy to love a company that responds to suggestions with appreciation and a positive response, but no one at Demeritwear knows that I have a blog (at least not yet!), and, as I’ve been crazy about these quirky little badges for years, I can affirm that I haven’t been successfully bribed to say good things about them. Thanks to the FTC, though, you can draw your own conclusions about that!

RelatedHow To Find Your Bag Anywhere

Posted in Adventure/Travel, Fun | 1 Comment

Presser Feet From Budapest

Ah, Budapest, I love you!  Along with a slew of old Burdas, look at what else I found:

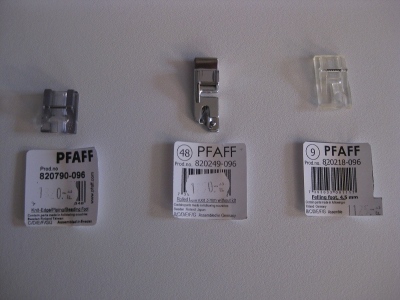
Three new feet for my Pfaff 1229!

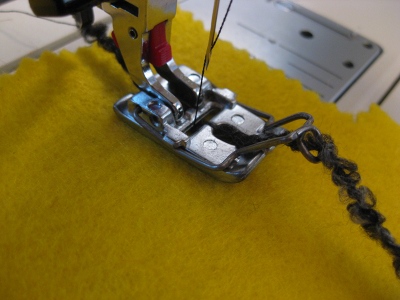
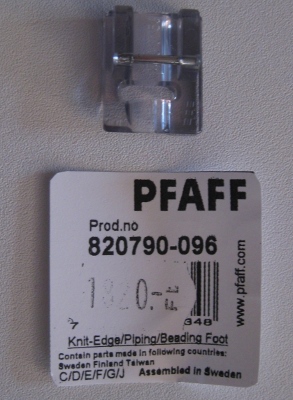
This one is a “Knit Edge/Piping/Beading Foot”.  According to my Pfaff accessory catalog, “[t]he Knit edge Foot has sides of different heights, making it simple to sew thick seams on knits and fur”.  The groove in the bottom also makes it possible to attach bead strands and piping.

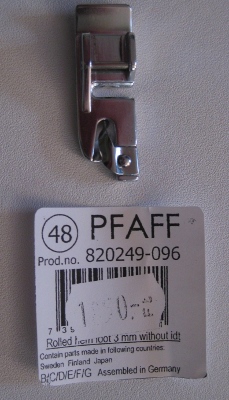
This one is a 3 mm rolled hem foot.  “[Y]ou can hem light to medium weight fabrics for clothing and home decorating items without having to pre-iron the fabric edges”.

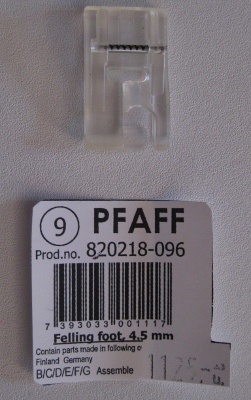
And this one is a 4,5 mm felling foot.  “Flat-felled seams are extremely durable and popular as the typical jeans seams.”  This one is for lightweight fabrics; I’ll need the 6,5 size if I want to sew denim or heavier fabrics.

My Pfaff 1229 takes accessories marked “D”; I was lucky to find a mechanic at the shop in Budapest who knew what I wanted, especially since I don’t speak Hungarian and he didn’t speak English!  I found a machine on the back wall with my shank, and gestured to explain the rest.  It worked out beautifully — there’s a lot to be said for good will and the kindness of strangers!

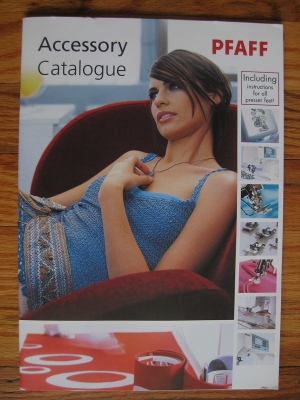
My Pfaff Accessory Catalogue, gift of another kind (stateside) mechanic, is a treasure-trove not only because it lists the various feet, but because it also includes instructions for using them.  Snap it up if you find one!

Posted in Adventure/Travel, Presser Feet, Tools | Leave a comment

Dear Baby Lock . . .

.  .  .  please forgive me.  I have slandered you wrongly.  Or maybe I’ve libeled you.  In any case, I was wrong, dreadfully wrong.  Sigh.

Posted in Machines, Tips, Tools | 5 Comments

Serger Stuff Storage

The arrival of my new serger has occasioned a few changes around here:  I’ve been motivated to get a bit better organized, at least as far as my new machine and its ancillary bits are concerned.

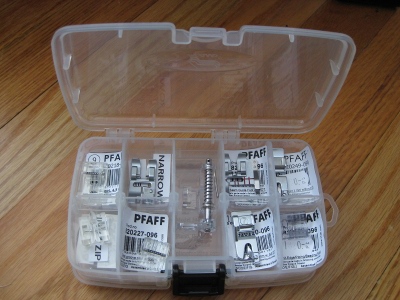
I’ve previously ranted about the poor quality of the tool storage case that came with the serger (plastic like cardboard!  and it won’t stay shut without a rubberband!):

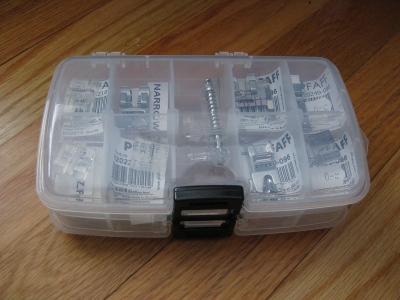
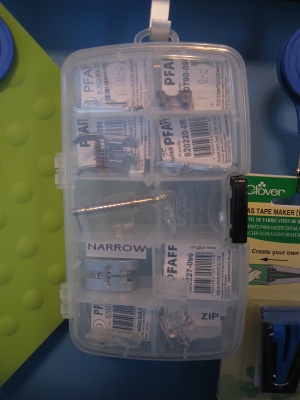
I’ve replaced it with a plastic box meant for photo storage:

This won’t last forever, either, as it doesn’t have real hinges, but no matter, it will serve for a long time, and probably be easily replaced when the need arises.  It was under two dollars in the junk craft section at JoAnn’s;  it’s meant for 4×6 photos, and is transparent, flat and slim, making it easy to keep handy, as well as to view everything inside.

PS – Don’t EVER store your photos in plastic boxes!  Worst idea ever! But I digress.

Carrying on with the photo theme, though, I store my serger project cards in 4×6 photo sleeves so that I can see them easily:

These, in turn, are stored in a three-ring binder with an elastic closure, so that nothing pops out unexpectedly:

The serger manuals are in the back of the binder

and so is the instruction disc that came with it

I added plastic dividers for the various sections; they give some needed support to the floppy pages.

Last on my list was thread storage.  I’ve been keeping my serger cones in the bottom drawer of my rolling storage bin, which has always been a bad idea.  It’s open, so conditions are a bit dusty (or fuzzy) at times in those drawers, particularly those closest to the floor.

JoAnn’s sells a plastic box specifically for storing over-sized serger thread cones.   Lucky for me someone had torn the cellophane off one of these, so I trotted over to the serger thread bins to try it out before buying. This turned out to be a very good thing.

Not one of the serger cones sold by JoAnn’s fit into the specialty storage box.  Not one! Could anything better illustrate the JoAnn attitude toward its sewing customers?  I’m so glad I didn’t haul that “custom” box home; I hope the clerk who was spared the horror of running it (and me) through the returns process is grateful, too.

This box was just right and half the price as well as being sturdier and possessed of a better, locking, lid and handle.  Of course it wasn’t designed for cone storage.

I can live with that.  It’s perfect!  As well as dust (and fuzz) free.

Posted in Machines, Tips, Tools | 2 Comments

Felt Gift Bags

Just in time for Boxing Day — that is, if you’re doing nothing else today — are these felt bags, shamelessly copied from ones Starbucks sells every December.  (Or, at least, for the last few.)

The Starbucks bags are much smaller, made out of much denser felt, and have a slightly elasticized ribbon as the closure.  Apparently, it pays to have a factory at your disposal in China.  (The Starbucks bag, which I bought, sells for only $4.00, so I’m guessing they’re not made by union labor in Seattle.)  I had to make do with plastic bottle felt and OTC ribbons.

The overall design has a nice retro feeling, and the contrast is so much fun:

Fortunately, plastic bottle felt comes in a huge number of bright colors (that’s about all it has going for it!), and is very, very inexpensive (and 60 inches wide).  Each of these bags cost well under two dollars to make, and are a lot less offensive to the eye than the horrible (and pricey) paper holiday gift bags that are ubiquitous this time of year.

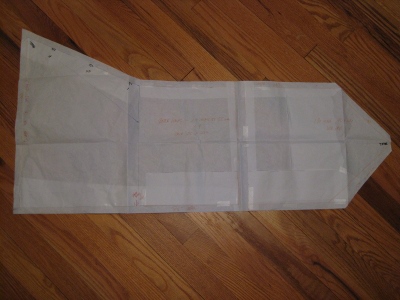
Here’s the pattern (yeah, I use the fancy “freezer paper” method):

Drafting this is incredibly easy:  Decide what size you want, draw the front, add quarter-inch seams, then draw the base to fit, and finally, the triangle for the sides.

Stitching is likewise fast and easy; I used the side panel color for thread, and made sure to stitch with the contrast color up so that the stitching line was as even as possible where it was going to be most obvious.

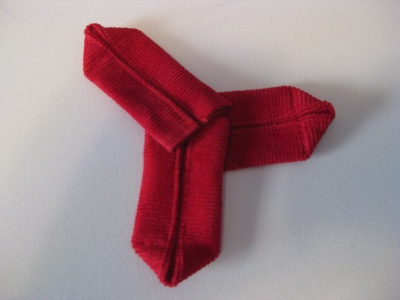
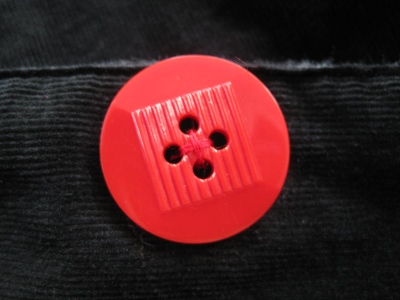
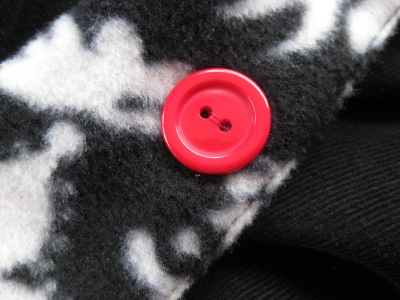
I made myself a little scheme so that I’d remember what buttons I’d planned to pair with what bags:

Do note that there are some more somber combinations here, including a rusty burgundy paired with black, and a dark green paired similarly.  Something for everyone!

These bags were a little too floppy, so next time I’ll double the fabric for the fronts and sides, and stitch around the tops and the handle openings for additional support.  Made more sturdily, these might get re-used, a thought that makes me happy!  Regardless, they’re a quick, simple, and very rewarding little project.

Posted in Bags, Fun | 14 Comments

How To Find Your Bag Anywhere

When we travel, Mr. Noile and I are not big fans of shopping, unless we’re buying books or food, both of which we like to bring home from elsewhere.  So it goes without saying that we aren’t in the habit of picking up souvenirs as we flit around the planet.  We do, however, find ourselves regularly acquiring the colorful embroidered patches that abound wherever tourists or travelers of any kind congregate.

I’ve always wondered what to do with them, and now I know.  I have a suitcase that came with a protective sleeve, and I’ve begun to sew said patches onto the cover:

I’d never desecrate my car like this, but somehow it seems OK to do this with my suitcase.  And, let’s face it, I’ll always be able to find my black bag in a sea of them, won’t I?  Not to mention the memories, the lovely memories .  .  .

This one is my personal emblem, which evokes, for me, the lovely ruined baths of Budapest, to which I hope to return as often as possible:

It’s decorating the identification flap.  Without it, I’d never remember where my ID is on the cover.

This badge, and a slew of others I have handy, is from a company called Demeritwear, which sells a whole line of somewhat wacky embroidered badges of impeccable quality.  If you want that little bit of je ne sais quois added to just about anything to which you can put a stitch, Demeritwear is your “go-to” place.  At the least, a visit to the site will make you grin.

We first did this on little Noilette’s toddler backpack, which was a great hit with her; kind of a portable scrapbook.  There wasn’t much chance of leaving it behind anywhere when it was such an important part of her well-traveled life, and so easily identified as hers.

Disclaimer: The usual.  It’s my blog, no one pays me for content or supplies it to me.

RelatedCase Mod

Posted in Adventure/Travel, Tips | Leave a comment

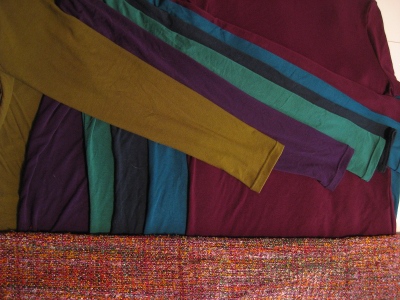
Polo-Palooza!

I finished a whole slew of my very favorite fall/winter tops just before taking a recent trip.  These are polos (those of us in the USA would probably call them “turtlenecks”)  from BurdaStyle’s 09/2010 issue, pattern number 121:

They’re all made in some variation of JoAnn’s silky polyester/rayon knit, which has the distinction of being the only fabric I’ve bought at JoAnn’s that hasn’t had some unfortunate issue.  (The only issue with these cuts was the careless chopping done by the sales person at the cutting table, but that’s for another day.)  These tops weigh nothing, and roll up so compactly that I could have packed ten of them if I’d wanted to!  The colors are deep and rich, and the fabric’s very nice to wear — perfect for everyday or traveling, all-around.

I used my new serger to add stabilizing tape, about six inches of it, to each shoulder seam.  There’s a slot in the presser foot that perfectly feeds 1/4 inch twill tape under the foot so that it’s sewed automatically into the seam.  This process could not have been easier.  Whoo-hoo!

Summerset Banks  has a fantastic (and illustrated!) explanation of a great finish for this collar, and I used it on each of these shirts.  Check it out if you’re making this pattern; you’ll be glad you did.

Summerset also suggests tagging the back of the shirt, which is good advice, since it’s almost impossible to tell the fronts from backs at first glance.  She uses a little bit of folded ribbon, but I dislike tags, so I just added a short, white, line of zigzag stitches.  I can spot these easily inside the tops.

This assembly line was also a chance to use one of my ancillary presser feet:  Pfaff’s “seam guide foot with IDT”, which  made short work of my hems.  It’s got a small blade-like edge on one side, and seam allowance markings all along the very wide foot:

I wouldn’t call this exactly a necessary accessory, but it really is an incredibly efficient way to keep my hem stitches the same precise distance away from the edges.  When whipping out multiple items as rapidly as possible, this is a great advantage.  If things get too rote, my mind tends to go numb; this is an antidote to forgetting exactly where I should be stitching that hem.

Related: Burda “Polo” #121 09/2010

Posted in Tips, Tops | 5 Comments

What’s Wrong With This Picture? (UPDATE)

(Other than the fact that what’s wrong is not too obvious from my less-than perfect photo?)

12/29/10 — UPDATE:  OH, SO MUCH LESS IS WRONG THAN I THOUGHT!!!!  Friends, I have wallowed in ignorance, and I have whined and puled about this screwdriver unfairly.  MEA CULPA!  And, to Baby Lock, my sincere apology.

This screwdriver is NOT supposed to fit into the rear screw on my serger.  The rear screw is a stabilizing device, used solely to hold the plate in place.  When changing the plate, one unscrews only the front screw, and lifts the plate upward without disturbing the rear screw.  Somehow I missed this.

Learn from my mistake — take the free class offered by your sewing store.  And don’t write any blog posts until you have.

This is the screwdriver that came with my Baby Lock Lauren serger.  It’s a little difficult to see here, but you can’t actually fit the supplied screwdriver into the rear screw.  That’s because the screwdriver is too long, and can’t reach the screw without banging into the serger.  (12/29/10 — AND, DUH, IT’S BECAUSE YOU’RE NOT SUPPOSED TO REACH THE SCREW!  Sigh.  I’d really rather be infallible, but hey .  .  . )

You can completely forget about fitting the screwdriver blade into the screw; that’s not going to happen — and if you jam it in partway, at an angle, to make it fit, and try to use it like that, you’re risking stripping the screw head, which is not good.

My screwdriver is probably just like the one supplied with your serger, and just about as useful.   Nicely done, Baby Lock; this is truly idiotic.  Is there some law that requires manufacturers to just throw any old screwdriver into accessory kits?  I’m quite sure that Baby Lock is not alone in committing this particular transgression.

Here’s what you need instead. It’s called a “thumb screwdriver”, and it’s perfect for tight spaces just like this:

You can get them at any hardware store, and they aren’t even expensive.  Just really, really useful.  Mine takes drill bits, so I can slap in whatever screwdriver size or type point I want to use.  I’m propping it up for the photo, but, of course, you’d normally hold it between thumb and index finger and just turn it.

This one is  made of metal and has a nicer-than-most gripping surface; it’s a little harder to find than the ones with plastic handles, but a generally better tool.  Worth the search, in my book.

An alternative is the “angle screwdriver” which usually comes with a slot head on one end and a Phillips head on the other:

It’s not quite as easy to use in a space like the one on my serger, but it will work in that kind of small space, and it’s very handy around the house in general, as well as in the sewing room.  Also available everywhere, except, of course, in your mfg-supplied sewing machine accessory box!

Related:

Lauren

Project Records for My Serger

Posted in Machines, Tips, Tools | 6 Comments

Project Records For My Serger

I vowed that I’d really get to know my  new serger this go-round, and have been devouring various resources.  Much to my surprise, my low-bump Baby Lock Lauren serger came with an excellent DVD, which I’ve watched, and found very helpful.  But the best resource has been Nancy Zieman‘s Serge with Confidence which has languished, unread, in my library for several years.

In Serge, Zieman suggests using “Serger Reference Cards” to track projects.  She shows commercial cards in the book, but I can’t find them on her site, and have never seen them in a store.  I thought these were a good idea, though, so I whipped up my own, tailored to my specific preferences:  That’s my card in the photo above, hot off the printer.

My word processor  has a template for index cards, three to a standard (US) 8.5 by 11 inch page, so that’s what I used, filling in the fields as I liked, and leaving a space at the bottom for samples of the work in question.  Once they were printed, I cut them with a guillotine-style paper cutter; scissors would have worked, too.

My template wastes paper, but did allow me to avoid creating my own index-card-table-template, which would have been a pain, especially in my somewhat kludgey software.  I might do that later on — in the meantime, let’s just say that I’m not going to be running out of bookmarks in the near future.

I use a Linux computer, which isn’t particularly user-friendly for these kinds of features (but wonderful for the important stuff!).  If you use a more common OS, you might have a more sensible index card layout in your word processor software.  Or not  .  .  . but it might be worth checking to see.

Just for fun, I used font colors corresponding to the colors on the tension dials for the needles and the loopers on my serger in the place on the cards where I’ll record the tension settings.

I printed the cards on cardstock (a heavier weight paper with a very slightly slick surface on one side).  Cardstock is available at any office supply store and makes for a heavier, more durable “index” card.  That might matter if you’re attaching samples to the cards.

To finish them off, I used a “decorative corner punch” to round the corners.  That’s a “fun” thing, too, but also sensible, as squared-off corners are likely to fray and get sloppy over time.  Eliminating them means that I’ll be able to handle these cards without making a mess of them.  I’ve left enough room at the bottom for stitching/fabric samples.  Here’s the first one I used, with sample attached:

Many people find sergers to be overwhelmingly frustrating, and having this kind of tool to refer to is just the ticket to reduce some of that frustration.  I’ve never found my serger to be particularly frustrating, but I have found it a pain to have to re-invent settings for new projects when I can’t remember settings that were second nature say, last year.  Now I’ll have documentation:  Perfect!

If you’re eager to develop the best possible relationship with your own serger, I highly recommend Serge with Confidence.  The projects might not send you — they’re not particularly to my taste — but you’ll be amazed at what you can do with a serger, and Zieman will walk you through every thing you could conceivably need to know about using one.   If you’re thinking about buying a higher-bump serger than I did, you  might want to take a look at  Serge before you shop; it would be a great tool for evaluating your needs and desires before you and your wallet step out.

Posted in Books/Magazines, Machines, Tips, Tools | 1 Comment