Shoe Mod

They were just about perfect, but they needed one small modification.

I bought these Mary Jane shoes the other day because they’re exactly what I want for tromping around this summer, and they’re made by Merrell. Merrells fit me very nicely.

mjblue.jpg

I didn’t mind the decorative trim on the strap, though I don’t plan to wear them much with blue clothing, but the zigzag trim, solid blue, bothered me. (The strap trim could be replaced, but I don’t think I’ll do that.)

So I took a permanent black ink laundry pen and carefully dyed all the blue thread (trust me, not my photography — that trim looks black, just like the shoes, in real life):

blackmj2-400.jpg

It took about ten minutes, and now I love the shoes. (I was careful not to touch the pen to the body of the shoe; I’m not sure what the solvents might do to the tech fabric, but I knew from experience that the ink wouldn’t harm the thread.)

I’ve used this trick on my favorite knock-around Bagallini bag, too, when something white scuffed up the nylon a bit.

I bought my Mary Janes at REI, but LL Bean sells them online. (And probably a hundred other places do, too.)

Posted in Tips | Leave a comment

DIY Meditation Mat and Bench Pad

Over the weekend, my spouse and I attended a meditation class offered by the Philadelphia Buddhist Association. My top goal this year is to learn to relax, and this is one of the tools in my relaxation kit. I was a little dubious at the thought of trying meditation — let’s just say I have an intense personality — but didn’t see how it could hurt. The teacher was kind and helpful and it was a very good experience.

zf.gif

Most of the attendees sat on the typical zafu pillow, set on a zabuton, but I found them very uncomfortable. Our teacher suggested trying the wooden bench (below), made by a member of the Association. The legs are angled so that the bench tilts forward. It’s set with the elevated side toward the back; you tuck your knees under it, and place your seat on the top of the bench. Your knees are on a zabuton, and your tush rests on a padded cover put over the top of the bench.

bench400.jpg

These very simple benches are made for the society by a member, and offered for a donation. It was so perfect for me that I went home with one, and immediately went to work making the pad for the bench, and a zabaton for beneath it.

Purists, you may want to stop reading here! Neither of the items I made ended up being at all traditional, but they let me use up a little bit of my stash, and allowed me to start daily meditation the next morning.

medpil400.jpg

I chose a totally non-traditional fabric, a cotton-rayon blend in turquoise with embroidered bees sprinkled all over. I wanted something as bright and as inviting as my sewing room; as my spouse pointed out, feeling happy isn’t in any way incompatible with meditation! Zafu pillows are traditionally stuffed with buckwheat, which is resilient and friendly to bodily contours. For my bench pad, I chose a cotton-wool batting. It’s breathable and comfortable to sit on, and, even better, assumes body temperature within minutes of use.

benchcush400.jpg

It was important to make sure that the bench pad went over the edges of the bench, so I cut the top of the cushion fabric about an inch and a half wider than the longer dimension of the bench (that includes an half-inch seam allowance) and about four inches wider than the width.

The underside of the cushion is cut in three pieces, with two inserts in the seams. I attached adhesive-backed velcro to the bottom of the bench, and sewed a matching strip to one of the inserts (the one toward the rise, or back, of the bench). Not traditional at all, but this keeps my cushion in place without distraction. I originally planned to put velcro on both inserts, but it looks as if that’s unnecessary.

underbench400.jpg

The zabuton at the class were rectangular; apparently, most are square, generally about 30 inches square, like the ones in the first photo above. I liked the look of the rectangles, though, and cut mine about 30 inches by 36.

benchpadd300.jpg

My zabuton is stuffed with many layers of polyester bat. Not so organic, but that’s what I had in my stash. Because I was concerned about the bench wobbling, I cut out all of the batting where the bench rests, and whip-stitched the edges of the batt together so that they wouldn’t slip. (I also whip-stitched the outside edges of the batting for the same reason.)

medcush400.jpg

Assembling the zabuton was easy; the cover is essentially just a huge pillow case. I left most of one side open after stitching it up, and inserted my prepared batting. Then I sewed up the open seam, wrangled the whole thing under my sewing machine foot, and stitched around the cut-outs I’d prepared.

medit400.jpg

The bench and zabuton, to quote Goldilocks, are “just right”. I was sensible to cut out the slots for the bench legs; there are no stability issues as a result. My knees rest comfortably on the zabuton, and the rest of me is aligned comfortably and correctly on my padded bench.

Image of many zafu and zabuton from Zafu.net

Posted in Home | Leave a comment

Sewing Workshop Soho Coat

This is a pattern I’ve eyed for a long, long time. I bought it a year or so ago, and ordered some rainwear silk from Denver Fabrics.

swsoho.jpg


When the fabric arrived, I was surprised to discover that it was coated on the wrong side (hence, I suppose, the “rainwear” designation). (I was happy with Denver Fabrics’ service, but do wish their descriptions were a little more complete.) The urethane-like coating was a bit ‘sticky’ and wasn’t going to be nice to wear, so I was going to have to line the coat.

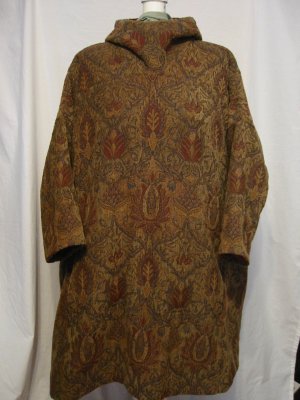
The whole point of using silk was to keep the coat as filmy and light as possible. When my mother-in-law and I went on an excursion to Field’s Fabrics, I found a delicate, light polyester called (I think) “crepe de silk”. I took it back to my in-laws, and encamped in my mother-in-law’s sewing room for nearly a week, during which I produced this:

sohofront2-300.jpg

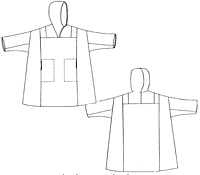
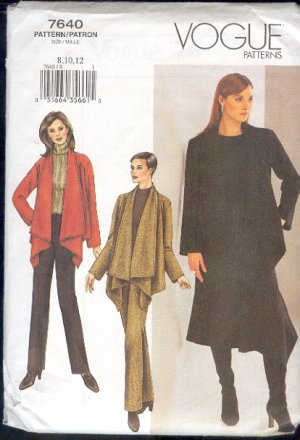
The pattern was easy to cut, and the directions were very clear. I made life much more complicated by lining the coat, and it took at least twice as long to make because of it, but the result was excellent just the same. I love, love, love the lines of this coat, and that fabulous hem. It looks wonderful on, and feels marvelous to wear. On my body, it looks exactly like the sketch on the pattern envelope.

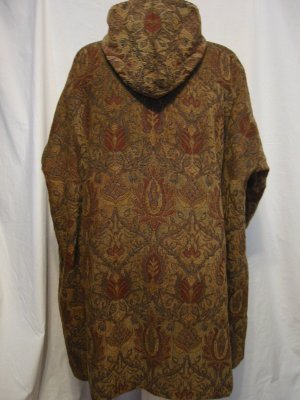
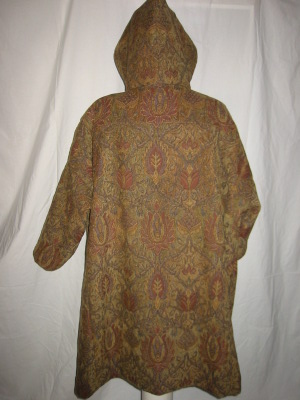
These photos don’t do it justice, but I’m not ready to appear in person, so we’ll just have to make do with these. Here’s the back:

sohoback300.jpg

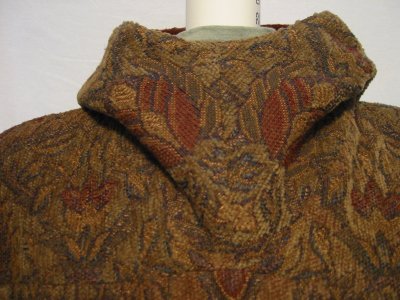
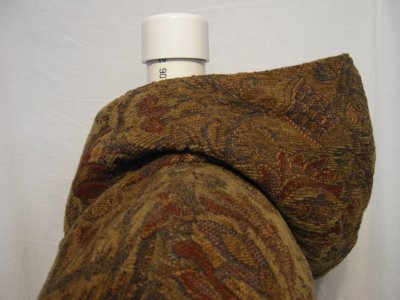
The hood is cut all-in-one with the body (fun construction!), and forms that wonderful collar in the front. It lies nice and flat in the back (at least when it’s not wrinkled from a recent trip to the city), looking great when you’re walking away, too.

sohohood400.jpg

Naturally, I goofed up a couple of things. I altered the length above and below the belt, and in the process got the pockets slightly misplaced. There’s nothing particularly wrong with that; they just don’t look exactly as they do on the pattern envelope. In the end, I think I placed the belt a little low. When I make it again (and I will!), I’ll raise it a little.

Because I could, I added two pockets inside the coat, in the lining, and gave them zipper closures. (I do like me a couple of security pockets!)

sohopocket400.jpg

The lining fabric turned out to be exactly what I needed (thank you, great Field’s consultants!). It’s so lightweight that the ‘silk-ness’ of the coat doesn’t seem much compromised. Lined, my coat is reversible, unless you mind seeing my ‘mark’ on the outside (that yellow tag).

The silk is interesting; when it gets wet, huge, terrible blotches break out all over, as if I’ve spilled my lunch everywhere. Then they dry almost instantly. A peculiar effect, but not at all bothersome once you’re used to it. And, oh, yes, it wrinkles like crazy where I sit on the skirt (or lean on the hood). This doesn’t bother me a bit; I rather like the wrinkly mess natural fabrics become. They look real!

Posted in Coats/Capes/Wraps | 2 Comments

Butterick 4373 – Window Valance

Once my machine had a nifty cover that’d I’d coordinated with my sewing room walls, I turned my attention to the windows. My room is very sunny and bright, and I really didn’t want curtains, but the windows looked too bare with no adornment at all. A valance was the answer, but ruffles were out, so I was happy when I spied this Butterick pattern.

4373.jpg

On the other hand, view F (on the upper left corner), with its wide sharp scalloped trim, seemed a little too formal, so I mirrored the narrow bias edging I’d used on my sewing machine cover. Fortunately for me, the valance pattern was meant for larger windows, and was made of three pieces – a large center piece, and two smaller side pieces. The center piece fit my smaller windows perfectly, so no alteration was required.

val3-400.jpg

Assembly was quick and simple. I just sewed the three straight sides with right sides together, turned the piece, and bound the decorative edge. The valance is lined in the same sage as the cover. I ran the curtain rod through a casing at the top, but I’m not sure I like the way it looks. I may decide to change the size of the valance in the future, making it less deep. If I do, I’ll re-do the top as well, running a line of stitching along the top where the casing folds back, and hand stitched the casing closed so that no stitches show from the front.

Here’s an updated picture of my sewing room with the valances in place:

room2-400.jpg

Posted in Home | 1 Comment

Butterick 5160 – Sewing Machine Cover

Naturally, the first project in my new sewing room had to be a sewing machine cover. I’d been using a simple, channel-quilted muslin cover, but it was pretty blah. When I found some inexpensive, very pretty yardage in blues that coordinate perfectly with my walls, I was ready to go.

5150py270.jpg

I adapted the cover from Butterick 5160, making some major changes. First, of course, it had to be fitted to my actual machine, which meant shortening it width-wise, and making it a bit taller.

smcover400.jpg

An outside pocket was a requirement, but didn’t need (or like the look of) the two pockets provided. One of the other views (probably for the slipcover) had a slightly fan-shaped pocket. I adapted this piece by exaggerating the fan shape, and enlarging the pocket. The idea was to have enough room to keep whatever spools, bobbins, trims, etc. I am using on current projects right at the machine for fast starts.

smcoverpkt400.jpg

This pattern is one of Butterick’s Waverly series, and the fabrics on the envelope photo look like Waverly home decor products. They probably have some heft to them, but my fabric didn’t, so I decided to use a layer of thin fleece for structure, and to line my cover with a sage cotton. The pattern calls for bias binding, but I didn’t have enough of coordinating binding to handle three somewhat bulky layers, so I assembled it with conventional seams.

smtop2-400.jpg

Originally, I didn’t intend to make the handle on top, but it became obvious soon that lifting and moving the cover was going to be a little bit of a pain if I didn’t. Besides, the bias trim and covered buttons were just too much fun — very reminiscent of 1940s aprons. The pattern envelope shows the handle popped up, which looks very cute with the cartoon-y look of the bias-trimmed cover, but I decided to attach mine flat, in keeping with the slightly more sedate look of my cover. I used the same olive trim on the top edge of the pocket, as well as for the buttons.

In spite of the many changes I made, this pattern offered a great starting point, and saved me the time it would have taken to do a careful self-draft. Along with this cover, there’s a chair slipcover (with a bunch of pockets included), basket linings, a sewing tote, a hanging wall organizer, an ironing board cover and, bizarrely, an iron cover, in case you need a flammable place to store your hot iron!

Posted in Home, Organization | Leave a comment

A (Sewing) Room of One’s Own

What could be better, for this first post at Noile.Net, than to describe my new sewing room? Over the course of the next month or so, I’ll be moving articles from my old blog to this new domain, and, of course, add new posts as I sew. But today, it’s all about my new room.

With just a little bit of work, and not too many dollars, we’ve transformed what was formerly a storage catch-all into what it was originally meant to be: a proper sewing room. Now that it’s done, I’m amazed and thrilled at how much easier it is to work in my new room.

tubs.jpgWhy didn’t we do this years ago? And why were we able to do it now? Over the past few years, we’ve learned lots about goal-setting and planning — skills we have never had in any quantity (at least in our personal lives). Without a plan, my sewing room was always doomed to chaos, and to the “organization” system you see on the left. In the past decade or so, I probably spent nearly as much on opaque plastic tubs like these as we spent last week on my new room. But I got so much more for my dollars (and effort) last week. Last week, I had a plan.

stash1-400.jpgThe first goal was to get my stash out where I could see it, be inspired, and know what was on hand. This Expedit “bookcase”, from IKEA ($150), was perfect for displaying yardage. I added seven Lekman boxes (at $12 a piece) to hold current patterns, scraps and smaller pieces of fabric. There’s a whole row of the Lekman boxes on the bottom of the unit in concession to the cats, and just because it seemed like a good idea.

rolled.jpgI put interfacing, batt and other items that don’t lend themselves to shelve storage in this round, mesh laundry hamper. It’s over-stuffed at the moment, but now that I know what I have, I’m expecting to see most of it disappear. The choice of this container was accidental, but inspired; there’s lots of room, and the mesh makes it easy to see anything that’s drifted to the nether regions.

pegboard300.jpgThe next goal was to get the most frequently used tools out of their hiding places so that they could be used and replaced easily. This pegboard was the solution: Home Depot offered it in white (as well as the commonly found brown). They’ll cut large sheets to size for customers, but you must buy the whole sheet, which is 4 feet by 8. This pre-cut sheet was 2 feet by 4; although it wasn’t the perfect configuration, it worked fine. The pegboard, the hardware to install it, and a huge assortment of hooks (as well as several accessories you see) cost under $20.

clip125.jpgThe patterns I’m working with are hanging from Mallen clips (3 for $2); I found them in the bathroom section at IKEA. They’ve got a rubber-like ring; there’s a peg-type gadget you can get from IKEA to hang them from, but they dangle from this peg hardware just fine and add one more bit of inspiration to the room. I’m going to enjoy changing this display as I work through my projects.

cuttab300.jpgThe pegboard hangs above a basic cutting table I bought at Joann ($59 — fortunately on sale last week). This is a “cheapie” version of much more expensive ones, and it’s just right for me at the moment. I’ll be writing a review of it later; overall, I’m pretty impressed with it, and it’s working well. Here it is with just one leaf unfolded; my first project in the new room is a small one. With both leaves open, there’s plenty of room for most of the projects I make; closed, it takes up very little room. Casters make moving the table and its leaves smooth and simple.

iron300.jpgBetween the pegboard and the shelving unit are my iron and ironing board, sitting on a hanger from Joann. That was a desperation purchase, since I didn’t want to order one. It’s crude and cheaply made, and worse, uses smaller than standard screws, which weren’t included. Still, it’s doing the job until the right one comes along. There’s room below for whole bolts of fabric, or anything else bulky that doesn’t fit elsewhere. My dress form fits partly into this little nook; it’s accessible, but neatly out of the way when not needed.

thread-house-closed.jpgThread storage was not a problem. I’ve been using this charming little “thread house” ever since I found it at a thrift shop many years ago. (See it closed, on the left.) Dust isn’t a major problem in most areas of the sewing room, but sometimes thread does hang around for years, and leaving it out renders it unusable if it’s not cleaned regularly. (I admit it, dusting spools of thread appeals to me not one whit.)

thread-house-open.jpgHaving everything sorted by color, and completely visible, is a huge advantage, and has saved me many a last minute trip to the store. You’d think that I’d have trouble with the spools tumbling over, but it’s never been an issue. If I were really worried about it, I could string thin wires just above the shelves inside. (Thread house, open, on the right.)

My sewing table is an old folding conference table. I’m not sure it’s the best thing I could have, but it works just fine, and I’ve not yet seen anything I like better. The two machines I use most frequently fit just fine on top, and there’s enough room to do just about anything I want to.

room300.jpg

The wood organizer behind my serger holds sewing machine needles, extra pens, and pin cushions along with whatever else (not much) that doesn’t fit elsewhere. A massive surge suppressor is hidden behind it.

rainbow-cart.jpg

I’ve been using these rainbow organizer drawers (on the right in the picture above) for years (I got them from Costco), but this week was the first time I put absolutely everything that belonged in them in their proper places. I didn’t like this color arrangement, so I rearranged them to emphasize the array of colors a little more.

chalkboard.jpgThe chalkboard/organizer on the wall is Luns ($14, also IKEA). It’s a legacy item, but I think it will stay there. I post projects I’m thinking about here and keep whatever pattern(s) I’m currently working on in the front bins. There are small speakers mounted on the bins. I hang my MP3 player on one of the hooks below, and plug the speakers in — a wonderful quality-of-life add-on!

Of course, there’s an over-sized trash can under the table — with a lid, so that I’m not tossing away the wrong things.

lamp.jpg

I’m not usually the whimsical type, but painting this room a bold color, and accenting it with crisp white and the “rainbow” drawers were good choices. The room is cheerful, playful and inviting. It floods with light during the day; at night the (yes, it’s IKEA) Jokel lamp, combined with the overhead light, provides plenty of illumination.Whatever choices you make for your sewing space, don’t forget how much it matters that you love being there!

It’s incredible how easy it is to work when I can put tools away as soon as I’m finished with them, and reach for them on a second’s notice. These few changes have taken the drudgery out of sewing, and make my room a true creative center.

There are still a few things left to do. My machines’ cases, and one other sewing machine, are beneath my sewing table, where they most definitely don’t belong. They’ll go into the closet as soon as we move the items we’re storing there for a family member.

mdstool.jpgI also need a proper, rolling chair. My mother-in-law has a wonderful physician’s stool (like this picture, but cushier); she loves it, and it’s very comfortable, but I want one with a back. That’s easy enough to find, but the stumbling block has been my hardwood floor. It’s surprisingly difficult to find a rolling chair that doesn’t require a protective mat under it — especially if you don’t want to spend a fortune.

And there’s that one, last little basket on top of the organizer drawers that has a little too much miscellaneous stuff in it.

So what did this transformation cost? Shelving unit, $150, boxes, $84, pegboard and hardware, $20, iron hanger $9, cutting table $59 for a total of $322. I don’t know exactly how much money I poured into “solutions” that never made my work area a comfortable, or useful, place to be, but I’ll bet that, over the years, it came close to this. This time the money was well-spent, and it seems like a small price to pay for the transformation we’ve effected.

(The lamp and blackboard aren’t included in the tally, since they are items, like my machines, etc., that I already had.)

Image of rolling stool from Amazon.

Posted in Organization | 3 Comments

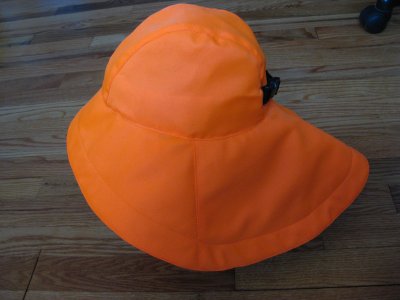
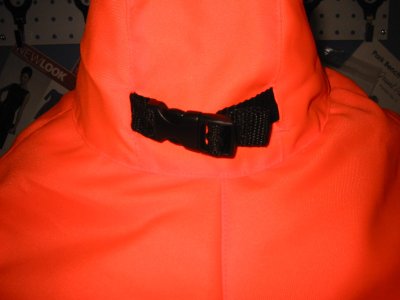
Vogue 8095 Fabulous Hat

(This is an older, not previously published, review, but I keep thinking about Cennetta’s hats, on The Mahogony Stylist, so I’m following her inspiration!)

The illustration in Vogue’s catalogue, and on the pattern envelope, made this hat look more like a cartoon than something to wear. v8095.jpg

Fortunately, Vogue put a photograph of it on the cover of its late summer catalogue, and wow! it’s dramatic! I tried to talk myself into buying a different pattern (this thing lists at $22.50 — oh, please!), but this was definitely the right pattern. Eventually it went on sale.

Continue reading

Posted in 2005, Hats | Leave a comment