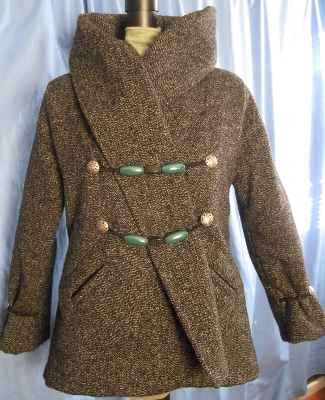
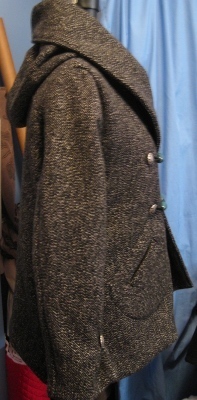
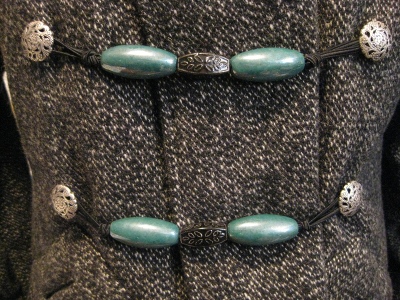
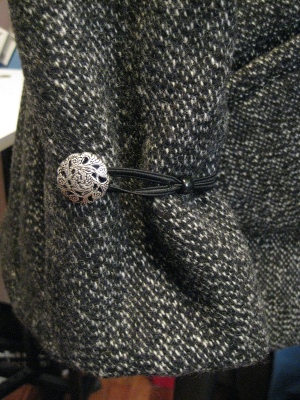
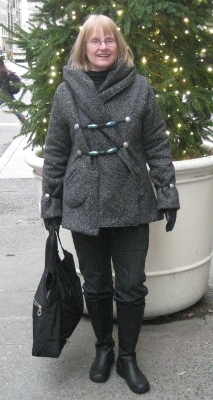
ABdPM 20013: The Lining

Wow, polyester, how do I hate thee?  Let me count the ways:  There’s the permanent factory crease down the center of your yardage that no amount of ironing will remove; the fact that you hate all thread tensions known to humans (and their machines); the way you equally  hate all needles; not to mention the lovely way you perforate — permanently — everywhere a pin is placed.

There’s more, but I haven’t got all day.

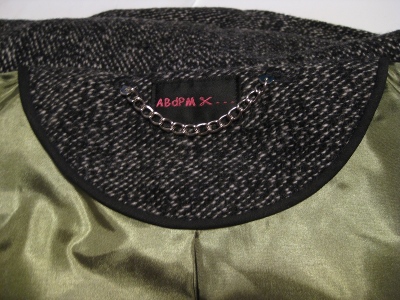
I know; I did the wrong thing.  I chose my lining for the color, not because it was going to be a good lining.  It’s green, a lovely, leafy green which just happened to coordinate with the buttons I intended to use to close this coat.

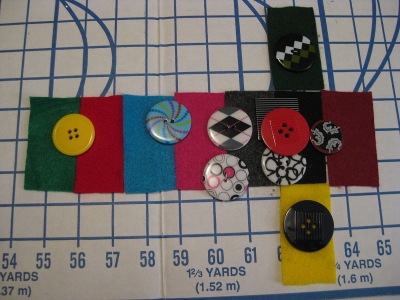
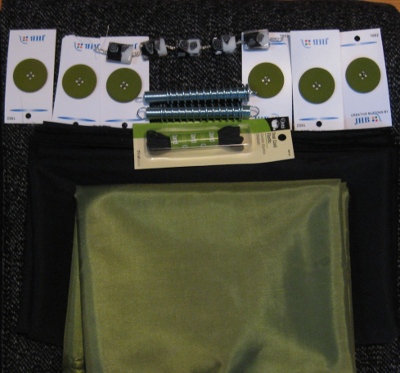
Top to bottom:  The tweedy wool, hardly visible; a strand of glass beads once considered for the closure; the now-rejected (sob!) green buttons; the rejected springs (ditto); oval elastic (still on); solid black twill, since rejected, originally meant for contrast; and the infamous poly lining.

Can I just mention how much I wish I had gone for a boring black, white, or ivory heavy acetate coat lining?  And then move on?  Live and learn; it’s the only way.

ABdPM has you use the same pattern pieces as the jacket for the lining; they just have you cut the body pieces shorter. A lot shorter, but this may have something to do with the way they finish the hem.  More about that later.

I decided, though, that I really didn’t want to simply use the jacket pattern pieces for the lining, so I made the following changes:

  • cut the back yoke and the lower back pattern pieces all-in-one, just as I did for the interlining
  • added a box pleat to the center back, to allow for ease of movement in the upper back especially
  • cut the sleeves (which aren’t curved where the back seam is joined) all-in-one
  • cut the backs and fronts 3/4ths of an inch longer than the interlining, and the sleeves 1/2 inch longer

I traced my own lining pattern, building from the ABdPM pattern, and adding these changes to my new tracings.  I might actually make this jacket again, so the extra effort is worth it; this jacket is actually pretty simple to make, once you know how.

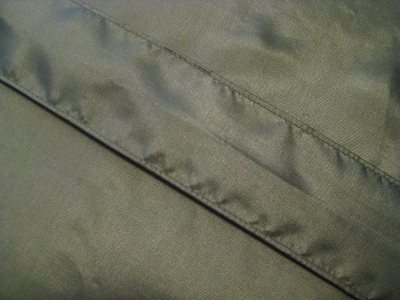
I edge-stitched the box pleat, on the wrong side of the lining, of course.  Doing this will help it to fall back into place as I move:

Satiny stuff photographs badly, especially in the hands of such an amateur as I am.  This actually looks quite a bit better in person than it does in the photo, though I was never able to fully resolve the poly issues chronicled above.

When it comes to coat pockets, I’m all about utility, and I like lots of them.  This led to one other change in the lining.   As I’ve made it, this is kind of a swing coat, and putting pockets into the lining might have weighed the jacket down and inhibited some of that pizazz.

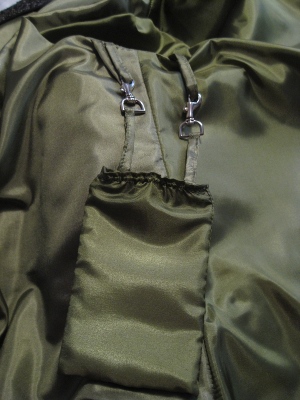
Instead, I sewed two self-fabric loops into the lining at the bottom of the armholes.  My cell phone will  go into this pouch under my left arm, out of the way, and not pulling on the jacket at all:

The picture’s not great, but you can see the silver hooks clipped onto the loops above the floating pocket.  This pouch was kind oaf a quick and dirty mini-project, mostly to determine what length the loops should be.  I may  make a more polished one later.  A “secret” wallet/pocket will attach to the other set.

If I ever have the misfortune of losing my bag in a city, I want three things:  my cell phone; a twenty dollar bill; and my transit pass.  I like having them all clipped into my coat.

I thought I’d bag the lining, since I’d never done that before, but quickly abandoned the idea, since the jacket is so bulky I’d have had to leave an entire side seam open to turn it.  No matter; inserting the lining is very straightforward, and it’s almost done.  Hurray!

Related:

Anticipation

ABdPM 20013:  Fit and Interlining

ABdPM 20013:  The Hood

ABdPM 20013:  Miscellaneous Report

ABdPM 20013:  C’est Fait!

Rant alert –nothing that follows has anything to do with ABdPM, or this particular project (except tangentially).  Read at your peril.

Adding to my polyester woes was the fact that I bought this fabric at JoAnn’s, and it suffered from all the usual JoAnn quality issues.  I was laying out the pattern on the first cut when I realized that there was an oil blotch, very subtle, but very present, about 15 inches into the cut.  OK, I kept cool —  I understand JoAnn quality, so I’d bought an extra half yard just in case there were issues.  I figured I could work around it.

So I changed the layout to work around the stain, but foolishly cut the front and sleeves before actually pinning the back (which is on a fold, of course).  Then I realized that I had left an inch too little fabric.  Aaaaargh!

I went back to JoAnn’s and discovered, amazingly, that they had gotten another bolt of the same stuff in.  (Glutton for punishment much??)  There was a spray of small oil-like stains on the start of this bolt, too, which I made the clerk cut off, but the piece I brought home appears to be fine — except for all the poly issues mentioned above.

I try to avoid JoAnn like the plague, but when color matching is an issue, sometimes I’m stuck.  It’s never a good thing.

Posted in ABdPM, Jackets | 1 Comment

Lauren

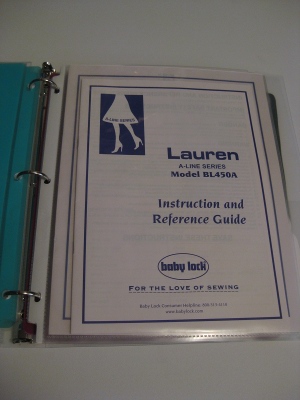
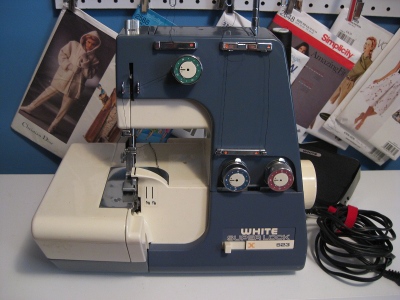
It’s official:  My 25 (or so)-year-old White Super Lock 523 serger is dead, in spite of a valiant attempt at resurrection by a diligent craftsman, and two decades of faithful service.  I may buy a Juki MO 654 DE in a few years, but right now I went for another model that’s just as basic as my White was:  A Baby Lock BL 450A  — which has been newly re-named “Lauren” by Baby Lock.

Here’s the printing on the box.  Is it really necessary to have so many names for one product?  It’s not just a Baby Lock, it’s a Baby Lock BL450A, and not just a Baby Lock BL450A, it’s a Baby Lock BL450A A-Line, and it’s not just a Baby Lock BL450A A-Line, it’s a Baby Lock BL450A A-Line named “Lauren”.  Are we confused enough yet?  This doesn’t making finding reviews, or identifying models, very easy for a poor woebegone consumer.

So far, I’ve only set it up and given it a very brief trial run.  Threading is almost identical to my White, and, although everyone seems to complain about threading sergers, it’s really never been much of a problem for me.  As is usually the case, this one shipped with threads in place, so I just grabbed each thread, attached the thread from my own spools, and patiently pulled the strands through.  (Always do the needle/s last!)  Tying the threads together works a treat, and I was ready to go instantly.

So far, the Baby Lock seems to function identically to the White, except that it’s a 2/3/4 thread instead of just a 2/3.  The 4-thread seam was a big surprise — it’s snug and perfect on knits, with just the right amount of elasticity.  It should be perfect for my turtlenecks now, and for knit tops and dresses in the spring.

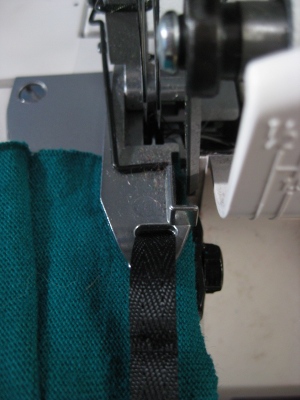
It does have one feature my White didn’t have (and one that I’m thrilled about):  A slot on the presser foot through which to feed stabilizing tape, or ribbon.  Huzzah, huzzah, huzzah!  I’m going to like that; it should make stabilizing the shoulders on my favorite turtleneck a cinch.

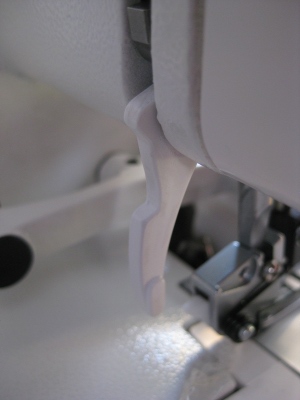
The only thing I don’t like so far?  The lever used to lift the foot is the cheapest, flimsiest piece of plastic imaginable:

Worse, it isn’t even firmly anchored; it just flops in place.  (It appears to be intentionally designed that way.  Phew.)  I’m sure it will serve just fine, but that’s one place where a quality piece of metal would have enhanced my user experience — hundreds of times a month.  I’m a bit annoyed about that; it seems like an unnecessary bit of cheapness.

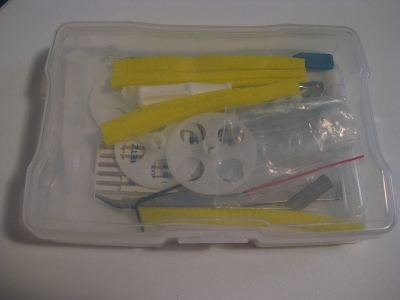
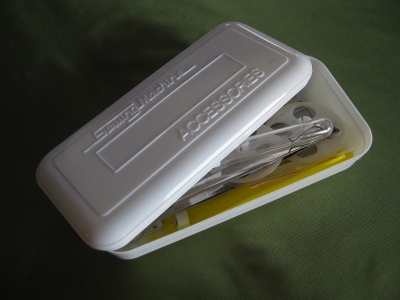
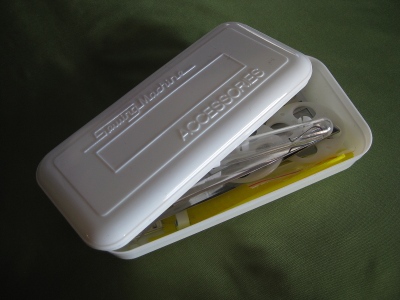
I think the accessory box is made of the same plastic, only much thinner and, incredibly, flimsier. At least this matters a lot less than the lever.  The box looks and feels as if it will bio-degrade on my sewing table within the week, which also means that it’s nearly impossible to close effectively, since it buckles when touched.  Wonder why it came with a rubber band around it?  I expect I’ll have to work out some other way to store the accessories, or risk having my aesthetics offended on a daily basis.  Not to mention regularly enduring the suspense of wondering if the box will evaporate one day before my very eyes.

But those are minor quibbles.  Will I regret not going for the Juki?  I made a similar gamble two decades ago, and won it handily when I bought my White, which, though a bare-bones model and inexpensive, gave me more than my money’s worth.  My serger needs are still very much the same, and are still so basic, that it’s quite possible that I’ll be as fortunate with this new machine.  The isn’t the kind of gamble I usually take with tools and equipment, and only time will tell, but so far, so good.

I miss my pretty little blue White, though.  And I hate the “Lauren” logo:  It’s half of a wench (waist to toes) in a skirt and high heels.  Right.  How completely characterless, banal and kind of retro-loathsome, not in a good way.  Not to mention that not all male sewers have an identical cousin like Peter’s Cathy.  Those who don’t are probably going to love this logo just as much as I do.  I’m so not impressed!

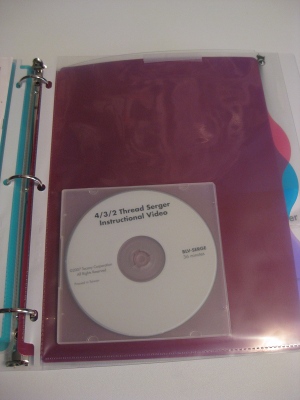
Note: A 35-minute DVD came with the machine.  It’s from 1997, and is described by the presenter as a “tape”.  It’s ever-so-fuzzy, but it is an excellent as an introduction to using the serger. Now that was impressive!

Posted in Machines | 2 Comments

ABdPM 20013: Miscellaneous Report

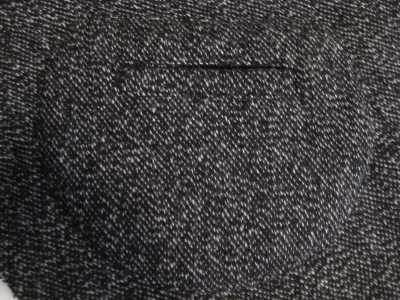
Things are progressing here — the jacket’s got pockets:

I don’t like raw edges on the insides of my patch pockets, so I lined these with a thin, slippery polyester.  And I interfaced them as well, because that will help to keep them from “pooching” over the years.  Then I turned them, and applied the finished pockets to the jacket fronts.

These aren’t exactly the pockets specified by ABdPM.  Their pockets have two bound edges, stitched from the contrast that I’m supposed to be using for one side of my hood (you can see this in the photo below).

I know, too small, but maybe you get the idea.  The contrast trim is just a thin edge on the pocket opening.

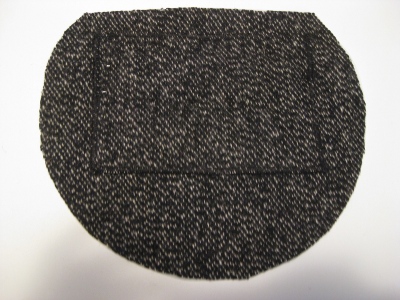
Instead, I used the exterior wool fabric, and made standard welts for the opening. Here’s the welt on the back side, before I stitched it in place:

This fabric ravels very easily; with another wool, I probably wouldn’t have bothered to finish the edges.  The welt fabric is a true rectangle, but I took this picture at an angle in a (vain) attempt to avoid the shadow you see at the bottom of the picture.  Got to work on those photo skills one day.  Not this week, however.

My pockets are larger than the ABdPM versions — about a half an inch larger all around.  ABdPM’s pockets are pretty small; big enough for hands, probably, but mine had to be large enough so that I could get my pocket camera in and out with no fuss.

I used to be quite good at making welts and bound buttonholes, but those days are gone, and, once again, I’m grateful for this lovely tweedy-twill which hides imperfections very nicely.  The welts nearly match.  Close enough, as they say, for government work — but far from perfection.

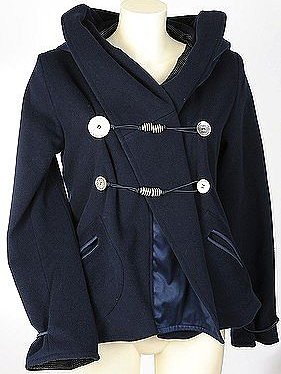
On other fronts (literally) I’ve been debating the closures.  When I first saw the ABdPM photograph, I was thrilled because I mistakenly assumed that the jacket was closed with springs:

Yeah, only a hardware junkie could have leapt to that conclusion. Those are actually beads strung on elastic, which loops over four assorted buttons.

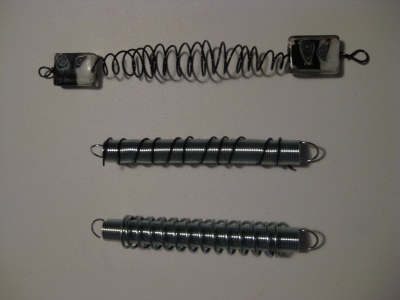
I liked the hardware concept a lot though, so I picked up a couple of springs.  They were too chrome-y, and maybe too heavy, as well.  Then I dropped in at the beading store and picked up some heavy black wire, which I wrapped around one of the springs.  Better, but not right.  Then I made a spring-like structure out of the black wire and added flat, rectangular, glass beads to the ends.  Not quite right, either.  The black wire coils completely disappeared into the tweed which just looked strange, rather than interesting.

Here are the three incarnations (in reverse order from the way I’ve described them, sorry):

All have been rejected (and you might say “good riddance”!), but I think I have a solution, which I’ll save for later.  I’m afraid that I really do want a kooky closure, so actual buttons-and-tabs or buttons-and-buttonholes are out of the question.

Related:

Anticipation

ABdPM 20013:  Fit and Interlining

ABdPM 20013:  The Hood

ABdPM 20013:  The Lining

ABdPM 20013:  C’est Fait!

Posted in ABdPM, Jackets | 3 Comments

DIY Serger Trolley

.  .  . courtesy of IKEA:

It’s their inexpensive, lightweight dolly; handy for everything, and just right for this job, too.   Cheaper and more versatile than the purpose-built carts.  Bungee cords recommended.  I couldn’t find mine, but I didn’t really  need them for this run.

Posted in Tools | Leave a comment

Disaster!

I’ve got the pockets done on my ABdPM jacket; the body assembled; the sleeves attached.  (Yeah, I’m a little behind on posts.)   I’m merrily serging along, finishing the armholes, getting them trimmed neatly and finished.

And then, this:

Well, it wasn’t just this.  First the needle broke.  Have I before broken a needle in my serger?  I don’t think so, but swapping it out for a new one was easy, until I realized what had happened:  That cute bird’s eye above?  It’s supposed to be behind the arm it’s in front of.  Instead, it’s at a crazy angle, and blocking all the nifty little arms and gadgets that make my serger, well, a serger.

I’m hoping that the stem the bird’s eye is on is attached by a screw that has simply slipped, either through age or from the effort of pushing through the humongous number of  fabric layers in my jacket.  My serger isn’t a particularly fancy one, nor was it particularly expensive, but it has been a good friend forever, and more than adequate for my needs.  We work together well, and I don’t want a new one.

Tomorrow morning, ASAP, I’m running it down to the fellow who may be able to fix it.  I’m really, really hoping he can give me the prognosis before the holiday starts; Monday seems a long, long time away.

I’ll be picking up some heavy-duty  needles for my Pfaff.  The jacket is so close to being finished; a little zig-zagging will do, if it has to.  I hope.

Posted in Machines | 3 Comments

ABdPM 20013: The Hood

Once I’d fit the jacket, and cut out the interlining, it was time to tackle the “exterior” fabric:  the wool the world would see.

This pattern calls for “serge” or “”twill” (it’s not clear to this English reader which) for either the inside or outside of the hood and the band that extends down the front of the jacket (they’re cut all-in-one).  My French isn’t good enough to figure out exactly which piece was which, although I think it would be pretty obvious once it came time to do the final assembly.  I’d decided, though, that I wanted two layers of my main fabric for the hood, so that’s what I did instead of using the contrast.

Here’s the hood, assembled, with the front edges of the hood and the front of the jacket bands to the right.  The bands are folded back because this is one looong piece.

Because I wasn’t sure exactly how this section was going to attach to the rest of the jacket, I probably made the front band a little longer than necessary; I won’t know for sure until the final assembly.  At this point, I’m supposed to have closed the bottom seam, and topstitched all around, but that’s waiting until I confirm this piece’s true size.  I think I’d have wanted to do that topstitching last, in any case, after the jacket’s all together.

The hood has an elastic drawstring, with which I did battle for hours.  I can’t even imaging what all went wrong:  Attack of the stupids, maybe?  I did make life a little difficult for myself when I insisted on putting a protective bead on the elastic. , inserted the elastic all wrong, forgot the bead and toggle .  .  .  and so on.  Here’s what the set-up looked like:

There’s the elastic (I cut it to the precise length of the part of the hood that holds the drawstring, so the hood, which also forms an over-sized collar, could be worn without any cinching at all), the lock toggle, and the bead.  The casing is along the hood seam; I’m not sure exactly how ABdPM meant it to be made, but I just topstitched on either side of the hood seam, forming a channel.

The problem is that the elastic doesn’t go the whole length of the hood; it begins in the middle of the hood’s curve, goes along the top, and then exits through a buttonhole a few inches from the hood’s front edge.  I did every dumb thing possible while trying to thread this elastic.  The first issue was classic:  There are four layers of wool forming this channel, and I laboriously  threaded the elastic up through one that didn’t open out through the buttonhole.  D’oh!  And it got worse after that .  .  .

I don’t even remember how I solved this problem in the end, but it involved making an opening in the hood lining seam, knotting the ends of the elastic (but not so much that it couldn’t be pulled through the channel), and somehow resulted in having the bead and toggle where they belonged on the outside of the hood, and the ends of the elastic stitched to the seam allowance in the inner hood, and with the seam closed up neatly.  Wool is so forgiving!

I love using this bead, because there’s no chance the toggle will be lost.  This means, I hope, that I’ll never have to think about this process again.

ABdPM marks the buttonhole perpendicular to the hood’s edge, but, instead, I set it over, and parallel to, the hood seam (only on the outside hood, of course, and before I assembled the pieces), and then just opened the seam where the buttonhole was centered.  This made a lot more sense to me, and was much easier to do over the thick wool layers.  I  made it as small as possible, and it turned out to be quite neat and tidy.

I did not interline or interface the hood or front bands.  I was sure the doubled wool would be the right weight, and I wanted the front bands to drape a bit.  They appear to lie over the front of the jacket, so they shouldn’t need extra support.

Cutting both the hood and the hood lining meant that I needed almost three yards of wool; mine was 62 inches wide.  It would have been a pretty tight fit, but probably still possible, to get everything from 60 inches, but less width might have gotten problematic.  The hood/front band pattern piece, with my  +/- 3 inch alteration was 40 inches inches long.  That’s one big hood!

ABdPH calls for far less fabric (even allowing for the major change I made); maybe they’re a lot more clever at layout than I am, though my layout sure looked economical.  No layouts are included, though, so their scheme remains a mystery.

Related:

Anticipation

ABdPM 20013:  Fit and Interlining

ABdPM 20013:  Miscellaneous Report

ABdPM 20013:  The Lining

ABdPM 20013:  C’est Fait!

Posted in ABdPM, Jackets | 3 Comments

ABdPM 20013: Fit and Interlining

From Au Bonheur des Petites Mains, this is the “Veste effet boule, à capuche”, (or “Jacket ball effect, hooded” per Google Translate).  I’m a little unclear on exactly what the “ball effect” is, but that’s OK.  It’s a jacket with a goofy hood, a fun front closure, and circular pockets.

Because the instructions are in French (or more accurately, because my French is decades old and beyond rusty), figuring out exactly how it’s meant to be put together isn’t the simplest thing.  Using Google Translate, and Shams’ helpful glossary, I cobbled up instructions that were more or less comprehensible, if slightly scanty.  That was my first step.

The next step was figuring out my size.  ABdPM patterns are French, and the sizing is a little different from what I usually encounter.  Allow me to correct that:  The sizing is a LOT different.  Not only do French women not get fat, but apparently they’re not very big, either.  And have no busts.  And super-slender arms.

So getting used to ABdPM sizing takes a little effort.  At 5’2″ and 122 pounds, I needed size 44, except in the shoulders, where I cut the pattern down to nearly the smallest size:  34.   (Size 44, by the way is the top of their smaller size range.)

I probably should have tried an FBA in a smaller size, but I’d still have needed the 44 sleeves, and I wanted the fullness of the larger coat body, not to mention that I needed plenty of space for my 37 C+ bust, and without an FBA the larger size was the only way to get it.

The size 44 sleeves fit in the biceps,where they’re snuggest, but come thisclose to being too tight, so that’s definitely something to watch.   Overall,  I’m pretty small for a North American, and my arms aren’t notably heavy, so these sleeves must be really narrow.

ABdPM patterns are printed on heavy paper (which is wonderful!), so I traced off my chosen size, and cut out the interlining (or underlining, or whatever).  No seam allowances are included; they’re completely up to you.  I used 5/8th of an inch, which is what I’m most used to.  I also made the jacket about three-fourths of an inch longer, before, of course, adding the depth of the hem.

My “exterior” fabric (that’s what ABdPM calls it, and I like that adjective a lot better than the silly term “fashion fabric”) is all wool, but not quite coating weight, so I knew I’d need some fairly serious insulation for winter wear.  The interlining is one layer of a thin, drapey poly batt, and one layer of cotton flannel, cobbled together with loose, free-hand quilting.

Yikes!  Clumsy stitching and out-of-focus.  Just think of the outer layer as an especially fuzzy flannel .  .  .

I’d never done free-hand quilting on a machine before, and, let me tell you, I did one messy job of it.  No matter; the only point was to keep the layers together without stiffening the lining.  In that, I succeeded.  I do, however, now understand why a quilting shop I stop in at now and then has a huge, computerized quilting machine which is always humming.

Since I was fairly confident of the fit, I used the interlining as a “muslin”, and tweaked the pattern only slightly, in the shoulders, as noted above.  This was pretty risky, and may come back to bite me, though, since I’m still not exactly sure how the jacket goes together.  I think I know, but let’s just say that the instructions are a little obscure in places.  A more prudent sewer would have done a full muslin, but since the jacket’s loose-fitting, and the whole project is an experiment, I was willing to take some chances.

The back of the jacket has a yoke, with a lovely curved seam, but I cut the yoke and lower back all-in-one for the interlining once I realized that the seam was strictly decorative.  I didn’t want the bulk in the insulation.

By the way, ABdPM patterns are hugely over-sized; about 9 x 12 inches, or roughly 22 cm by 30 cm.  They come in a stiff, nearly cardboard-like envelope, with a photograph of the finished garment, a page of instructions, and the pattern itself.  This presentation explains the hefty shipping charge to North America, but the packaging is an aesthetic joy, and a further spur to action.  I can hardly keep from drooling every time I see the envelopes on my shelf.  Who wouldn’t want to sew something packaged so enticingly?

Related:

Anticipation

ABdPM 20013:  The Hood

ABdPM 20013:  Miscellaneous Report

ABdPM 20013:  The Lining

ABdPM 20013:  C’est Fait!

Posted in ABdPM, Jackets | 6 Comments

OT: New Life for a KitchenAid Mixer

This is off-topic, but it’s such a handy thing to know that I’m sharing anyway.  My KitchenAid mixer — a 4.5 quart model — is at least 30 years old (I inherited it), and it is a workhorse.

A while ago, though, one of the bowls flew off the mixer while I was using it, and I realized that it no longer locked in place.  This is potentially dangerous, so I quit using the mixer until I could figure out what to do about it.

I think this mixer is literally the only  “Made in USA” thing that I’ve ever owned that turned out to be a quality item; it does what it does incredibly well.  Maybe the new ones are just as good as this one, but I didn’t want to replace my old friend if there were any way to save it.   Why toss a perfectly good machine if it’s avoidable?

And it was avoidable!  All I needed was a new “mixer bowl lock plate”:

Five bucks on Amazon!  (Plus another five for shipping, but, hey, a new KitchenAid would be a couple of hundred dollars .  .  . and, the truth is, I’d probably not have replaced it, considering how few baked goods we eat now.)  For ten dollars, and about three minutes to replace the old base,  I’ve got my mixer back!

I’m sure the lock plate is available elsewhere, too, but I can vouch for the company (Seneca River Trading)  that fulfilled my order through Amazon.  I had the part within days, and made bread with my repaired mixer this morning.

Making bread is the last domestic thing I’m doing for the next three days:  I’m declaring a Sewing Mini-Vacation, beginning the minute this is posted.  The next few days belong to Au Bonheur des Petites Mains!

Hello, FTC!  This is a hobby blog, and I have no affiliation with Amazon, KitchenAid, ABdPM, Seneca River Trading or any other corporation I might have incidentally mentioned in this post.

Posted in Tips | 4 Comments

Anticipation

I’m expecting my first batch of Au Bonheur des Petites Mains patterns any  minute now, and am beside myself with anticipation.  ABPM, as they’re known in a number of French blogs, are patterns with a very different twist.  (See the English version of their site, courtesy Google Translate, here.)

None of these happen to be in the set I’m waiting for, but they are on my short list for the next purchase.  This is, according to Google, a “cowl neck shirt”:

A “down fold shirt”  (that’s “down” as in “fold down”, not as in “feathers”):

And a “round collar coat”:

There’s more, much more!  The model garments are heavy on grays, blacks, and somber accents, all of which work well with the rather edgy, even flamboyant designs, but that doesn’t mean that we have to stick with those schemes ourselves, of course.

I first “met” ABPM through Shams’ blog, Communing with Fabric.  If you go to this link, you’ll read about the start of Shams’ ABPM adventure; if you click on “au bonheur des petites mains”  under “labels” at the bottom of that post, you’ll be taken to all of Shams’ ABPM posts.

Shams has an incredibly helpful French glossary, which I’ll be relying on, as well as a US size chart, in this post.  I don’t think there could be any better preparation (or inspiration!) for using ABPM patterns than reading Shams’ posts.  I’ve set aside the next three days so that I can make my first ABPM pattern, and, like any good marathoner, I’ve been training, first under Sham’s tutelage, and also by reviewing a bunch of French blog posts which highlight other ABPM creations.

Here’s the one that led me to the rest:  It’s  Je Couds Au Bonheur des Petites Mains (“I sew Au Bonheur des Petites Mains”), which looks like a collaborative effort, with a bunch of links to creative blogs worthy of some attention on their own.

Don’t read French?  Copy and paste any French URL into Google Translate, and you’ll see web pages that, if they’re not exactly French, will be close enough to figure out what’s going on.  As for me, there’s a stack of fabric, notions, and anything else I thought I might need waiting in my sewing room for my first ABPM project.  Tonight, though, if all goes well, I’ll be translating the instructions.  I can’t wait!

Related:

ABdPM 20013:  Fit and Interlining

ABdPM 20013:  The Hood

ABdPM 20013:  Miscellaneous Report

ABdPM 20013:  The Lining
ABdPM 20013:  C’est Fait!

Posted in ABdPM, Tips | 1 Comment

Felted Wool Tunic/Vest

Thanks to Shams, I’ve been introduced to the wonderful world of Fawbush’s, where I saw this marvelous vest from Angel:

Here’s the description:

Since 1985 Angel has been providing customers with unique, fashionable, high quality womens apparel. Their garments are produced in Turkey using the finest Italian yarns. We love the drape and classic styling of this versatile piece. It features a no closure front, a double collar and embellished pockets.

Nice! — but this is knit, and I wanted something woven.  And I’m not nuts about that upper collar; it’s just not a look I’m wild about.  Clearly, I needed to make my own.

What material to use?  Felted wool seemed like the best answer, as I wanted to keep the vest as simple as possible, and didn’t want to mess with wither the weight or angst of facings.  I decided to make a muslin of regular old felt, just to get a feel for sizing, etc., so I trotted down to the local “fabric” store and bought the only felt yardage they had — made from recycled soda bottles (and boy, could you tell!).  Here’s what I worked up:

I really liked the look of this!  I finished all the edges in woolly nylon, and my only regret was that I’d made it in such an awful fabric.  Since I was about to leave on a long trip, I began to dream about how nice it might be to wrap up in a boiled wool vest on a chilly plane .  .  . but I had only a day or two before the trip, and no time to find nice wool, boiled or not.

There’s an overstock store near us, though, and through energetic ferreting, I was able to find two 100% wool throws for a pittance.  I tossed them into the washing machine and dryer, several times over, and ended up with enough wool to replicate my vest in something with a much nicer hand:

I didn’t, and don’t, like this version as much, though.  The fabric was thicker, so that the pocket shape isn’t as pronounced (the stitching doesn’t take up enough of the fabric, so the pockets are larger, less rectangular, and “poufier”).  Of course, I couldn’t match the burgundy in woolly nylon, so I had to use a pewter/black instead — it’s OK, but not as nice as I’d like.

This version needed something:  some kind of closure.  I showed it to Mr. Noile and was debating the various options.  I was leaning toward magnets, but debating how I’d keep the stitches from showing on the “right” side.  A non-functional button, sewn over the magnet,seemed to be the right answer.

Mr. Noile looked thoughtful for a moment, and then suggested attaching magnets directly to the button(s).  He pointed out that this would let me change the button configuration any time I pleased.  Brilliant!

So I got out the hot glue gun and attached magnets to buttons, resulting in this, the smock vest:

and this, the one-button close:

and this, the loden version:

and this, the two-button-with-collar styling:

and this, the pocket variation:

This was all very well and good (and a lot of fun!), but overall this project was not a success.  First, because this kind of vest is not best suited to a small person with a large bust, and secondly because somehow that lovely burgundy boiled wool just looks a little becky-home-ecky compared to the more sophisticated-seeming gray flat felt.  I really, really prefer my gray felt version, but the fabric’s just too awful to wear.  Sad.

Not to mention that woolly nylon was not the right edging.  It snags and pulls on everything.  Though I should note that the boiled wool itself is heavenly to wear; it’s both warm and light, and feels incredibly natural on the torso!

Neither version really captures the longer, leaner look of the original (or the better drape!), and, in the end, I’ve got something quite different.  After all, that’s what “inspiration” is all about, rather than “copying”; I love the way this morphed into something else.  This exercise was a lot of fun, and I’ll have to continue to experiment like this in the future.

I made a tiny pocket hidden in the large pockets to hold the buttons when they’re not in use.  That was a good move, and would have been especially useful if I’d actually worn it on a plane.  Which I didn’t, because anything I take on a plane has to have many uses over the course of the trip.  A long vest just wasn’t minimalist enough for me in the end.  But it was a lot of fun playing with the idea!

Posted in Jackets, Tops | 3 Comments