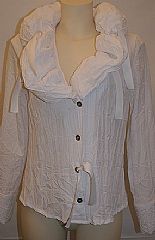
Burda “Polo” #121 09/2010

I’ve been dying to make the “trench jacket” from Burda’s 04/2008 issue since I first saw it on Cidell’s blog.  After snagging that issue in Hungary, I was all gung-ho until it occurred to me that I’d never made a pattern from a Burda periodical, much less one written in Hungarian.  (I have traced patterns before, and made things from Japanese pattern books, but let’s just say that Japanese is a lot easier than Hungarian.  Truly.)

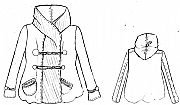
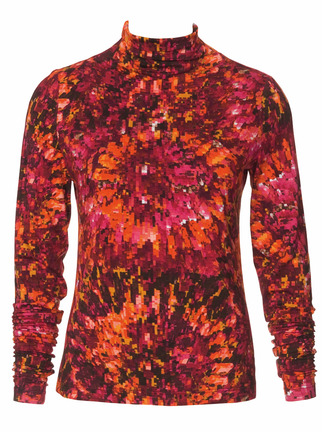
Then I saw Dawn’s post about the “polo” #121 from BurdaStyle’s 09/2010 issue.  Bingo!  I love this top:  It’s got only three pattern pieces, and it’s so simple that directions are essentially irrelevant.  Here’s one Burda version, from their site:

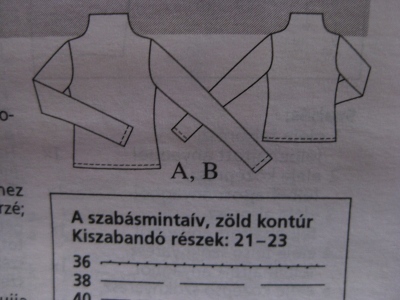
There’s a 121a version and a 121b version.  I’ not sure what the difference is; the technical drawing in the magazine suggests it’s the length of the body, but on Burda’s website the lengths for the two versions look the same.  That’s probably another little detail I missed because of the language issue.  Such things aside, this top is incredibly easy and fast to make — perfect for starting out.

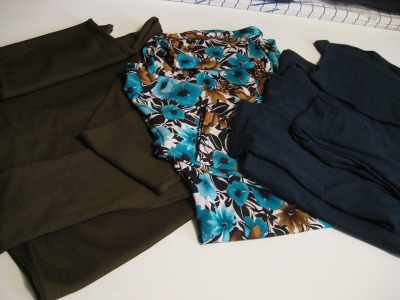
I ended up making three:

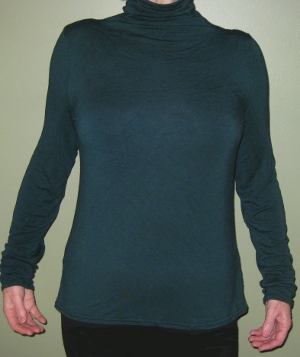
The green one on the left is JoMar mystery fabric (could it really be nylon?? nobody makes knits from nylon any  more, do they?) that I got specifically for knit “muslins”.  The print is a super-over priced JoAnn poly-spandex knit bought at 50% off, and the teal is a JoAnn rayon/spandex, similarly over-priced, and also bought at 50% off — but this fabric drapes very nicely and is a dream to wear.

I cut a Burda 40 at the bust (and below, because it just didn’t matter in this style), but a 38 in the shoulders.  Now that I’ve worn these tops, I realize they’re a little too blousy in the body., so I’ll tweak that for the next batch.  And I may need a 36 in the shoulders.  Live and learn.

The sleeves are super-long, as Karen notes, but, as you can see in the technical drawing, it’s intentional. They’re meant to be scrunched up.

I like that look — they’re still slim-fitting, but a little more interesting than plain sleeves.  Karen commented on the Burda instructions for turning the collar under — I couldn’t quite figure out what she meant, but I decided to simply hem the collar edges, and wear it scrunched, too.  In these soft fabrics, it feels nice, and I like the way wearing it scrunched echoes the sleeves.

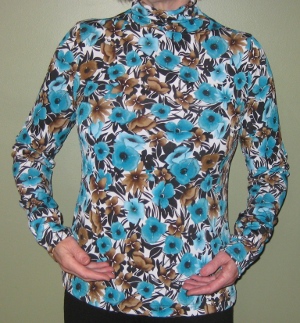
I’ve only got one picture of this shirt on my body so far.  My photographer, Mr. Noile, appeared to become ill while regarding this particular version, and muttered something about “granny print” and “singularly ill-advised”.  I may add other photos later, but feared to tax my beloved further today.

I had a LOT of trouble with this fabric, and never found a needle that liked it, though my collection is extensive.  And it’s got the usual JoAnn issue:  every puncture mark leaves a little white hole, presumably because the dye-job is too inadequate (or too cheap) to survive even the mildest needle-tampering.  Love the colors, though, except the white.

I’ll be sending this one to the charity shop, as I think it unlikely that I’ll be able to wear it in peace in the future.  I do hate to see  Mr. Noile suffer!  (The photo’s a little bleary; perhaps that’s what caused Mr. N’s nausea?) Swapped the photo out for a less-blurry one; Mr. Noile is not appeased.  The fit of this version is best through the shoulders; maybe because this fabric stretches hardly at all?

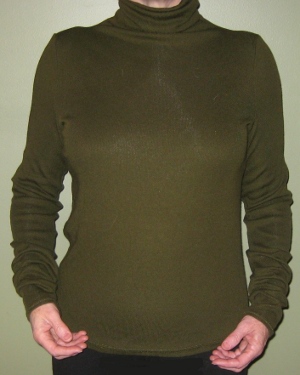
Here’s the JoMar ribby-knit:

Love the sheen from the flash.  This is a really stretchy knit; you get the full effect in the scrunchy sleeves.

I need styling help, don’t I?  Can you tell how much I’m into the construction, not the fashion?  As if to prove the point, here’s the teal version:

The shoulders are waaay too wide on this one; this soft, drapey knit probably  needed stabilizing alaong the shoulder seams.  And this is the fabric that called for a more body-fitting silhouette; the trunk kind of just hangs.  I only wear it tucked in , so it probably doesn’t matter, but I’ll fix this in future iterations.

It was a great idea to start my Burda life with this pattern.  I’ve gone through the steps now, I know what to expect all along the way, and I’ve got a good idea of how Burda fit will work for me (at least sometimes) in knits.  I’m taking another trip soon, but when I return I’ll be tackling that vest.  I can’t wait.  In the meantime, I’ll be taking these three tops with me on this most recent trip — it was a quick and easy job to whip them up in the week between Budapest and the next (domestic) excursion.

Dawn also posted about this pattern here, and mentioned Karen’s post so I checked it out, too.  And Cidell’s made one now, too.  I think Burda has a hit on their hands.

Posted in Tops | 3 Comments

Burda in Budapest

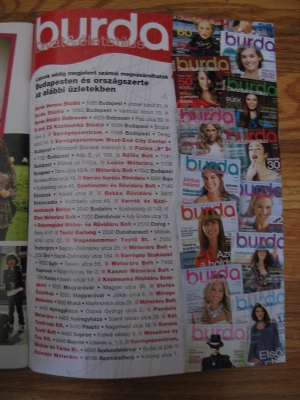
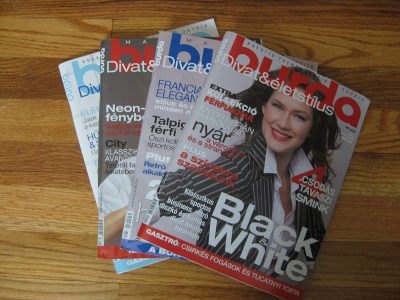
After discovering that it’s possible to buy the current issue of Burda’s pattern magazine virtually anywhere in Budapest, Hungary (gas stations! magazine kiosks! hole-in-the-wall newsstands!), I took special notice of an ad in the back of one of the Burdas I’d gotten.  I can’t read Hungarian, but it was really obvious that this ad was for back issues

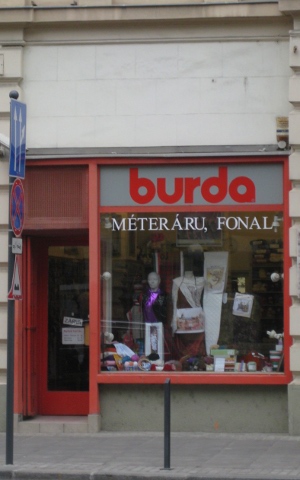
.  .  .  and it included two addresses for Burda stores in Budapest.  Budapest, my new favorite city, is very easy to navigate.  I knew I could find at least one of these stores, and so I did.  Here’s the store in Budapest IX (that’s the district) at Vámház krt. 13 (that’s the street name and number):

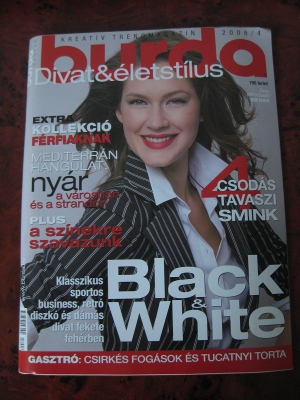
Inside was Burda-back-issue-heaven.  The Burda I wanted most wasn’t out on the rack, but the proprietor was kind enough to search through a huge stack behind the register, and turned this up:

It’s the 04/2008 issue I’ve been desperate to find — the one with Cidell’s trench jacket!  I bought it immediately, and also a slew more, some of which are below:

The price?  About $2.50 USD for each.  I was practically hyperventilating from delight!

However, I didn’t come home with a truckload.  I had a list of issues I wanted, some of which went back to 2000 or so, but I soon learned that I couldn’t get those issues here; the Hungarian version of Burda has only existed since October, 2005.   Not to mention one other detail:  I’m not nuts about Burda’s summer issues, and the end-of-year holiday issues don’t do much for me either.

Still, this was quite a coup, and I loved the store, which is, by the way, also sells yarn, along with yardage.  All communication, except smiling and nodding, was conducted by writing dates down (in Hungarian format, of course), but that was no problem at all.

Later I went back and asked about a double tracing wheel, suspecting that I could find one more easily in Budapest than at JoAnn’s.  This Burda store didn’t have it, but the proprietor made a call to their store on József krt., wrote down which streetcar to take, and I went over there and picked up my new dual wheel.  So much fun, and I got to see a whole different part of Budapest into the bargain.

Why is is so easy to find old issues of Burda?  Well, it’s probably partly because Hungary may still be a nation of sewers.  But it’s also at least partly because Hungary, or at least, specifically, Budapest, is still a nation of readers.  There are lavishly stocked magazine stands all over the place, and people are still reading like crazy on public transit, with only a few electronic devices (cell-phones; MP3 players; hand-helds) turning up, and those rarely.

Economically, Budapest seems to be still suffering from the “long sleep” that was communism/dictatorship; having a world full of text on every corner is one symptom.  It made me realize how much we’ve lost, at least in the reading arena.  Once electronic devices are in the hands of every Hungarian, most of those books and virtually all of the magazines are doomed, along with the tempting kiosks.  And easy access to Burda.  It’s a trade-off, but is it good?

Posted in Adventure/Travel, Books/Magazines | Leave a comment

ZÜCA Comment

Well, this is interesting. A ZÜCA employee attempted to leave a comment on my post about the ZÜCA Sport Pro without identifying herself as an employee.

Comments on this blog are moderated, and, specifically because she did not identify herself as representing ZÜCA, I did not put her comment through.  (I knew she was a ZÜCA employee because her IP address came through as ZÜCA’s, leaving no doubt as to her identity.)

As I told her in an email, I’m not the only person in the world who believes it is unethical for people to promote business interests in situations where they are not making it clear that they have a business relationship with the product or concern.

When I called her on representing her company’s interests without identifying herself as being affiliated with the company, she claimed to be “commenting as a reader as well as a consumer”.

Well, no, she wasn’t. She’s not a regular reader of my blog, and she saw, and responded to my review of the ZÜCA, only because she is a ZÜCA employee.

Even if she’d just incidentally seen my review somehow — within hours of when it was posted —  it’s unlikely that she would have spontaneously responded in an attempt to promote the company’s interests if she were only  a “reader” and  “consumer”.

Casual “readers” and “consumers” have no reason to promote corporate interests for companies they have nothing to do with, and they sure aren’t trolling for opportunities to do so.

Ethical bloggers, and those who merely obey federal law, are obligated to report any remunerative interest they have in products they feature in blogs.

Ethical companies are careful to make the same disclosures, and don’t allow their employees to post comments on business-related blogs or blog posts without identifying themselves.  Not to mention that, on a strictly pragmatic note,  this is one truly horrible way to cultivate a relationship with a blogger (or even, yes, a real “consumer”) who might have turned out to have been an adoring — and enduring — ZÜCA loyalist.

I’d be interested in knowing if this is acceptable behavior at ZÜCA, or if it is just one employee’s bad judgment.

The Sport Pro is a great bag.  I sure hope the company doesn’t suck.

Related: My New Bag:  ZÜCA Sport Pro Review

Posted in Bags | 2 Comments

My New Bag: ZÜCA Sport Pro Review

Dear sewers, hot on the trail of my last post (which was mostly written BEFORE my last two trips!), I am trying your patience with yet another luggage/travel post.  Bear with me; shortly we will return to our regularly scheduled programming.

I knew the day was coming, but hadn’t expected it quite this soon.  As I lifted my long-time carry-on out of the overhead bin for the last time as we returned from Hungary, I noticed that the supporting plate under the bag had broken loose.  I shoved the support back into place, but knew that this meant that it was vehicles-only for this bag from now on.

Since I’d done my research, though, I knew what the replacement would be, and I ordered a ZÜCA bag immediately. Here’s a shot of the type of bag I got, taken from ZÜCA’s glitzy, but not-very-enlightening, video:

ZÜCA makes quirky cases for travelers, for make-up artists and for ice-and roller-skaters.  Each type is different; most have fitted interior pockets of one sort or another. (And good luck finding what you want on ZÜCA’s website:  See “Note Regarding Ordering” below.)  My ZÜCA is a Sport Pro; more on what that means, or doesn’t, further into the post.

I chose this ZÜCA for these reasons:

  1. It fits standard carry-on dimensions, and will fit in the overhead bin of virtually any plane that has them (the dimensions are actually slightly smaller than those of the overhead carry-on bag I’ve used for nearly 20 years, and never had to check.)
  2. Every review I read said that the ZÜCA rolls like a dream, and the large skateboard wheels are replaceable.
  3. The design and construction look excellent.  It’s held together by screws, which I can tighten if necessary.  The actual bag, which fits inside a metal frame, can be replaced if damaged or torn, without requiring a frame replacement.  A cover comes with it, so that the bag is protected when tossing it around, or if you must check it for some reason.
  4. The frame is designed to support up to 300 lbs.  It’s a place to sit in those interminable lines which are an inevitable part of travel these days.  Find an outlet, and you’ve got somewhere to use your netbook, even if there are no other seats in sight.  And get this:  the seat front is curved; there are no sharp edges to cut into thighs.  Someone did serious end-user testing here!  (Uh, it’s a pun.  Accidental, I assure you.)

The ZÜCA is oriented a little differently than most suitcases, which is, well, a bit disorienting, at least at first.  It opens like a locker, with a door in the front — a “front” which would be a “side” on most suitcases.  Here it is next to my well-loved old carry-on:

The suitcase on the left opens conventionally (for a roller) with a zip all around the front.  The ZÜCA is sideways in the photo; the opening is facing my old carry-on.  Both bags have pull-out handles for pulling or pushing, and both have handles on top for lifting; the ZÜCA’s is inside the circle indentation on top.

The cubic dimensions are almost the same, though differently arranged, and the ZÜCA, at 8.75 pounds empty, is just slightly heavier than my former carry-on.  Wheels cost weight, but, for me, the trade-off is well worth it.  (For the record, the ZÜCA measures 19″ x 13″ x 10″; my former bag 22″ by 14″ by 8″.)

The ZÜCA is very slightly smaller than my old bag, but holds just about as much.  There’s an exhaustive list of what I travel with on this post if you’re wondering what I manage to get into such small bags.  (No need to click through right now; it’s the post following this one.)

If you’ve read that previous post, you know that I’m a fan of packing cubes.  If you’ve never done roll-and-cube packing before, I recommend it highly; a read though that post will tell you why.  The ZÜCA Sport Pro comes with its own set, which stack in the main compartment.  The effect is a lot more like dresser drawers than like randomly stuffed cubes:

To use the ZÜCA for more than a weekend’s worth of clothes, you’ll need to roll everything to fit into the cubes.  And you’ll have to get used to squishing the well-stuffed cubes into the ZÜCA; the opening of the suitcase is a bit narrower than the cubes themselves.

I thought that was weird at first, and it was a little difficult to get used to, but I  soon appreciated the logic — you can pull one “drawer” out and all the others stay in place — neat trick!  I love the convenience of being able to grab only the cube I need, instead of unearthing all of them just to get at one item.

ZÜCA’s cubes are intelligently made, with handles at the front so that they can be grabbed easily.  They’re lined — a really nice touch which should ensure durability — and piped with a vinyl edge that tends to hold the empty cubes open, making them easier to pack than unsupported ones.

They’re also color-coded, so that you can theoretically tell the sizes apart at a glance.  This is the one thing I’d criticize, though:  The tags are so small and indistinct that I couldn’t easily distinguish any color but red when the cubes are in the suitcase.


You can check this out in the photo immediately above, and in the one just previous to it — see the red tags?  You can probably pick them out pretty easily, but not so much the green, blue, and the “orange” which is actually tan.  (The small instruction booklet that comes with the ZÜCA explains the that green-tagged cube goes on the bottom, and the “orange” one goes on top, except that in my case, the allegedly orange cube came with tan tags.)  The green and blue, particularly, practically disappear, even in the enlarged photo.

Naturally, I fixed this by adding grosgrain to the front of the cubes, at either side of the handles.  At the same time I turned my tan cube back into an orange one:

Notable improvement, isn’t it?  ZÜCA could similarly color-code the cubes more clearly, too, and should consider doing so.  In low light even the red  ZÜCA tags are difficult to distinguish.

Tip: The bottom cube in the ZÜCA Sport Pro is smaller than most of the other cubes (it’s the green one), and fits just forward of the recessed wheels.  This means that there is a space behind the cube, and between the wheels.  An Eagle Creek quarter cube, if not over-stuffed, fits perfectly here.

The quarter-cube is the small, multi-colored striped packet in the back.  It’s my miscellaneous (clothesline, rubber stopper, needle and thread, safety pins, band-aids, etc.) kit.  I love the way it fits into this otherwise useless space.  (Accidentally, there’s a striped top in the cube in front.  Ignore it.)

The Sport Pro has a number of other features unique to ZÜCA which make it particularly useful.  There’s a mesh bag attached to the top inside of the case with a pull-out TSA compliant quart-sized plastic pouch:

The idea is that you just reach inside to toss your fluids into the TSA bin. Here’s how the TSA pocket looks with the ZÜCA open, and just the “green” pouch (and my quarter-cube) in the bottom:

It’s a great feature, with one caveat:  If you fill the TSA pouch so that there’s absolutely no room to spare, grabbing the top handle of the suitcase will be difficult, as the overstuffed bag will press up against the underside of the handle, making it difficult or uncomfortable to grip.  (But, let’s face it, nobody’s TSA fluids bag needs to be that full, though.  Honest.)

Inside the front flap is a waterproof pocket for the soaked bathing suit you wore up until the last minute of vacation (or for that sink-laundered shirt that didn’t quite dry):

It’s normally zipped flat against the inside of the ZÜCA opening; this photo shows it unzipped and fully “popped out”.  There are also two mesh pockets on the inside of the flap (essentially on top of the waterproof pocket), and several loops.  (What the heck are the loops for, ZÜCA?  I know they’re there for a reason, and I know you’ve thought this thing out perfectly — how about sharing with us??)

The outside of the ZÜCA is also beautifully planned, with pockets everywhere they could possibly be:

(Yeah, it’s lying on the floor. Don’t ask; it was just easier.)  You’re looking at three pockets here (and there are three more, identical, on the other side).  See the turquoise cell phone at the top?  It’s tucked into a little tiny zip pocket that’s perfect for cell phones, small note books, snacks or whatever.  See the olive green REI tote?  That’s tucked into a zippered pocket that goes down the whole length of the ZÜCA, and that’s where this expandable tote lives when I travel.  And the Burda?  It’s in a deep open pocket that’s perfect for, you guessed it, magazines, newspapers or other flattish things to which you may want ready access.

But wait!  That’s not all!  Here’s the back of the ZÜCA:

The transparent pocket is for your identifying tags (I turn mine around so that no personal information is visible; this is a photo shoot, so you all are seeing my “Noile” card.)  The digital photography handbook, which I should read, is in the middle pocket, and a Moleskine is in the third pocket.  The front of the ZÜCA Sport Pro has no external pockets.  Trust me, you don’t need any more.

See that oval below the Moleskine?  It’s a handle.  The ZÜCA has handles on top, back and bottom, which makes it a cream puff to lift and manipulate:

You’re looking at the back of the bag (above) and beneath it (below).  The oval openings are the handles.  See those cut-outs? (they look like tiddly-winks in the photo, but they’re holes in the frame).  They reduce the weight of the frame, but not the strength.  And they look très  cool, non?

You can stuff the external pockets with confidence (though, I should add, perhaps with non-valuables) and then slip this cover over the ZÜCA before popping it into the overhead bin or checking it.

This works perfectly for me, as I never access my carry-on while in flight; everything I need on a flight is in the bag in front of my feet, not in the overhead bin.

The ZÜCA’s cover has elastic bands at one end, and attaches firmly with nylon buckles at the other end; it’s not going to slip off.  Although there’s an accessory seat cushion available for the ZÜCA, you don’t really need it; the cover is quilted and very nice to sit on, but I don’t find sitting on the unadorned top of the case to be any issue, either.  Like the main bag, the cover’s got its own discreet flap for ID information; that’s another thoughtful, practical touch.

The front zippers have loops so that you can use a small padlock to keep them shut, if you like, and there’s a neat flap that covers the tip of the opening.  That gives the bag a sleek look, but it’s also a small security feature, since it hides the zipper pulls.  I keep a padlock in one of the small side pockets, by the way, in case of need.

So what’s the bad news?  Well, you might choke on the price — $285 directly from ZÜCA.  If you’re not set on a particular color, you can almost certainly find it for less elsewhere, perhaps on overstock.com or ebaggs or similar sites.  Or take a look around ZÜCA’s site; they’ve got a sliver-framed, pink edition on sale right now for $219, and a “factory outlet” page, which might offer fruitful hunting.

Keep in mind that you are looking for the model with two wheels, not four.  The four-wheeled models are the smaller skate cases, and they’re a lot cheaper, but probably not maximally useful for serious travel involving day-to-day clothing.

In my situation, I buy the best possible luggage I can because luggage is the last thing I want on my mind when I travel.  And I only buy luggage every 20 years or so; if my ZÜCA is as good as I expect it to be, I’ll never buy another suitcase.  I’ll be able to maintain it by tightening screws, and the wheels and interior bag are both replaceable, should the need ever arise.

If you pay full bump and keep your ZÜCA for 20 years, it will amortize at  $14.25 a year.  I’d say that’s just fine.  The carry-on my new Sport Pro replaced cost far less — nearly 20 years ago — but I couldn’t find a bag like it at any price, this year, that looked as if it had half the lasting power of my vintage Lands’ End bag.

Naturally, then, I asked myself if I wanted to go through three inadequate $100 bags, or buy one $300 bag that met my needs perfectly.  It was a no-brainer.  Get yourself a nice coupon from overstock or pay much less through other means, and you bring down the cost-per-year proportionally.  Do be aware, though, that ZÜCA offers a lifetime warranty on bags purchased directly from  ZÜCA or authorized dealers; you might want to make sure that you’re buying from one of those before you click.  Or you might find a price that’s so good that you really don’t care one way or another .  .  .

Note Regarding Ordering:  I ordered the ZÜCA Sport Pro, which is exactly the model I wanted.  You’ll have trouble finding a “Sport Pro” on the ZÜCA website, though, if you go looking for it.  The ZÜCA website is surprisingly messy and confusing, and the Sport Pro isn’t even listed as a product; to find it on their site, you must know exactly what you’re looking for.  Though you’ll end up ordering something called the “ZÜCA Pro Black & Black Full Set”, you’ll get the Sport Pro, in spite of the fact that the website confusing lists only separate “Pro” models and  “Sport” models.  Wacky.

Here’s the box mine came in, with the “Sport Pro” labeling:

(Cats are attracted to ZÜCA.  What’s not to love?  Cozy, secret cubbies, all devoid of cat hair.  Duty calls!)

In general, ZÜCA’s website is an uninformative disaster, at least as far as providing any clues as to how to actually pack and use a Sport Pro or its derivatives.  If you want the make-up case, which you’ll see reviewed all over the Internet, you’ll have to figure out for yourself how to configure a ZÜCA case to make one.  If you want a skating case, you’ll have to figure out that it has nothing to do with the Pro cases.  And if you want to know exactly what a Pro consists of, and why you might want one, you’ll need to be reading reviews like this one.

For people who make a fantastic suitcase, the ZÜCA folks sure don’t have a clue as to how to present it.  Yes, there is a video, but it’s high on “slick” and low on information. Nothing on the website explains or compares the different models, or how to customize them, or why I might want to do so.  Or not.  If a customer doesn’t already know exactly what he/she wants, he or she is in for a bunch of confusion and frustration.

Hey,  ZÜCA! I don’t want to know how cool your web/video people are, I want to know how ZÜCA will work for me!  You’ve got all these great features, and you explain them .  .  .  nowhere.

I had to scrabble like crazy all over the Internet all by my lonesome to figure it out, and even then I didn’t have a clue about some features until I got mine home and went over it carefully.  All that work shouldn’t have been necessary.  Lucky for me (and you!) that this bag was just as terrific as I’d guessed it was.  How many customers are you losing because understanding your product is so tricky?

ZÜCA’s attractive, but less-than-helpful, site is here.  The one thing it does well:  the technical specs, which are spelled out nicely.

Disclaimer: Nothing I reviewed here was provided to me by the manufacturer, and I received no compensation for writing this post.  All I got out of this was the thrill of writing the overview I wish I’d seen when I was researching my replacement bag!

Related:

Carry-On Only Travel

How To Find Your Bag Anywhere

Case Mod

Also: ZÜCA Comment

Posted in Adventure/Travel, Bags | 14 Comments

Carry-On Only Travel

Sewers, I am back from a travel-mad summer and fall, and determined to write about luggage and packing.  Ignore this post if you prefer — I’ve got a bunch of real sewing articles lined up, which will shortly begin appearing.   Everyone else, have at it, but be warned this is a long post!

This past year has been a wild one for travel, with three major (unexpected!) trips.  From my east coast home I’ve been to San Francisco and northern California; lapped Toronto/Newfoundland/New York during a single trip; and traveled to Budapest, Hungary on another, not to mention a lot of shorter trips to a bunch of other places. The least duration of the big trips was about two weeks; the longest nearly four. All with only one small suitcase.

When I fly, I travel with carry-on bags only, and until you’ve done that, you probably can’t imagine the sense of freedom not checking luggage offers!  Here’s how I do it.

I take one carry-on, and one “purse” or personal bag; that’s it.   My carry-on suitcase is small enough so that there’s no dispute about whether it is “legal” or not.  Mr. Noile now does this, too, so the trips we take together no longer involve any waiting at the luggage carousel.

Here’s our total combined luggage at the end of our nearly two-week-long trip to Budapest.  My carry-on bag is at the left rear, with my “personal” bag in the front (it’s overstuffed with ten BurdaStyle magazines I found in Budapest, some sewing notions and a few small gifts).  Mr. Noile’s bags are to the right.  This is all the luggage we used for two weeks of travel to Eastern Europe.
My suitcase is over 16 years old — maybe closer to 20.  I bought it at Lands’ End (a place I no longer shop now that Sears owns it), and it has seen me through hundreds of thousands of miles of travel — many, many trips annually for each year I’ve owned it, through Mexico, Europe, Canada and all over the United States.  I haven’t found anything on the market that I like as well, and I’m dreading the day when I finally have to replace it.

This particular bag is 22 by 14 by 8 (inches), and yes, it has wheels.  (I have problems with my arms, and wheels are not optional for me.)  The wheels are small but strong, have (clearly!) withstood the test of time, and the bag is designed so that they take up minimal room both inside and out.  Even in Europe, I wasn’t asked to put it to the bin test; it was obvious that it would fit easily overhead on all but the smallest planes.  And so it did.

The month-long trip involved the most extreme fluctuations in temperature, so the following list of items I packed  includes everything I took for that trip, with notes for what I switched out for the less-complicated travel.  This most challenging trip also involved several radically different environments:  temperatures ranging from 30-40  degrees, daytime, in the first, 85-90 degrees in the second, and a third one of temperatures around 70.  It was casual travel, but I needed to look nice some of the time. On the other hand, my clothes need to be optimally functional, too.

I packed almost exactly the same items for each trip of the three trips, with minor changes noted below.   Here’s what I took in my carry-on for this trip (and what I take for virtually all trips):

2 technical shirts, long-sleeved, quick-drying, breathable synthetic blends (my favorites have zip-open vents for hot weather wear) ( I eliminated these in Hungary; I use them to avoid sun on my arms, or to layer.  Hungary was neither hot enough, nor cold enough, to require them.)

1 sleeveless shirt, same as above, dries in a few hours (eliminated for Hungary and San Francisco)

6 tops, 3/4ths length sleeves (the ones I’m using currently are a blend of rayon and cotton with a touch of spandex) most serious travelers would take only 3, but that would require doing a “sink laundry” every night, and I’m just not up for that

1 pair “hiking” trousers in technical fabric; convertible to shorts (for cooler weather, I just wear black stretch jeans)

1 pair dressier trousers with “hidden” zip-off legs; convertible to long shorts, expensive and well-made enough that the hidden zips look like a design feature ( for more casual travel, these would be second pair of black stretch jeans)

6 bras (unless it’s winter, and I can get away with just wearing supportive camisoles.  I hate bras.)

6 stretch nylon camisoles (for first layer cold weather wear)

6 pair briefs

1 pair technical “longies” (colder temps only)

4 pair heavy Smart Wool hiking socks

4 pair thin Smart Wool socks

swimsuit/cap

1 cotton long-sleeve v-neck tunic for sleep and lounging (or short-sleeved, over-sized tee for hot climates)

1 pair all cotton men’s boxers as pj bottoms, combined with over-sized tee (on cooler trips, I replace these with thin leggings for sleep and lounging)

1 light weight, technical fabric, pullover knit  hoodie for layering
1   fleece hoodie (zip front style), with extra long sleeves, and a longer torso
1 windbreaker with hood, technical fabric OR a technical rainproof raincoat (to layer over the fleece in rain or cold weather)

1 Buff convertible scarf/hood/neckwarmer (worth every penny — shop around for design; my black-on-black is discreet enough that any adult could wear it, which is more than you can say for some) I keep one of these handy even at home; it can make a huge difference in comfort if the weather changes suddenly; if wind kicks up; or if a jacket alone turns out to be not quite enough.  Mr. Noile has commented that my buff makes my shirts look quite a bit dressier, too, when worn as an impromptu  collar.

1 pair technical gloves (very thin, with grippy fingers; mine must let me use my small camera while wearing them)

1 packable sun hat (only if climate indicates; otherwise, a beret or other hat for warmth or sun protection)

1 pair waterproof hiking shoes these go in my “personal” bag, and guarantee extra attention from TSA.  It’s probably a better idea to wear them than to pack them, but I much prefer slip-ons for TSA screenings (on urban trips, I eliminate these)

1 pair Keen-like fisherman-style sandals (can be worn with with or without socks) (Keens don’t fit me — sob! — so I have to find good fakes) (in cooler weather, I wear Clarks of England instead, lately this model “Maggilyn” which was incredibly comfortable for miles of walking on cobblestones and broken sidewalks all day long in Budapest, even though they’re amazingly lightweight)


1 pair flip-flops

1 extra-large technical towel (super water absorbent, dries very quickly, full body coverage — microfiber, not the old-style)

clear plastic pouch with TSA-compliant fluids


mesh toiletries pouch (it’s the striped one in the picture at the end of this post, striped for easy identification) with items I didn’t include in the fluids bag, or in the small kit in purse; these include a flat vinyl sink stopper; tiny alarm clock; tiny reading light; a travel clothes line; a small sewing kit with pins, extra buttons, etc.; any medications or vitamins; one of these small cups so that I can take meds or a quick sip of water in a bathroom, conveniently.  (The cups are called “travel shots” and hold 1.5 ounce — I doubt that they enhance an alcohol experience much, but they are great for travel.)

a Swisscard, which I carry every day in normal life, and is, at least at the moment,  TSA and CATSA compliant.  It fits in a credit card slot in my wallet.  I use this thing every day, even in real life.

1 heavy-duty, zippered, nylon tote bag which I always pack in the front zipper pocket of  my suitcase.  It can function as a shopping bag, marketing tote, a picnic bag or a spare suitcase if necessary (works on trains, would be a bit more problematic on a plane if I filled it on the trip, and still didn’t want to check my suitcase — in that case, I ship the excess.)

Here’s how I dressed:

  • For the coldest outdoor weather on this trip (30 – 40 degrees) (10 days), I layered my torso clothing like this:  camisole/3/4ths sleeve shirt/LS shirt/knit hoodie/fleece hoodie/windbreaker.  I was plenty warm, even when wet.
  • My head was covered in 4 layers:  Buff/knit hoodie/fleece hoodie/windbreaker.
  • My lower body was covered in the usual panties-technical longies-khaki trousers.
  • In the colder climate, I stripped off the extra external layers once I came indoors, changed to my stretch technical trousers, and pulled my knit hoodie on over my 3/4ths sleeve shirt.  My black knit hoodie — a “better” brand with a slim cut and whose quality was obvious — and black technical pants had the virtue of looking a bit dressier than the khakis I wore outside.  I could go to dinner and not look woefully under-dressed.  Indoors, I switched to the Keene-like sandals with the thinner socks.  I could have upgraded by act by wearing the ballerina flats, since I had them along, but I didn’t bother.
  • In the hottest climate (85 degrees) and during a few days of milder weather elsewhere (70 degrees), I zipped off the legs of my trousers, and wore either my sleeveless top (with or without an open LS technical shirt over for sun protection), or just one of the 3/4ths sleeve shirts and standard undergarments.  I wore the Keen-like sandals without socks.
  • In all weather, I slept in the boxer shorts and the LS cotton tee (or the tee tunic and leggings).  If’ I’d been cold, I could easily have slipped on my fleece, especially since it wasn’t my outer layer (and so stayed quite clean).
  • I ALWAYS pack the flip-flops!  I wear them in any and every shower wherever I go.  If conditions in bathrooms or showers prove to be worse than I expect, it doesn’t matter — my feet never touch the ground.  Ditto for hotel carpets — with the flip-flops by my bed, my feet never touch the awfulness that lurks there.

I pull whatever I wear on the plane from this list.

Everything gets packed in organizer cubes, by type — outerwear in one; tops in another; undergarments in another, etc..  Chargers all go in one small, zippered mini-cube.  Here are the cubes, packed, stacked in front of the suitcase.

Yes, every one fits into my suitcase!  The miracle of packing cubes cannot be over-stated.

My “purse” or “laptop” bag is an Overland Equipment Cambridge — an older version than the one now available (and I  like it better, because I hate front flaps like the one on the new version).  (Not to mention that I totally  hate that —  unnecessarily heavy — leather patch on the edge of the flap on so many of Overland’s bags.)  The Cambridge is a great convertible bag with really well-designed internal pockets for a laptop and more.

It can be carried as a tote, slung over the shoulder, or worn as a backpack.  The handles are adjustable; the sides cinch or expand, and there are efficiently designed shoulder straps hidden in the back panel — into which maps can be tossed for easy retrieval.  It’s absolutely perfect for my purposes.  I can get to anything I want in it easily, and can get my electronics out of it fast for TSA.

Inside this personal carry-on I pack:

1 eeePC ASUS computer and components
1 e-reader (Sony; it’s slimmer and lighter than others and I’m not tied to a proprietary store for books)
1 pocket digital camera
1 mobile phone
1 mesh pouch with electrical components including a double-headed outlet extender, two-prong outlet adapter, and all chargers needed for equipment, including an extra camera battery

1 pair spare glasses

an alarm clock (mobile service is not infallible)

a watch (for the same reason)  (I will probably wear the watch, but pack it for TSA)

a small travel light for reading if electricity fails AND a mini-led-flashlight

all paperwork, itineraries, ticket pouch, contact information, etc., spare vision prescription, any other prescriptions

passport, ID, small note book and at least two pens, business cards

instead of a wallet, this Baggallini Everyday Bag, with the strap replaced by a knife-proof pacsafe CarrySafe 100 strap. Wworn with the strap cross-body, this combination offers all the advantages of a fanny pack without the horror factor:

cash (which I also wearing in my travel wallet/belt, under my clothes — my passport will live there while I’m traveling)

a small toiletry kit, packed so that I can wash up, or even launder my clothes, if I end up the protagonist in a travel agony story and stranded overnight where I hadn’t planned to be.

In it:  dry soap leaves; dry laundry detergent leaves; a tiny microfiber wash cloth (MSR personal — it’s about 12×9.5 inches); a toothbrush and small tube of toothpaste (retrieved from the TSA bag after security), tiny travel deodorant (ditto); lip balm;  EARPLUGS!; any anything else that seems like a good idea.

a relevant guide book, or, usually, the relevant Moleskine city book and any directions or pocket transit maps I’m likely to want

an extra, thin, larger size Moleskine notebook; also a couple of smaller mechanical pencils for museums where note-taking with pens isn’t allowed (no sharp points with these Pilot minis)

I also carry a thin pass case on a leash that I use for transit passes; I pin or clip it into a pocket and can easily grab it, use the pass, and replace it without ever going into my bag

a water bottle, empty if I’m going through TSA.  On the plane, I ask the attendant to put my beverages into this water bottle — less messy all around.

Here’s what it all looks like, packed up and ready to go, hat jauntily posed on top:

One day, I’ll be carrying only clothes I’ve made, but that’s going to require some serious planning — and it will never involve the most interesting pieces in my wardrobe, for obvious reasons.  For me, travel is all about comfort and practicality, not style or statement.  The focus is on the experience; I don’t want anything coming between me and the new world I’m entering, so my clothing and luggage are the last thing I want on my  mind.  That’s why I love this system — it’s totally liberating!

I’ve won Mr. Noile over to this kind of packing, but our daughter, Noilette, who is an inveterate traveler (Mexico, Haiti, US this year; Israel, Switzerland, Mexico, US last year)  won’t carry-on anything.  Go figure.

Disclaimer:  This is a hobby blog; I receive no compensation of any kind for any endorsement.  Opinions are my own.  Links are to Amazon (for the most part) because most manufacturer’s websites stink, and it’s not easy to make a link to a viewable product.

Related: My New Bag: ZÜCA Sport Pro Review

Posted in Adventure/Travel, Bags | 6 Comments

Burda Score – Times Two

I’m in Hungary right now — yeah, I’m surprised, too — and guess what I found at a gas station on the day I arrived:

Yes, at a GAS STATION!  I can hardly find Burda Style in the United States, but they’re sitting around at gas stations in Budapest.

And the price?  Less than $4.50 USD apiece.  Eat your hearts out, poor deprived North Americans.  (Don’t worry, I’ll be crying next  month.)

That was Sunday  night.  Today (it’s Tuesday here), I found the October issue at a news stand near the gas station:

Of course, the instructions are all in Hungarian, but given the quality of Burda’s directions, I don’t count that as any kind of disadvantage.  I’m tap dancing here, people!  Budapest is wonderful, and this was frosting on the cake.  Or, rather, frosting on the torte.

Posted in Books/Magazines | 6 Comments

Vogue 8151 – Darted Tee

I’ve never been a big fan of Sandra Betzina’s patterns; they seem a little, just slightly, on the matronly side.  Really nice patterns, if you were inclined that way, but, I don’t know, blocky maybe?  Maybe kind of matronly?  And I’ve always thought this had something to do with the “Today’s Fit” sizing, which I read as being for bigger, more “mature” women.

Well, whether or not the rest of me is following, my bust seems to have joined the “bigger, more mature” category.  I’m having fit issues, so, Sandra, here I come!  I still can’t get my head around the style issues, but I’m looking for a tee I can live with, so I started with this Betzina tee:

The one one the right.  Yep, a tee shirt with a dart.  It’s come to this .  .  .

This poor thing’s been through a hard day, and my pose is wonky, so please forgive both of us for looking so, well, ratty.  This pattern comes in Betzina’s A, B, C sizing.  I cut a size C, except in the shoulders, where I cut an A.  (Betzina’s Today’s Sizing has a bust size similar to Vogue, but a much larger waist, and a larger hip.  Only the bust size was relevant for my top, of course.)

We’re not going to discuss the fact that my bust is asymmetrical, and that I’m not going to wear the kind of armor that would correct this normal, human issue.  Suffice to say, the darts are symmetrical, even if I’m not.  It does look as if there’s a little bit of pulling across the chest, though, so I need to address that.  My bust is one inch larger than the C size, so, in this case, I guess I should have trusted Vogue sizing.

I dropped the bust dart by 1.5 inches, to accommodate my real bust, and shortened the dart by .5 inch, so it didn’t run across the front of my chest.  I also lengthened the top by one inch, and took .25 inch out of each side of the back neck to conform to my shape there.  (I remembered to alter the neckband to accommodate that change; that’s a critical step.)

The dart placement is just right, though there’s a little pulling at the lower front of the armhole.  Is that fit, or the result of my bizarre, chicken-wings pose???  I haven’t gotten this “modeling garments” thing down yet.

The back is fine, but someday I really am going to have to address the swayback issues.

Other reviewers have noted that these sleeves are tight; they are, but I like this fit.  I think most people wouldn’t, and if I were actually as big everywhere as Betzina’s size C, these sleeves wouldn’t work on me.

So, does it make sense to wear a tee shirt with darts to accommodate a larger bust?  I kind of think maybe it does.  If  I buy RTW tee shirts that fit my bust, I’m swimming in the rest of the shirt, because the rest of me just isn’t that big.  I’d rather feel relaxed in a tee shirt than slobby, so maybe this is a better choice.  Interestingly, I really liked wearing this shirt — it felt like clothes, not like a sack I’d pulled on, but was still just as easy-to-wear as any old tee.

Incidentally, I cut this shirt from a heavyweight Fruit of the Loom men’s tee.  Ever noticed what great colors men’s tees come in these days?  Much nicer than the pastel, icky women’s shades.  And the fabric, while nothing to write home about, is about 1000% nicer than cotton knits at JoAnn’s.  Lots cheaper, also, even if you need two.

Posted in Tops | 6 Comments

Reality Check

A lot of people have asked me to post a picture wearing my clown pants, so here it is.  I was fooling around when Mr. Noile was taking my picture, and when I saw the result, I realized that my pose was the complete antithesis of the photo on the pattern envelope.

First, one top is tucked in and one isn’t; one top has sleeves, and the other doesn’t;  one set of arms is tossed outward, one is folded inward; one set of  feet are together and one isn’t; one model is 5”9″, one is (*cough) shorter; one coif — well, we’re not going to get personal here.  Here are the two images, side by side, for the full effect:

Reality check!  Professional model versus the amateur who just got back from a picnic.   Can you tell the difference??  (Hint: the amateur is wearing water-safe Keens, whilst the professional has on a very cool pair of spectator shoes.  Happy to help!)

It’s just possible that these pants weren’t meant to be worn with a common tee shirt, or to a picnic full of Linux users.  Whatever.  They’re the most comfortable thing I’ve worn for alfresco dining in 75 degree weather in a long time.

I’m posting a couple of views of just the pants (modeled, that is, by the amateur) below, so that you can see them without distraction.

I’ve just noticed for the first time that the pants in the pattern photo don’t curve across the top of the foot — the hem is straight across.  On the other hand, you can barely make out the curve in the photo above because the hem is caught on the elastic pull tabs on the sandals.  Reality bites!

Also, I’ve just learned that white fabric is transparent, no matter how opaque it looks off a body.  Photos are so educational!

Here’s the back:

Didn’t get a good shot here with skin showing, but hey, this isn’t MPB and you won’t catch me encroaching on Peter’s turf (or his calendar plans.  You can thank me later.)

You can barely tell in the photo above, but the hem comes midway up my heel; exactly where I wanted it.

If you recall from my previous post, I trimmed quite a bit off the waist on these pants.  I think the next pair is going to get a fair bit chopped off the sides and legs, too.  I left a little more ease in the hips and legs than I probably should have for this pair; that was deliberate, as these have no give at all, and I really didn’t want fabric plastered to my body in summer heat.  I could shave another half inch off each side seam without losing the effect.  (“Ya think?” said Mr. Noile, with another of those eye rolls.  Hmmm.)

The tall amongst us should note that the proportions would be nicer with long legs, but these pants are so much fun, and so wonderful to wear, that shorties like me shouldn’t be discouraged.  Equal rights for all — that’s what makes this country great!

Previously:  Vogue 1116 – The Clown Pants!

Posted in Pants | 10 Comments

Simplicity 5502 – Chevrons

This is about a 45 minute top — there’s nothing to it really, so whipping one up is really no problem.  I love stripes, though, and that makes all the difference.  Twenty minutes to sew, and a lifetime to match the stripes:

I weigh 121 pounds in these pictures, but I look like a linebacker.  Let this be a lesson to you:  Stripes are not your friend.  I don’t care, though, because I love the thrill of matching them up.  I cut a size 12, which Simplicity calls a 34 bust.  Right.  Mine is 37, and I’ve got plenty of room in this top.  What is wrong with these people?

See those folds next to my bust?  That’s where darts should be.  Or at least, it’s where you’d put a dart if the sleeve weren’t a dolman.  But, gee, it’s a tee-shirt!  Who wants structure in a tee-shirt?  (The next knit shirt I make is going to have darts, though.  I need to know if I can live with a dart-fitted tee.  And find out if a fitted tee is actually a good idea. )

I made view F, with longer sleeves and the v-neck:

Here’s the back, also not flattering and in need of some serious swayback help:

This is just a knock-around tee, so I’m not too concerned about these issues.  It’s comfortable, and easy to wear.  The sleeves are cut all-in-one with the bodice (there are just two pattern pieces), and that’s not really a slimming look, either, especially if, like me, you’re a little bustier than your size would suggest.

The sleeves are perfect on me, which means that they  may be a little on the short side for someone with longer arms.  The pattern envelope doesn’t say that they are 3/4ths length, but I’ll bet that’s what they are on a taller woman.  I suspect that Simplicity skimped because this diagonal design uses a lot of fabric; longer sleeves might mean a more contorted cutting layout.  It’s odd that they don’t mention that the sleeves are short though.

The instructions have you just turn and stitch the raw edges.  That’s what I did for the hem and sleeves, but I bound the neckline with bias tape to stabilize it and give it a nicer finish.  I really prefer to make a facing on a v-neck top like this; if I make it again, I’ll draft one and do that instead.  I added two inches to the hem; that’s great for tucking it in, but it’s really more than I needed.  An inch would have been fine.

The chevrons turned out well.  I matched them everywhere — center front and back; side seams; and shoulder/sleeve seams.  I love this stuff.  It makes my geeky heart sing.

I’ve documented my frustrations with knit hems before, but this time I tried something new I read about somewhere.  (Can’t remember where, unfortunately.)  I used wooly nylon in the bobbin, winding it loosely and gently by hand.  Then I did the topstitching with a double needle.  The result was smooth and beautiful, inside and out.

Matching stripes isn’t difficult at all; it just takes care and patience.  The trick is to cut each garment piece as precisely as possible.  There are several ways to do this.  It’s important to cut each piece individually, making sure that each obvious line matches up with its mate on the seamline.  It’s not actually the edge that you care about; it’s where the seam falls that matters.

When I sewed with plaids, I’d actually draw the major lines of the plaid onto the pattern pieces so that I could match them perfectly when I reversed the tissue pattern to cut a corresponding left, right, front or back piece.  Stripes are easier.  You can draw them, too, on your pattern tissue, but another, faster method, is simply to turn your cut piece over with the tissue still attached, align the stripes perfectly, and then cut the second piece out.

I’m a killer at pin basting; I hate to baste anything with thread, and over the years I’ve become very proficient at using pins to hold my unsewn garment together under the needle.  But for perfect alignment, I pin stripes first, and then baste.  When the margins are so small, you really don’t want a stray pin shifting even a thread or two as you sew.

I think Mr. Noile isn’t a big fan of this one.  When I took it in to show him, he rolled his eyes and said it reminded him of this:

Then he beckoned me to step closer to the screen, so that I could fully experience instant vertigo.  I think he’s trying to tell me something.

Image source: http://i.imgur.com/0bXCJ.jpg  (If anyone knows the original source, please let me know.)

Dorothy, in the comments below, suggests that this may be from this link (see “Impossible-figure rotating snakes 2” and prepare for extreme eye agony if you follow the link!)

Posted in Tops | 9 Comments

Vogue 1116 – The Clown Pants!

Yes, the andreakatzobjects AKO atrocities!  And I love, love, love them!

Remember how I was vowing, in my very last post, about how I was never going to make anything geometric again, blah, blah, blah?  Well, I forgot about Vogue 1116.  In my defense, though, I just want to point out that this geometry has nothing to do with the rounded parts of my body.  This is a whole different matter.

I did NOT make the insane bow.  I have no problem running all around town in wacky pants, but even I am not eccentric enough to sew a huge decorative sash to the back of a pair of pants I may actually want to wear while sitting.

Because I no longer trust Vogue’s sizing chart, I used a size 12 pattern, although my waist is theoretically an inch-and-a-half too large for size 12.  I had a feeling that I’d be drowning in size 14 legs, so there was no way I was going there.

I did add 1.5 cm to the front waist, and reduced the back waist measurement by .5, since I was nervous about ease.  As a result, my initial fitting meant that my size 12 was 1 cm larger than Vogue’s.*  I didn’t really need that 1 cm, but the pants fit better because of the front/back alteration.  In the end, though, I had to make them smaller.  See the asterisked note below.


Majorly wrinkly; I know.   (Just like Vogue’s!)  I love crushed cotton and linen, though.  No complaints here.  Good thing, too, since every time they’re folded, they wrinkle anew.

The real challenge here was altering the length.  Not surprisingly, there’s no provision on the pattern tissue for an alteration anywhere but in the crotch.  After pin-fitting the pieces (fun, fun, fun — if you try it, you’ll see why!), I eyeballed the trickiest bits — the fronts and sides — metaphorically closed my eyes, and drew a straight line right above where the leg “boxes” begin.  Then I shortened the pants by 4 cm, which turned out to be perfect.

You probably think that the wildest thing about these pants is the sculptural affect on the legs.  But you’d be wrong!  The wackiest thing is the hem — the pant legs are hemmed straight across the back and side, but they’re curved — and faced!! — across the front.  Strange, indeed.  You can’t really see it in Vogue’s photo, but the curve follows the top of my foot very nicely.  It’s one of those wonderful touches no one will notice, but the maker knows is there.

The facing and hems didn’t match up perfectly; I’m guessing that’s my fault, not Vogue’s, and a result of my shortening the pattern.  But when I make these again, I won’t bother with the facing at all; I’ll trim the pant legs and face them with bias binding, turn it under and topstitch.   I think the facing’s just a lot of bother for no good reason.

The pants are meant to be lined, but that’s not happening in my lifetime.  Instead, I used the enclosed facing pieces (yes!  no drafting for me!) to face the waist.  I carefully used a cotton/poly as close to my skin tone as I could find, forgetting completely that I only had white interfacing on hand.  Oh well; the fabric’s opaque enough that it really wasn’t an issue.

Here’s a view of the back:

These pants were so much fun to make!  There you are, sewing along, making what looks like a perfectly normal pant leg.  Then you pivot, pivot again, and once more and bam! suddenly there’s a three-dimensional something under your needle! It just doesn’t get better than this.

The fabric is a new IKEA duvet rescued from the AS-IS bin.  I wanted something white and crisp, but not just ordinary sheeting, so this mondo-seersucker fit the bill perfectly.  And how much do I love having designer pants from IKEA’s cast-offs?  A bunch, folks, a bunch!

Tip for wearing:  The sculptural effect in the legs morphs when wearing the pants.  The legs become shape-shifters.  Although this is a rather cool effect, and probably part of the designer’s overall scheme, it’s not necessarily desirable when actually wearing the pants.  I ended up tacking the lower front of the jutting triangle to the pants legs on both sides.  This preserved the geometry, but made the pants far more wearable.

* This gets confusing:  After I wore the pants, I ended up taking in the waist another 6 cm, or about 2.4 inches.  This is a woven, non-stretch fabric, and the “ease” gapped badly when I was actually moving around.  This final alteration made my version of these pants over two inches narrower in the waist than the Vogue size 12 version. According to Vogue, I’m a perfect size 14 in the waist, so this is another score for Vogue’s ridiculous size chart.  Way to go, Vogue:  Mystery sizing — that’ll keep the home-sewing market strong!

Update:  A few more photos and observations at Reality Check

Posted in Pants | 7 Comments