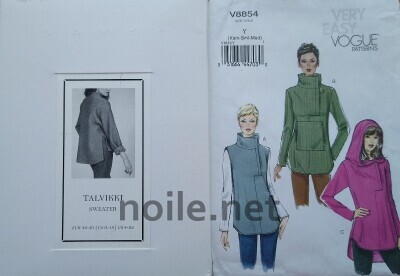
V1642 Sweatshirting Done Differently

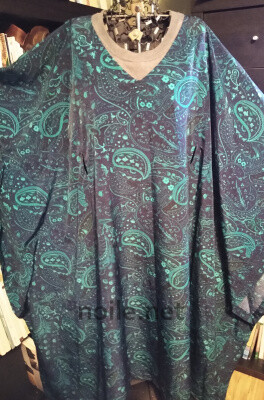
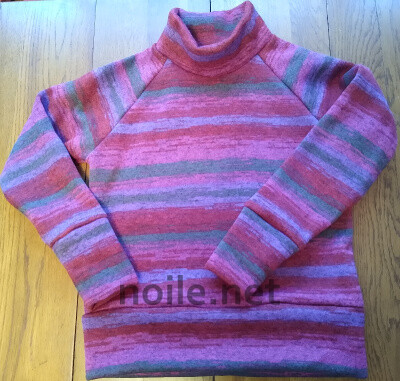
It makes very little sense, even in ordinary times, for me to wear anything other than sweatshirts at home. I live with a herd of cats, all of whom have highly functional claws, and with whom I interact all the time. Sweatshirts can take that kind of heat.  But sweatshirts are b-o-r-i-n-g.

When I saw this pattern, though, I was chuffed.

It didn’t hurt a bit when I went out to buy it, eons ago, and one of my favorite people at my local store asked me if I’d seen this new release — “I saw that, and I knew it was YOU!” he said. He was so right!

Continue reading

Posted in 2020, Tops | Leave a comment

Maywood Totepack

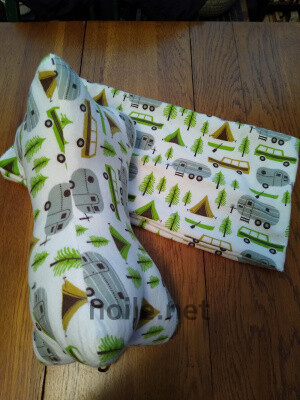
It’s literally been years since I posted here, but now, in the middle of Pandemic 2020, there’s been time to clean things up and re-start. And what better post to begin anew with than Klum House‘s Maywood Totepack? It might be coffee time — this is a loooong post!

Continue reading

Posted in 2020, Bags, Covid | Leave a comment

Kwik Sew 3463: Skinny Pocket Version

This post marks the beginning of “historic” posts from 2014, before I took a long break from blogging:

Once I’d made one tunic, I made another and then another, each time varying the pockets and and the neck bands.

kspk

This is the second of four:  Pink isn’t really my thing, but I can’t seem to resist stripes, and this was a lovely, soft, cotton knit.

kspkpt

The pockets, in this case, are skinny and vertical, just wide enough to put a hand into, and they’re set perpendicular to the main stripes.  I didn’t want my stitches to conflict with the stripes on the fabric, so I carefully attached the pockets by sewing along one of the skinny white stripes.

ksppkst

That gave the pocket attachment a much more deliberate look, and also made the white topstitching look more organic than it would have if run across the pink stretch.

Instead of making a neck band, I faced the neck edge with a strip of fabric, cut crosswise and then turned under.

kspnh

I didn’t have a coverstitch machine when I made this, and you can see that I had some trouble making consistently-sized stitches on the second (lower) row.  Stitching near the bulk of the seamline is much more consistent.

The seamline between the facing and the tunic is to the right in the photo below; that strip is the facing, turned inside.  I like this finish better than simply turning the edge of the garment in and stitching; the facing strip gives a little more substance, and a more finished look.

Because I didn’t have the extra width of the band called for by the pattern, my neckline is larger and lower than the one designed by Kwik Sew.  Next time, I’d alter the pattern so that mine doesn’t turn out this wide.

The Kwik Sew pattern is excellent; I did change up the shape of the skirt to make it flare in an “A” shape.   Construction is really simple .  .  .

kspstr

.  .  .  but skinny-stripe matching less so.  I was really annoyed that these weren’t perfect, but perfection is hard to find!

ktnc-400

I hope this isn’t one of the huge number of Kwik Sew patterns Big Pattern kills — it’s fun and versatile, and a great stepping stone for playing around with various decorative elements.

See different versions of this pattern:

Color-Blocked Tunic with Hidden Pocket

Posted in Tops | Leave a comment

Color-Blocked Tunic with Hidden Pocket

(This is a “catch-up” post from long before now.)

The past few year has just evaporated for me, with lots and lots going on that kept me far from my sewing room.  I’m looking forward to spending a lot more time there in the future than I have lately.

But first, I have a backlog of posts that have yet to make it to the interwebs.  First up, the Parade of Tunics. In my new-found devotion to being comfortable at all costs, I adapted this Kwik Sew pattern:

An elongated tunic like this just doesn’t do anything for me, so I flared the skirt, and then worked up a muslin. I’m in love with the idea of wearing PJs all the time, and apparently want to be able to go out so clad, too.  My plan was to make a tried-and-true pattern I could use for all seasons, with variations.

The muslin has a geometric panel, and (my favorite feature) a hidden pocket:

Miss Bedelia, nude as she is under the tunic, is not the best model for knits, since her wire frame protrudes distractingly, but I’m loving using her, and she’s the only dummy I have at the moment who is my size.

To make the panel, I traced the pattern, cut, slashed, and added seam allowances as required.  Easy-peasy, really.  I added an invisible zipper to the seam, with access to the hidden pocket:

I used an embroidered twill for the pocket.  It’s covered in bees, which is amusing, but the fabric is really too stiff to be discreet, so it’s a bit bulkier than it should be.

Hey, this was a muslin, so why not?  I’m not crazy about this particular tunic, but it’s still a lot of fun to wear, and if a tee shirt can’t be fun, what good is it?

The solid contrasting colors don’t send me, but this was also an exercise in stash-busting, so I’m dealing with it.

Kwik Sew patterns have always been sort of the step-children of the pattern world, and quite under-rated, I think.  I’ve always found them to be utterly reliable, and great starting points for exercising some imagination.  I was saddened to learn that Big Pattern has bought Kwik Sew, and the inevitable degeneration has begun:  No more lovely heavy pattern paper, a greatly pared-down catalog, and, soon, I presume, extinction.

Posted in Tops | 2 Comments

Simplicity 1775: Cape

This is one of those patterns with two numbers.  Here’s 1775, with a cluttered, uninteresting envelope graphic

and here’s 0311, with the trendy buffalo plaid, and the silly accessories marginalized

I made my cape out of PUL, the laminate that JoAnn sells in their strange little diapering department.  PUL is a polyurethane laminate; in this case, it’s probably bonded to polyester; the fabric itself is a knit.

Instead of making the tie, I shortened and interfaced the belt, added wide hook-and-loop fastening, and used two over-sized buttons as a faux closure. The belt’s a little loose here; it’s a very nice feature, though, and gives the cape a slim line.

The length and proportions were right for me.  I wanted the cape to cover my tush, so that I could wear leggings with it. Tall people might want to alter that — the length is the same for all sizes, and if it’s just right for 5’2″ me, it may be far too short for average height, or taller, people.

The pattern calls for a lining, but I wanted this cape to be as light as possible, to make stowing it in a bag easy. To finish it, I turned the edges, and coverstitched:

The white laminate leaves the impression of a lining, and the coverstitch makes it all look deliberate.

I thought that the PUL would be difficult to work with; it wasn’t, except for turning the belt casing. In that case, the material tended to cling to itself. Folding and stitching could have solved that problem, but, as the belt is wide, I was able to turn it by keeping at it, patiently.

Pinning is a bad idea when sewing PUL, though theoretically possible if you stick to the seam allowances, as you must when sewing leather or leather-like synthetics. For the hem, I used binder clips:

These are “smalls” and “minis”, which I used liberally, to make sure the hem curves stayed in place.

This method worked perfectly, and the clips left no marks. I found this container at the office supply store, which lets me keep the clips sorted by size, and minimized the mess while working with them:

The pattern has some nice features: the facing pieces have only two sizes, so it’s actually possible to see the cutting lines; the ink on the tissue pattern is dark, and very easy to see and use (unlike the very pale inks sometimes encountered with the rest of the big four companies); and there’s an extra, appreciated, touch to the design — belt loops in the back:

The belt circles around the back, goes through the loops, and then into two “buttonholes”, along the torso, then out two more “buttonholes” in the front. This holds the cape close to the body, making it much easier to wear than an unrestrained cape. The sides are wide, enough, though, that my arms don’t feel too constrained while wearing it.

The PUL material is somewhat breathable, but we’re not talking Gore-Tex here. It is light and flexible, which made it a good choice for a cape that will spend much of its life folded, only to be brought out in an emergency. The pattern called for topstitching all around the bottom edges of the facing, but the PUL was  not going to cooperate with that, so I settled for edgestitching around the neckline.

ycbh

In another concession to the fabric, I didn’t do machine-made buttonholes; instead I faced (and interfaced) rectangular, buttonhole-sized cuts in the material, turned the facing, and edgestitched all around. It’s a cleaner look, and should wear better.

The inside facing just floats; that works fine in this material.

ycrev

I wasn’t brave enough to do the same for the button at the neck edge, though (or for those on the belt). At the neck, I simply made an ordinary buttonhole. I doubt it will wear as well, but dealing with all the layers of cape, interfacing, seam junctions, and facing was just too daunting.

There’s a separate hood pattern included, but it’s basically a rectangle, and I wasn’t tempted to make it. If I want a hood, I’ll draft one myself, or I’ll look for one with shaping.  An over-sized rectangle isn’t very pleasant to wear, or manage, in rain.

Printing two envelopes is kind of a waste of ink, isn’t it? And/or effort? And using two numbers is confusing, isn’t it, especially if you’re looking for reviews . . .

Posted in Coats/Capes/Wraps | 4 Comments

Vogue 8407: Boarding Pass Case

I’ve been meaning to make a boarding pass case for  me and one for Mr. Noile for quite a while.  Now that both our passports have RFID chips, I decided the time had come.

bc-pt

There’s really nothing to drafting one of these things; it’s essentially a set of pockets on a string.  I had this pattern in my stash from years ago, though, so I started with it.  Then I changed it up as needed for my own requirements. Here is side 1:

bc

(Bad photo:  The case is squared properly, honest!)  I used dupioni silk to keep the case as light as possible.  My boarding pass cases go through TSA in the same clear plastic bag as my personal electronics, so I used the brightest colors possible to ensure that I can track the packet easily as it goes through the screening process.

The pattern called for cardboard as a interior reinforcement, but that strikes me as really unwise, since there’s nothing much worse than rotting cardboard inside anything one depends on for travel, and getting wet sometimes happens.  Instead, I cut support pieces from the thinnest quilting template plastic I could find, then rounded the corners slightly so that they would not cut through the silk.

bc-tm

Because RFID chips broadcast to anyone with a reader — that would be anyone who’s interested, not just your friendly snoopy government — I wrapped foil around the templates.  Aluminium blocks the radio frequency. Commercial pass cases are available that theoretically have the same protections, but tend to be bulky, heavy, and expensive.    Here’s a snippet from CNN describing the effect:

Wrapping your passport in aluminum foil actually works. It is called a “Faraday Cage,” and it’s the same thing that protects you from the microwaves as you watch your popcorn pop. The foil blocks electromagnetic waves so a nearby chip reader can’t force your passport chip to perk up and say “howdy.”

Accordingly, I cut heavy-duty aluminium foil to size

bc-fl

and wrapped the templates.  I lined all of the pockets with foil, since many credit cards now also come chipped, which makes them vulnerable to remote ID theft,  too.

bc-ft

This pattern is another one of Vogue’s failures: There are lots and lots of small rectangular pattern pieces which Vogue (or whomever) has avoided labeling, even though there is plenty of space to do so.  I transferred the information, but, come on, that was a pain, and why was it even necessary?

bc-ptn

Really, Vogue?  You couldn’t be bothered?

The pocket edges are meant to be bound;  here are two very unhelpful pattern pieces for the binding, which, bizarrely,  don’t even have the pattern piece numbers printed on them.  That information is on the swath of otherwise blank tissue paper proximate to these pieces.

bc-bd

Instead of binding the edges, which would have been a huge pain in the silk, I ended up reinforcing the pocket tops with narrow grosgrain ribbon.  We’ll see how that holds up.

bc-zp

This project was sewn on my vintage travel machine:  a Kenmore 1030.   That’s the zipper foot above, doing double duty as an edge stitcher.  I hadn’t sewn on this machine in a while, and was reminded all over again what a excellent little powerhorse it is.

The pattern calls for an around-the-neck ribbon.  That’s cute, but a lousy idea for something worn while travelling, and the instructions didn’t provide for any length adjustment, which might matter depending on how, and over what, you wear the case. bc-cl

I used round cord — nicer against the neck — and added a cord-lock so that I could control the length.  I strung a  bead — a really ugly plastic bead! — onto the cord to keep the toggle from sliding off the end.

Most, if not all, of the pockets in the pattern are open.  That’s not a very good idea, either, in my opinion.  I prefer to ensure that crucial documents and cards — not to mention currency — are locked down, so I added zippers to two pockets, and hook-and-loop fasteners to a third.

bc-rv

Above is side 2.   The shadows on the red pocket are dips in light caused by two sew-on hook-and-loop fasteners inside the pocket. The ridge on the right is a pen sleeve; that’s a nice touch.  I’ll keep a small notebook or a few index cards in the pocket next to it, since the ability to jot a note is a fine one to exploit when on the run.

bc-bpex

I did leave one large pocket open on  side 1 for quick access to a boarding pass.  And I made one other change:  The lower front pocket on this side — the bright blue one here — is meant to have a clear window into which you can pop your ID.

bc-lp

Since the whole world doesn’t need to know who I am, or where I’m from, or what my address is, and since I travel on a passport rather than with a driving license, I made this pocket opaque.  And I added a zipper, so that anything in it can be safely contained.  I stitched grosgrain ribbon along the zipper edges for support, and for a cleaner-looking finish.

Since this project is essentially just stacked rectangles, it would be an easy one to draft yourself, and not much more trouble than figuring out where Vogue has hidden the many unlabelled pattern pieces on the tissue.  That’s the route I’d have taken if I hadn’t already owned the pattern.

All that’s required is to figure out what pockets you want, stitch them to each backing piece (front and back), put the right sides together, add a neck string, stitch around the main pieces, turn and close up the opening.  As I wasn’t much of a fan of the instructions in general (cardboard support, ribbon neck tape, open pockets, failure to label pattern pieces)  I’d give this pattern the rare “D” grade — barely passing.

Posted in Accessories, Adventure/Travel | 4 Comments

Vogue 8854: My Kind of Sweats

This is the second time I’ve made this tunic.  The first go-round was an experiment:  Could I get a decent-looking top out of some men’s sweatshirts?  The answer was “yes”, and now there’s no stopping me!

btnVogue 8854 is turning out to be my best friend:  gotta love this collar  and the great excuse for featuring a single favorite button!  That’s a skinny grosgrain loop around the button, below, which make a quick, no-turn, closure.  I do double the ribbon, though, for durability, and stitch along the edges before sewing it in place.

btnbtnI mostly sleep-walked through making this one, and made a massive number of mistakes, all of which I was able to fix, more or less. Paying attention counts, but so does recovering when one hasn’t . . . and sweatshirting, thank goodness, is the most forgiving of fabrics, providing, of course, you rip out stitches with great patience.

btn-sh

I managed to get the stuff that counts most, righ.  And I remembered the small details, like the edge-stitching on the shoulder.  That  helps define the seams, and keeps them from looking sloppy-sweatshirt-puffy.

btnf

This iteration was cut from just two men’s sweatshirts — one XL, I think, and one XXL, for the length.  There doesn’t seem to be much increase in length as the sizes go up, so I wasn’t tempted to buy anything larger.

Love this pattern!  The changes I made included sloping the shoulder to fit my own better, enlarging the front pocket, lining the front pocket, adding cuffs using ribbing from the source sweatshirts, using grosgrain instead of self-fabric for the button loop, and eliminating the shirt-tail detailing from the hem.

Posted in Tops | 4 Comments

Pillowcase-Sham, Fungi-Edition

A dear relative has made her life work the pursuit and study of the mushroom.  I wanted to make her a set of silky pillowcases so that she could spend her drowsing moments with images of her favorite obsession.

Do you have any idea how difficult it is to find serious mushroom prints on fabric?  Oh, sure, the cartoon mushroom is everywhere; so are psychedelic interpretations of the honorable fungi, colors and shapes distorted beyond recognition.  And fungi with elf-dwellers below: there is plenty of that.

fpc-prt

Fortunately, a chance stop at a vacuum cleaner/sewing machine shop fairly far from home turned up this lovely print complete with proper identifications in Latin.  I was stunned!  So was the clerk, who pointed out that I was buying the last of a whole bolt — and that the store had gotten two in.  She said she couldn’t imagine how they’d ever sell it . . . and yet, it was disappearing like mad.

fpc-fl

I whipped the pillowcases up in no time, but these aren’t ordinary pillow sleeves.  Although these can be used like standard pillowcases, I deliberately designed them to be used differently.

fpc-gpI dislike, intensely, this (shudder) ugly gap, in which the pillow, and its under-dressings, show through the opening.  Surely this is not how pillows are meant to be used!

fpc-cl

Is this not much nicer?  It’s still a light, comfy pillowcase, but how much better!  There will be no pillow slippage here — where one wakes up in the morning to discover that the pillow has wrestled itself half outside the case, seeking an unclothed domination over the bed.  There will be no uncertain moments during the night when the coarser cover of the pillow itself sullies the sleep experience.

Also, an encased pillow just looks nicer on the bed, even if under the covers.  Make sure you plan ahead, though, since you will need to cut the front side of the pillowcase longer, which will affect how much yardage to buy.  My finished flap was about five inches, plus about three-quarters turned under on its raw edge, so my front piece had to be at least that much longer than the back.*

All I did was stitch up three sides of the pillowcase (French seams, of course, for a neat finish), and hemmed the back open edge as usual.  The front edge then got a deeper hem.  Then I turned the pillowcase inside out, and folded the deeper hem against the inside front of the case.

fpc-pn

I then stitched along the existing seam line to hold the deep hem in place. It doesn’t show here, but I also bar-tacked at the end (within the seam allowance), rather than simply back-stitching, since the lower edge of the deep hem will be subject to unusual stress when folded over the pillow.

The pillow can be slipped inside just as usual (in the Philistine fashion!), or it can be popped into the case, with the deep hem folded over the opening, so that nothing shows but your preferred fabric.

fpc-pkg

It was a small gift, but it bundled up quite nicely.

I admit that when I replace our current set of pillowcases, I’ll probably serge the seams, which is far less elegant, and correspondingly more efficient.  (Mr. Noile sleeps with nine pillows; do you blame me for wanting to cut the labor short?)  For a gift, though, French seams and the neatest of finished edges are the right thing.

*Thanks, commenter LindaC, for having noticed that I left this crucial bit of information out!

Posted in Gifts, Home | 4 Comments

Decades of Style 5006: 1950s Stole

For a long time, I’ve wanted something stole-like that I could wear to spruce up basic travel outfits, and which would work as a personal wrap on a plane.  When I saw Decades of Style’s 1950s stole, I knew I had to make it.

dcstlSee that cool little arm flap on the right?  That’s what sold me!  However, as you’ll see, things didn’t turn out exactly as I expected, though the end result is very much what I wanted.

dc1

The pattern has only four pieces — one of which is sewn to the border of a large piece.  So there’s the front, back, and the wrist flap; the only tricky part is keeping the pieces sorted out once they were cut.  I took a tip from Jillly Be’s excellent post about her own Decades of Style stoles, and marked each piece (and its right side) with tissue paper.

dc-lbl

This is particularly important because the pattern pieces aren’t symmetrical.  Nor is the construction intuitive, so I highly recommend not skipping this tip! Also, it’s very important to note that the main fabric is cut RIGHT side up, but the lining is cut WRONG side up; a rather critical instruction that was apparently left out of earlier printings.

My fabric is a lap robe rescued from an IKEA “as-is” bin.  (Gotta love IKEA!)  In some respects, this material is the worst possible for a stole — it’s extremely subject to pulling and forming awful loops, so I’ll have to keep my eye on it and catch them as they occur.  On the other hand, I fell in love with the fabric’s light weight, its soft texture, and the excellent tones, which will work perfectly with every color in my winter travel wardrobe.

dc-fp

The flap that I was so thrilled about (so 50s!) covers an opening in a seam between the upper back and the lower back.  You’re meant to wear the stole with a wrist slipping though it.  As well as that may have worked at social events in the 1950s, when women may have delightedly posed for effect while conversing — cigarette poised in holder — at cocktail parties, that wasn’t going to fly in my life in the 21st century.  I need that arm!


dc-nk(Yeah, that lining hasn’t recovered from being crumpled in a packing cube.)  Jilly Be also wrote about being concerned about the wearability of this stole.  In an amazingly courageous act, Jilly added buttons and buttonholes to one side so that the wrap would stay in place.  I followed her sensible example, but sewed over-sized snaps under the buttons.  No way was I brave enough to put buttonholes in this material!

A secondary advantage of adding the closures is that it makes it much easier to figure out how to put on the stole.  That’s surprisingly difficult the first few times it’s done, but using the buttons for orientation is very helpful.  (The lining is a satin backed with cotton, for a little extra warmth and heft.)

Mr. Noile and his mother — we were visiting the parents when I sewed this up — took one look at the flap and suggested I turn the opening into a pocket.  Brilliant!

dc-pk

That’s exactly what I did.  It was an after-market hatchet job, and not at all elegant, but it worked perfectly anyway.  I cut the pocket from lining material, added a zipper so that nothing would fall out (and to support that seam when the pocket was in use), and tacked it into place behind the flap by hand.

My e-reader just fits in the pocket; I wouldn’t walk around with it in my pocket, but it will be really convenient to have a safe place to stash it while traveling, since I’ll be able to put the reader down safely while briefly doing something else, like eating.  I hate using airline back-seat pockets, not only because they are probably filthy (used diapers, anyone?), but also because stashing anything there increases the chance I’ll leave it behind.

The pattern is terrific, and I highly recommend it.  Beware, though, that this is a midriff-hugging stole; the drawing is quite accurate.  It will cover your bust, but nothing below.  If I make it again (and I might, in a more durable linen), I may increase the front length.

Sizing is atypical, which you’d expect from a vintage pattern.  Following the chart, my correct size probably should have been A, but I made B instead, which was just right for my slight-ish C bust frame; size A was right for my frame, but a little tighter than I liked across the bust, and there wasn’t enough difference, otherwise, between the sizes to require alterations.

Posted in Coats/Capes/Wraps | 6 Comments

Burda 6992 — Asymmetrical Cape with Bat-Wing Sleeve

This is one of those garments I really should have drafted on my own.  It looks simple, and it is. But Burda offered a few details I really coveted, and wasn’t sure I could get right without a lot of experimentation, so I bought the pattern.

bdwrpt

I love the bat-wing sleeve (it’s on the left in the photo below).  I wear mine reversed (and that’s how it is on my dummy, too) since I am right-handed and would rather have the fitted sleeve on my dominant arm.  There’s an opening in the drape on the right for the left arm of the wearer, but no sleeve, and it’s this asymmetry that I found so appealing.  There are just two pattern pieces: a rectangle, which, optionally, can have a longer, slanted, hem, and a triangular piece that forms the sleeve for the right arm.

bwcp

Here’s a side view of the sleeve.  I really like the geometry of this wrap, and the added interest from the angled hem.  On the right, the garment ends at the high hip, but dips to below the knee on the other side.  Or much longer:  I removed several inches all around.

bsw-slvThere’s a drafting error or two: one set of notches does not meet up, and one side seam is longer, not intentionally, and doesn’t end where its mate does.  Correcting this is simple; just lop off the longer edge.  (This is a different matter than the intentional, extra, length of View A.)  That’s very sloppy, especially considering how simple this pattern is in the first place.

Because of the way the sleeve falls, the back looks quite a bit different from the front.  Eventually, I’ll try to get some pictures up showing the cape worn; I’m not sure these really do it justice.

bwbk

One thing to keep in mind when making this pattern is this:  It looks as if varied sizes are included in the envelope. In fact, there’s even a size/yardage table on the back. But this is a one-size-only pattern; close scrutiny reveals that the yardage is the same for all sizes.

I half-followed Burda’s directions, until I realized that they seemed to be complicating what was, in reality, a pretty simple project.  I found the directions completely baffling — which is really ridiculous, since there’s nothing very complicated here at all.

No, Burda, one size does not fit all from size 8 to size 24 — especially if it’s an over-sized pattern to begin with!

I don’t wear the smallest Burda size, but if I’d left this pattern unaltered, I would have found it unwearable.  I trimmed this baby everywhere, and raised the neckline, too, so I wouldn’t swim in it.

bwbtn

However, when I altered the neckline, the combination of the one Burda direction I followed and my alteration left me with an opening in the neck edge, on the left shoulder.   Since it didn’t look terribly out of place, I could have left it.  Or I could have sewn it shut, which would just have continued the seam line on the rest of the garment.  Instead, I decided that a decorative button and loop were called for.

bwbtncl

That’s a hair band, cut to size, looped around the button.  (Hair accessories:  Best source of colored elastic bands anywhere!) I’m not sure whose mistake this was, Burda’s or mine, but it worked out just fine.

The fabric is a bouclé that’s very similar to a silk and rayon one I love.  This one has the same weave (though different colors), but is probably an acrylic blend.  The texture is visually interesting  (and there’s some rayon there in the bulky yarns, which are softer than the rest of the weave), but it’s ever so slightly on the stiff side. That’s probably a plus, since it’s also less fragile than my beloved silk/rayon bouclé.

Before assembling the cape, I carefully zig-zagged all around the edges of each piece, to prevent ravelling and distortion. This probably isn’t the “right” thing to do if you’re doing couture sewing, but was a sensible thing to do for this project.

bwhk

All the seams are bound with a Hong Kong finish, which lends some structural stability to a fabric that inherently has little.  In order to reduce the appearance of bulk on the outside of the garment, I lightly hand-stitched the seam allowances to the body of the garment, ensuring that they would lie flat instead of bunching.  For this fabric, simply pressing the seams open would have been ineffectual over the long term.

bwsd

The stitches are very loose so that the seam allowance will “float” instead of pulling at the material and distorting it.

The verdict:  The pattern is pretty awful, but the results quite satisfactory. I’m not sorry I bought the pattern; I just think it’s a little ridiculous that I still had to essentially re-work the whole thing in order to use it.

Feet I used to make this cape included:

bw-saft

the seam guide with IDT;

bw-fqi

the quarter-inch right guide foot;

bw-ne

and the narrow edge foot for stitching-in-the-ditch.

I thought I’d like this cape well enough, but it turns out that I love it!  However, anyone tempted to make it should be sure to check out the sizing before cutting, check the neckline (too big for me, but I suspect too small for the larger end of the size range), and beware that there is one point (marked “2” I think?) where the ends of the two pattern pieces will not meet correctly.  A tissue fitting will identify all these issues, and all are easily corrected.

Posted in Coats/Capes/Wraps | 1 Comment