Vogue 1192

So I’m spending this year getting fit, and I’ve decided that I’m tired of wearing boxy, over-sized clothes that look good in theory, but pretty awful on actual bodies.  Now I want clothes that are shaped like me, not like inhuman geometry.

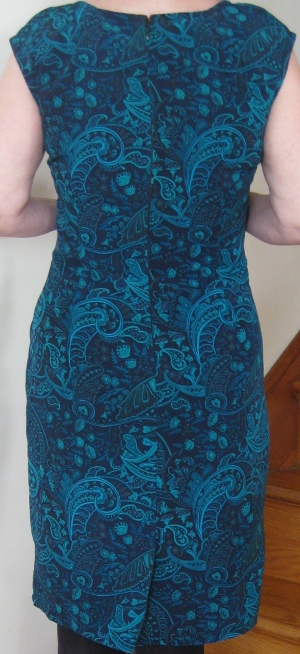
I began with Vogue 1192, an Anne Klein design.  I checked Vogue’s size table, and this is what I discovered:   My measurements are 37-28-36.  Size 14 in Vogue is 36-28-38.  Pretty close, right?  I realized I might need to take in the hip, but, on the other hand, maybe not, as the dress looked a little slim.  The critical measurement was the bust, so I cut my  muslin in a 14, realizing that the bust might need some tweaking.  (This dress is the muslin; matters went no further.)

And whoa, Mama, did it need tweaking!  I whipped up the muslin, and it looked like a sack.  Everywhere — bust, waist, hips.  You could have wrapped me in several layers of cotton wool, and it still wouldn’t have fit.

So I re-cut the sleeves and shoulder seams to a size 12.  Then I removed nearly 3 inches each from the waist and the bust!  Yep, the very same bust that was supposed to fit one an inch smaller than mine.   And that hip?  It lost two and a half inches, and there’s still plenty of ease.

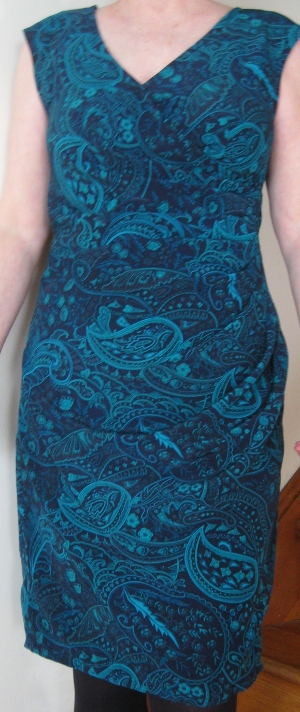
This fit, nicely

and still with plenty of ease.

I realize that the dress is supposed to be lined, but this amount of ease is absurd for lining, isn’t it?  If I’d lined the dress, I still would have been swimming in the thing.

Not to mention that the size chart wasn’t the only issue with this pattern.  There’s something seriously strange about the left side bodice piece.  Part of the problem is the giant, one-size dart which is on the left bodice only.  One size, Vogue?  For women who wear Vogue sizes 8 to 14?  How on earth could all those busts get a proper fit with a one-size dart?

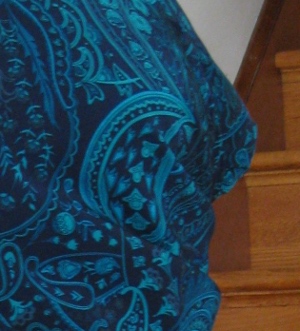
Not to mention that the complete lack of a taper leaves a cute, pointy little pocket.  If you’re wearing a Jane Russell bra, this might work, but, in my case, I was grateful for the busy print, which makes the ohh-la-la point a little difficult to see:

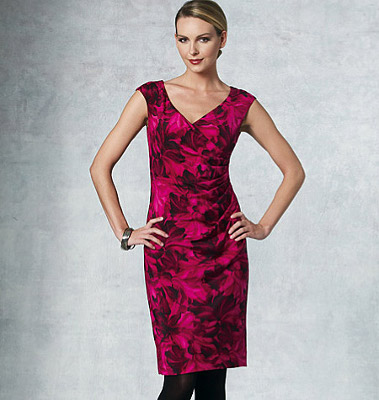
It’s only on the left side; there’s no dart on the right.  I couldn’t help but notice that the woman modeling the dress on the pattern envelope has no bust at all.  This would make fitting simple, as long as you 1) ignored the dart or 2) buried it completely under the pleats, and just hoped for the best.

The other part of the problem has to do with the cut of the left bodice.  It floats strangely; if I’d lined the dress, I would have had to anchor it to the lining.  It’s boxy where the dress, and  my body, aren’t.

The right crossover goes across the fullest part of my breast (if the Vogue’s model had one, it would go right across hers, too); and the left cross-under bunches weirdly under the bust.  In order to keep the bodice smooth, I had to tack the two layers together at the center front neckline.  It’s a fakeout, though, not a real solution.  I was waaaay too sick of this dress to even consider re-drafting the left bodice.

I added two small darts at the back neckline, but that probably wasn’t a Vogue problem — I may be a little round-shouldered.  A lifetime of wearing knits may have successfully obscured this.

The pleat actually falls nicely; I’m standing with my left leg forward for some reason.  Art?  Perhaps.  Also, I haven’t hemmed the skirt yet, and probably  never will (it’s just basted here).  Enough, already, with this dress.

There’s another little bit of deception on the pattern envelope:  The hem appears to fall mid-knee on the model.  I’m going to go out on a limb here, and guess that the model is not 5 feet, 3 inches tall; they never are.  This dress, cut in Vogue’s size 14, goes to my mid-knee.  Unhemmed.  I claim I’m 5-foot-3, but it’s not really true.  I’m 5 feet, 2.5 inches on a good day, which, you’ll understand, this wasn’t.  The size 14 length  hits just above mid-knee on me, and that’s with a 3/4ths inch hem!

Also, can anyone explain why there are different cutting lines for the front hem in all size versions, but only one cutting line for the back hem?   Is there a reason why you’d cut the front to a size 8 length, but then attach it to a size 14 length back?  Just asking, because, d’oh, that just makes no sense at all.

Auntie Allyn made this dress in a knit; the pattern calls for woven yardage.  Allyn’s version worked very well for her; maybe using a knit is part of the secret.  Hers looks fantastic; she didn’t line it either, and just finished the edges by turning and stitching.  I used bias tape to finish the neck and armholes on my woven fabric; it was quick and clean.

Pattern:  FAIL

Dress:  It’s just kind of meh.  I thought it would be a more chic version of the ubiquitous wrap dress, but it’s just kind of neither here nor there.  I will never, ever make it again.  Kludgey fixes do not make for good repeat projects.  And Vogue?  Favorite pattern-maker of my youth?  I’m not loving you so much these days.

Posted in Dresses | 9 Comments

Vogue 8675

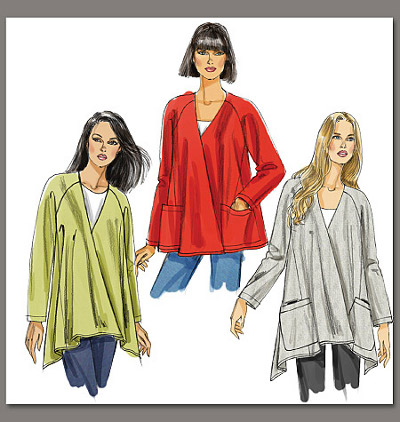
As many bloggers have already noted, the illustration for this pattern evokes a big “ho hum”;  it looks like just another boring Vogue basic:

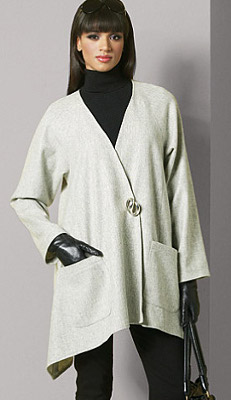
Then, a lot of us saw this photo, and took a second look:

Much better, isn’t it?  When I looked at the actual pattern, I loved the sleeve shaping, which follows the shoulder curve.  The side seams also provide some extra, flattering, shaping.  I saw this as my chance to make a jacket that offered some of the geometric edginess of a Marcy Tilton pattern, but without the boxy, unfriendly-to-humans shape that Tilton’s jacket patterns almost always feature.

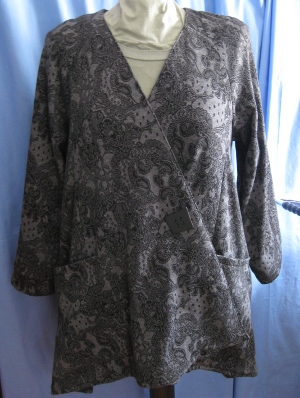
Did I get my wish?  Well, kind of:

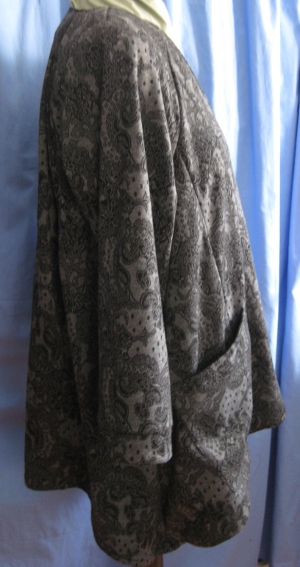
I originally made view B, the long version, with pockets.  Vogue says I’m a size 14, so I cut a size 10, which fit perfectly, except that view B was way, way too long for my 5’2.5″ height.  I was drowning in this thing!  (Vogue’s sizing chart is a joke, but that’s another post.)  I ended up cutting about 3 inches off the length — not quite enough to make it as short as view A, which looks awfully boxy in the line drawings.  My sleeves are also 4 cm shorter than Vogue’s.

My pockets are larger than Vogue’s — that might not have been the best choice, but since they’re hardly visible in this print, it’s not much of an issue.  I don’t know why anyone uses a 5/8ths inch seam on patch pockets, but that’s because I always line (and usually interface) mine.  Then I use a much smaller seam and turn the pocket.  This gives me better control on a curved edge, and a neater result.

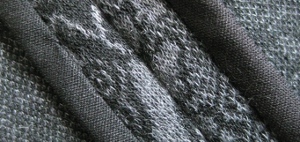
I used a completely unnecessary Hong Kong seam finish because I just love it, and, since this jacket is unlined, I wanted to see more than a raw edge every time I wore it.

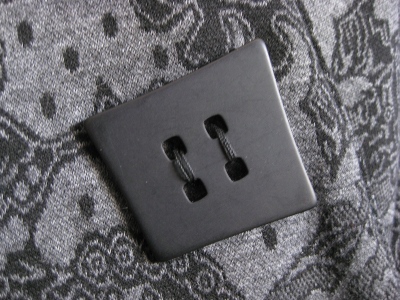
Because I was seduced by the photo of the coat closed with a pin, I added a jumbo button with an extra-large snap underneath, to give the effect of a pin without the fuss.

This was a “wearable muslin”, so I used a stable knit that I had around.  (The pattern calls for a lightweight woven.)  I knew that if I didn’t make another one, I’d still probably like using this on a plane, where I often want a blanket, but need to bring wear my own.  This could be a perfect “carry-on” coat/sweater.  Wearable on a trip, but cozy like a blanket on planes.

The knit actually worked very well, except that mitering the two angled corners at the hem was a bit iffy.  I think using a lighter woven would give a better drape, too, although this fabric actually falls nicely on my body.  The knit fronts cling a bit to each other, which turned out to be an asset when the jacket is closed; the under layer of a tighter woven would likely need some kind of anchor (a tie or snap or something of the sort) to keep it in place if the jacket were fastened closed.

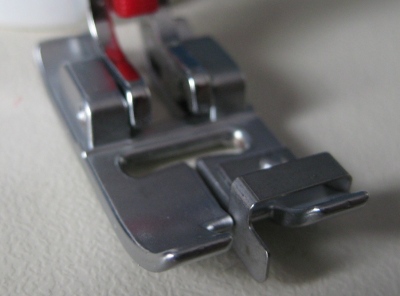
Because I didn’t want to do any hand-stitching on this project, I used this accessory foot to “stitch in the ditch” to attach the neck facing to the shoulder dart:

This is the first time I’ve used this foot, and it worked amazingly well.  The blade separates the sides of the seam just enough to hide the stitching perfectly.

Vogue’s directions were simple and clear; the pattern pieces look wonky, but go together perfectly.  Was it a success?  Well, I think so — I do get some of the geometric flair from the angled hem, and the cut of the jacket is much more flattering to a real human shape than that of most unfitted jackets.  But it’s probably time for me to face the fact that over-sized garments, however well-cut, are just not flattering on someone of my size and height.  This jacket is perfect for tall, willowy Auntie Allyn.  It’s merely OK on short, petite Noile.  Sigh.

Posted in Coats/Capes/Wraps | Leave a comment
Doughnuts

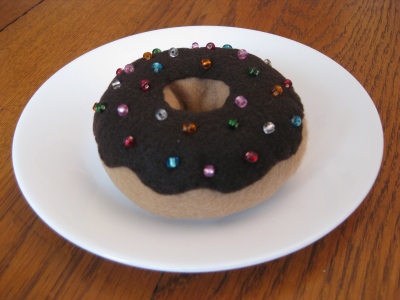
SewStylish featured handmade pincushion doughnuts in the Fall 2010 issue.  (Why do they do this?  I mean, feature Etsy artisans?  Are readers of SewStylish really going to go out and buy stuff they could make??  Of course not; we’re going to be inspired and copy.  It’s not a bad question, is it?)  Anyway, I’ve been needing a pincushion, and, even more, needing a small, quick project that would get me back in to the sewing room.

Fortunately, I don’t like doughnuts, so there was zero chance this would send me to the local bake shop, or even to the kitchen, to overindulge.  If I liked doughnuts, I’d prefer chocolate, so that’s what I made.  It’s made of ordinary cheapy craft felt, but the pliable kind, not the stiff stuff.

I cut a doughnut-shaped piece of plastic and inserted it into the stuffing at dead center so that there was no chance that I could stick a pin all the way through, since I intend to wear this on my wrist.  That should be deliciously ludicrous — but quite practical.

Sniping aside, everyone should go to WoollyDuck on Etsy and see what the deranged and brilliant person behind the shop has done with felted wool.   Absolute genius!   Could I do this at home?  Not on your life.  So maybe SewStylish wasn’t so far off base, after all —  maybe it was just the the focus of the article that was off base, and SewStylish should have been celebrating the craft, not just featuring pincushions.

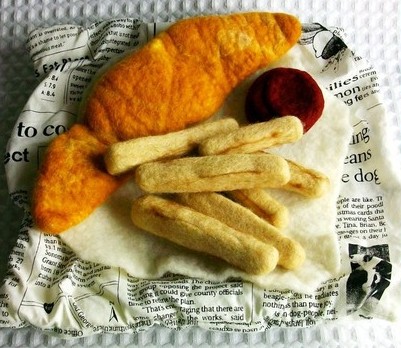
Mr. Noile has vetoed buying “Fish and Chips” (what’s his problem?!?), but somebody should, because it’s utterly amazing:

Yeah, with newsprint wrapper!

WoollyDuck Fish and Chips

Posted in Fun | 2 Comments

Vintage Max Studio Skirt Mod

This skirt belonged to my sister decades ago; it’s a vintage (just barely) piece from Max Studio, which is still around, and still doing interesting stuff with wrinkled fabric.  This particular skirt is made of acetate, pre-crumpled, and, until this week, had a heavy knit band with a drawstring attached to the top.  I’ve just laid the original waist band over the skirt to give the effect here; I’m kicking myself for not having taken a picture before I removed it:

The skirt goes to my ankles, and I’ve always loved it.  It feels like silk, and floats like a dream, all the while drifting around, and clinging to, my body as if I were a sylph.  But I’ve always hated that bulky waistband!  It  just seemed to me to weigh the skirt down, to no good effect.  (Yeah, yeah, I know — it’s “art”.)  Not to mention that all that rib knit was thick and lumpy under the tops I wore with it.  Or that I hate drawstrings.

So I removed the original waist band this week.

Which was no small feat.  The ribbing wasn’t just slapped on; it sandwiched the top edge of the skirt perfectly, and ripping those stitches — rows and rows of them — took forever, and great care.  When I was done, I replaced it with a deep  stretch lace waist:

The lace can be worn all the way up, kind of corset-style, or folded double, and I can wear the skirt pulled up, or push it lower, depending on the length or effect I want.  Much better now.  Here’s what the whole skirt looks like:

(That wacky stretch lace?  From Jomar; it’s five inches wide.  I paid $5.00 USD for an industrial-sized spool.  How could I not??  If I never do anything else with it, it’s already been a bargain.)

Note:  I realize that I’ve just left a comment on Peter’s blog about my general disdain for designer labels, the current poor quality of “designer” apparel and accessories, etc., and my unwillingness to buy into the whole concept.  In my defense, I’d like to point out that I didn’t buy this skirt!  I did look it up though — now that it’s “vintage” I wondered what Max Studio was up to.  I can’t vouch for the quality for their clothing these, days, though.  You’ll have to check that out yourself.
Posted in Skirts | 2 Comments

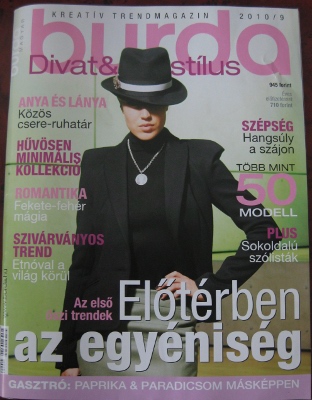
The Elusive BurdaStyle

May, 2010 edition (with the truly awful shirt on the cover) is at Barnes and Noble in Exton, PA.

Or, at least, two copies were, two days ago. A survey, over the past few months, of Barnes and Noble and Borders stores in several area states revealed that this B&N appears to be the only such store carrying BurdaStyle.  Get ’em while they’re hot.  Or available, whichever.

Posted in Misc | Leave a comment
The LBD (Times 365)

Uniforms.  It’s what we sewists hate, right?  But what if you only had one dress — say, one LBD, like this one:

Here's the front, with an inverted pleat.

And the back, with a full-button opening.

Sheena Matheiken began an experiment in fashion sustainability in May, 2009.  What if she were to wear only one dress for an entire year?  365 days?
How do you design a dress that can be worn all year around? We took inspiration from one of my staple dresses, improving upon the shape and fit to add on some seasonal versatility. The dress is designed so it can be worn both ways, front and back, and also as an open tunic. It’s made from a durable, breathable cotton, good for New York summers and good for layering in cooler seasons. With deep hidden pockets to appease my deep aversion for carrying purses.
Actually, there were seven dresses, all identical, because, I suppose, doing laundry every night isn’t anybody’s idea of sustainability.
The dress part of the project was intriguing enough, but Sheena and her crew went one step further.  They called the exercise The Uniform Project, and turned it into a fundraiser for a group that educated children in India.  Here’s how Sheena described the other part of her mission:

The Uniform Project is also a year-long fundraiser for the Akanksha Foundation, a grassroots movement that is revolutionizing education in India. At the end of the year, all contributions will go toward Akanksha’s School Project to fund uniforms and other educational expenses for children living in Indian slums.

Here she is on July 10, wearing her LBD as an over-dress.  The red trim is under the dress, and then picked up again by the belt:

Halfway through, celebrating the sixth month anniversary of the Project.  The front pleat gave her enough room to add a petticoat beneath.  Add a collar, a satin cummerbund and those great gloves — and wow:

On January 5, with a t-shirt under and a sweatshirt pastiche-of-a-corset providing a burst of color:

On March 24, with just a big belt, a cowl and exuberant tights:

On January 21st, an over-T and a wrap belt:

There’s more, much more at The Uniform Project.  Click through the calendar at the left to see each day’s image.  Sheena is adorable and gamine, but there’s plenty of inspiration for those of us who are neither.

Sheena’s styles get quite wild and crazy; I’ve deliberately chosen the most conservative in deference to those of us who like character, but who aren’t gamine types (or very young women) ourselves.  But every day of Sheena’s project is worth viewing — it’s a real treat.  And, though the Project is over,  it’s not too late to donate to Arkanksha, either, if you like.

For fashionistas, there are notes for each image describing the accessories, etc., all of which were thrifted or donated to the Project.  As of today (May 19, 2010) the Uniform Project has raised $94,742.00, enough, they say, to keep 263 kids in school through the Arkanksha Foundation.  The fashion may veer toward the wacky, but there’s no more down-to-earth goal than educating tomorrow’s adults.  Good work, on all fronts, Sheena and crew!

Posted in DIY, Fun | 4 Comments

PR Weekend Diary

Ever wonder what a PR Weekend is like?  Here’s a whirlwind recap of the last few days in Philadelphia:

First, the incomparable Kenneth King put on a wildly entertaining show, hauling out a number of amazing garments from his bright red suitcase and describing how he went about designing them.  He was wearing an ornately embellished blazer he got at a thrift shop or consignment store, to which he added incredible frogs to replace the buttons and buttonholes:

He was very, very funny, extremely personable, and completely accessible.  His presentation was an off-the-wall,  rip-roaring way to start a fun weekend.  There wasn’t much ice left unmelted by the time he was packing up.

He started off by telling anyone who hated fur to just shut up.  So we did.  Kenneth King is a force of nature; you don’t argue with that.  Ignoring the fur part (see?  I’m still not talking fur), the lining on this bolero was incredible.

He started with a photo of trees (with snow on the branches?), used the photo to turn the limbs to shadows, then pin-pricked the pattern, dusted through the holes to reproduce the pattern on the lining, and so on.  I hope I’m describing this particular garment — I may be conflating this with another.  There was lots and lots of awesome “so on”.  If Kenneth King is in town, get on the train!

The topic of the day was embellishment, and we’d all come with kits of goodies so that we could play and experiement.  Kenneth showed us a bunch of useful techniques, and brought along samples, too:

Interestingly, he did not bring any books for sale, owing, he said, to an agreement with his publisher.  He had quite a few tales to tell of working with his publisher, so any would-be authors also walked away with a bunch of information that was likely to come in handy.

I kept trying to get just the right shot of his gadget kit, but, hey, it’s a real tool box, and he was using it, so this was all I ended up with:

I’m pretty sure that’s an industrial-strength cosmetics kit.  Clever, and perfect for the job!

Then we were on our own for lunch in the area; my two companions were almost too-patient with my peculiar food needs, even though I tried to liberate them several times, but in the end we were rewarded when we found Asian Bistro, and bento lunches at a very reasonable price, including, in  my case, miso soup:

Yeah, I know.  No fur, but I eat fish.  Neurological issues; it doesn’t seem safe not to.  (I’d like to note that it’s not easy escaping meat in Philadelphia, whether or not you consider that Cheesesteak sandwiches contain actual “meat”.)

Afterwards we caught the Phlash loop to the Philadelphia Museum of Art for a behind the scenes look at the textile collection.

Oh.  My.  We gasped and ooohed our way through a half-dozen garments.  This bodice is from one of the gowns; the flowers are paper, and the fringe is thread.  Carolyn was standing next to me, plotting how she was going to duplicate this amazing finery at home, so I’m counting on her to come up with her version ASAP.

The curator was very accommodating, turning edges and folding each garment so that we could get a really good look at the details.

I’m a local, so I went home at this point (I was up at 5 AM catching the train after only four hours sleep), but dinner at a pizza place near the hotel was included in the weekend fee.  Not pizza, it turned out, but a full-fledged Italian dinner,  with cannoli for dessert (be still, my heart!).

The next morning it was into the big yellow school bus (really!) for a trip to Philadelphia’s Fabric Row.  Lee had her hands full with 39 of us on the bus; she resorted to counting us, largely, I think, because the din was overwhelming, and there was no other way to make sure all the chickens were in the coup.

The driver looked as if he were flying gang colors what with the headgear and the pants, but he couldn’t have been nicer, and, although he got lost twice in New Jersey, he got us back on track quickly.

Philadelphia’s Fabric Row is a little thin if you’re used to NYC, but somehow it looked as if most of us found at least something to buy.  Lines were long at PA Fabric Outlet, where prices were seriously low, especially for lace, trims, buttons, and one of my favorite vices, tapestry-like wide trims.  This was probably the busiest Saturday in memory for them, but everybody managed just fine.

Lunch was on our own on Saturday, too; I ate early (breakfast had been at 5 AM)  at Moaz Falafel, but I won’t do that again.  As I was  munching at the front counter, a guy in a filthy white van pulled up and honked.  A Moaz employee came out of the restaurant,  threw open the sliding door and dragged a huge plastic container — just like the ones I use for clothes storage — across the (dirty, dirty) empty van floor.  Then he replaced the lid, which had apparently popped off while the van was in transit.

The container, obviously not food-grade or anything close to it,  was full of the cilantro sauce I had just put on my falafel.  Swipes someone had obviously made with a cloth or sponge were clearly visible inside the top half of the container.   My falafel was a little gritty; now I didn’t want to think about why.   The employee shot me a very worried look (I was alone at the counter), as well he should have.  Gag.  No more Moaz for me.

Nonetheless, I lived to shop again.  Shudder.

We met back at the bus and headed for London Textiles across the bridge in New Jersey, which is where things got crazy.  London is a wholesale operation, so it’s like a large warehouse.  We were handed a price list, based on type of fabric, but what really got us mobilized were the last two lines:  wool or silk remnants $5/yard, all other remnants $3/yard, must take whole piece.  Remnants?  Must take whole piece?  Honey, take this box of Godiva, and you have to keep it ALL!

It looked as if the locusts had descended.  There were a half-dozen or so deep bins full of fabric, mostly from one to six yard pieces (that is to say, from $3 to $25 for the piece), everyone of them with a crowd of women ducking in and out, fishing for gold.  Some people were surprised to realize that the cost was per yard, not per piece, but this didn’t seem to discourage anyone, and I’d be surprised if anyone left without at least one remnant.  Volume in the bins was noticeably down by the time we left, but there were beautiful silks, linens and cottons from rolls flying out the door too.

No pictures.  That would have required focus that I just couldn’t muster.  Also, I was climbing into the remnant bins along with everyone else.  I was busy.

Thence to Jomar, kind of a Philadelphia sewing institution, and one upon which many of us are heavily dependent.

On the website, it’s the Swanson store, but it’s on Jackson Street, a few blocks behind IKEA, over by the water.  Jomar stores sell huge quantities of junk liquidated goods, but each store also has a huge (and widely varying) selection of cheap, cheap, cheap yard goods.  You name it, Jomar has it:  everything from the most coarse burlap to filmy designer silks to home dec.  Mimi, a PR volunteer, told me that Jomar started out selling returns from places like Garfinckel’s, the venerable Washington department store.  That merchandise would be several hundred grades above what’s currently sold on the first floors, but there are  amazing finds to be had upstairs at any Jomar if sewing is what you have in mind.

Jomar is notorious for very slow service at the cutting tables (if you go, consider a weekday during business hours for best service), but they had been warned by the PR team, and they really rose to the occasion.  The staff was whipping through the cuts as if they were slicing butter.  Because we’d run a little late at London Textiles, we’d all chipped in a dollar to hold the bus for an extra hour, but if people were held up, it was because they couldn’t stop shopping, not because Jomar wasn’t on the ball.

Several of us had trains to catch, and couldn’t stay later, so our PR coordinators arranged with Connie and  Andrea for transportation back to the hotel or to the train.  It was great that everyone was so accommodating, and I was really pleased that I hadn’t had to skip the afternoon in order to get home when I needed to.  Sheila, Elizabeth and I had just enough time for a quick bit at Cosi at the 30th Street station before our trains.  (There was one last joke on the quasi-vegetarian — the Cosi guys accidentally served me a roast beef sandwich instead of my roasted veggie.  Just after I had determined that the portobello I was looking at had a strange texture, they came chortling up to make the switch.  I hadn’t taken a bite, and the veggie sandwich — way under 400 calories, was satisfying and delicious. (Salad, by the way, involved 1.5 times the calories.  Gotta love labels.)

What was the best part of a completely great weekend?  Seeing so many women wearing clothes they’d made themselves.  An amazing number of attendees wore their own creations, many of which I recognized from blogs.  It was so cool to see them in person!  Auntie Allyn’s dress looked great in her PR review, but was even more smashing on her.  (Vogue 8659, here I come, and may  you look 1/6 as good on me as you do on Allyn!),  Connie’s Vogue 1090 suits her to a tee, and I loved seeing Lee’s just-finished turquoise tunic.

Paula McP’s “happy pants”/linen top were so much fun, and her Asian jacket was gorgeous.  (She doesn’t have a sewing blog, so I lobbied for one.  She’s hiding treasures from us!) There were  so many wonderful garments, all of them great reflections of the women who made them, and a treat for the eyes — not to mention inspiration for the fingers.

The garment that took my breath away in its perfect simplicity, in part because it suited the wearer so perfectly?  Claudine’s linen dress with chevrons:


This picture doesn’t do it justice; you have to see it on Claudine to realize how perfectly it suits her.  (In fact, Claudine’s blog pictures don’t do her justice:  She’s always so serious.  In person she has a lovely smile, and is the soul of grace.)

Claudine embroiders.  Really, really well.  What you can’t see clearly on this dress (although there’s a close up on her blog, and a larger image available) are the beautifully worked and placed chevrons at the bodice and along the sides.  Meticulous work, and so perfect for the dress as well as on Claudine.

PR coordinators and volunteers Karen, Andrea, Lee, Kisha, Mimi, Annette and Elaine did a great job coordinating this first Philadelphia weekend, and rolling with the few bumps.  I especially appreciated the booklet we all received with bios, the itinerary, maps, and a list of the stores we visited (includinf contact information).  My only suggestion?  Make sure that everyone’s blog is included in her (and potentially his) bio, as well as their PR names.  I want to keep tabs on what all these creative people are doing!  (Prior to the weekend, I made up this list, but I’m sure I missed someone .  .  . )

Plash photo credit:  visitphilly.com

I see my shorthand got away with me:  This is a recap of a weekend in Philadelphia organized through Pattern Review, popularly known as “PR”.

Posted in Fun | 15 Comments

Vogue 7997: The Real Thing

I recently made a “muslin” of this top, which you can read about here.  (When you click, the new post will look the same, but if you scroll down, you’ll see it’s not.)  This post is about the “real” top, which is based on Vogue 7997:

Vogue uses elastic to gather the sides of both the shirt body and the collar, but I eliminated that step.  I wanted to be able to bunch up or stretch the body length according to my mood, and using elastic in the cowl sides would have prevented me from using my modifications as I planned to.  Here’s my finished shirt, in a cotton/lycra blend, with my (modified) collar arranged a little differently from Vogue’s illustration:

Along with eliminating the elastic, I made a few other modificationa.  To recap a bit from my previous post, what I wanted was a top similar to this one (below), made by Coutourwear (more information about it on that earlier post):

I altered the Vogue collar, making it 16 inches longer than the one in the pattern, which lets me wear it in a bunch of different ways, including as a hoodie.  Here are a couple of neckline variations:

With the cowl crumpled, up almost like a wide, scrunchy turtleneck:

And the hoodie version (it’s a little surreal; my duct tape dummy doesn’t have a head, so I improvised):

My version can also be worn completely off the shoulder, just like the Vogue pattern, but apparently I failed to photograph it that way.  (There’s a good picture of how it looks on that earlier post, though, in sage green.  Link below and in the text above.)  I may add a photo of it arranged later, but wrestling this skinny, stretchy top onto my dummy is no small job.

The biggest change I made to the pattern, other than the collar?  I added straps:

I love the bare-shoulder look, but I’m not a slight adorable 22-year-old ingénue, and no way I am suffering through wearing a strapless bra under a soft, comfy shirt.  The visible bra straps had to go.

I also added thumb openings to the extra-long sleeves.  These little “catches” are featured on a lot of contemporary sports/hiking/travel wear.  The thumb openings keep the sleeves in place over my hands in cool weather:

I don’t know if the Contourwear top has these; there’s no detail about it at all on the site.    (I’ve got a microfleece zip hoodie from another company that has them.)  I thought they were silly when I bought the fleece — wouldn’t I just use gloves?  But, to my surprise, I often pull the sleeves down over my hands in weather that’s a little too warm for gloves, but too cold for bare hands. They’re perfect for a top that can go from bare-shouldered to fully covered in ten seconds.

The sleeves on my version can be scrunched up to 3/4ths length, or they can cover my hands.   (The Vogue sleeves are already extra-long on me; if you want the thumb-catch feature, you  may  need to lengthen the pattern piece.)

End of pattern review.  Less-relevant rant follows:

Countourwear in general is well worth a look.  If you have the budget, check out their AnyWear travel wardrobe; you’ll be amazed at how much you could get into a small suitcase.  This is not your grandma’s travel wardrobe!  Be prepared to suffer, though.  The website is pretty to look at, however it  has minimal information, and is a pain to navigate.  There are absolutely no detailed descriptions for any of their garments, for example.  (As if I’m going to buy ANYTHING for these prices, sight unseen, without knowing a lot more than how it looks in a single commercial photo!)

There’s nowhere you can view their whole product line — you have to pick by fiber category.   What’s up with that???  Just to make things worse, there’s no search function (!).   Good luck finding their hoodie — or anything else.  It took me forever because, for some strange reason, I couldn’t remember what it was made of.  (Why would I???)  I had to scroll through each garment, under each fiber menu, until I found it.  And no, I still don’t remember what it’s made of.

Previously:  Vogue 7997:  “Muslin” Version

Posted in Tops | 2 Comments

Skirt i: Japanese Pattern Book

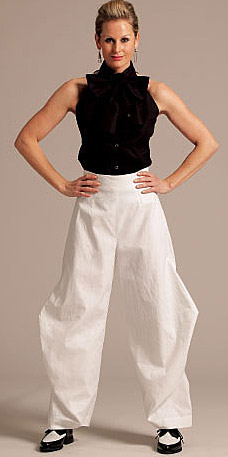
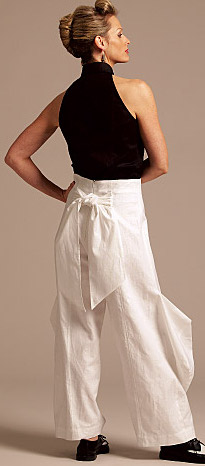
This skirt (actually, it’s called “skirt/pant”)  is the cover shot on the Japanese pattern book We Wear Clothes Onself:

Inside the cover is a pattern sheet a lot like the ones in BurdaStyle.  Every pattern piece you need to make all the garments in the book are on one small sheet of paper that’s printed on both sides.

All of the instructions are printed in Japanese, but the illustrations are superb, so figuring out the construction of this skirt wasn’t particularly difficult.  The patterns are all named with English letters — in this case, the letter “i” — so it’s possible to locate the pattern pieces by looking for those letters as a clue.  I did end up checking the kanji to make sure I had the right pieces, though.  You don’t need to read Japanese to do this; just compare the figures to see where they match.

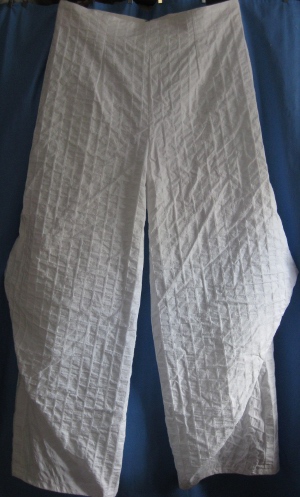
I marked each of the pieces I needed to trace in red pen before I started, which saved me a lot of grief.  No size was indicated (or at least, I had no way of figuring out what size the skirt was meant to be), so I checked the measurements, and then added a 5/8inch seam allowance all around.  That turned out to be perfect; however, the wench in the photo is clearly a lot smaller than I am, so I suspect that seam allowances were included for the intended size.  Here’s the front:

Wrestling the skirt onto Miss Bedelia was a bit of a challenge, and I see she looks a bit tipsy below.  A firm elastic waist and a dressmaker dummy are not necessarily the best combination.  (And, boy, did I crumple the fabric in the process.  Good thing I’m in love with wrinkled linen!)  The curve on the back is a different shape from the smaller arch on the front of the skirt:

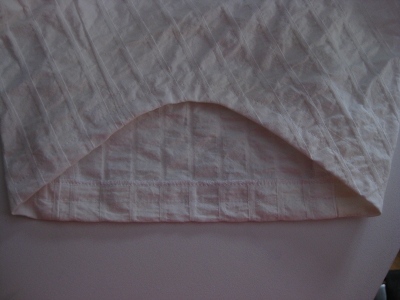
There’s a center panel on the front and the back, both neatly top-stitched.  The hem arches are faced, but the rest of the hem is essentially straight, and just turned up and top-stitched.  My kind of finish!

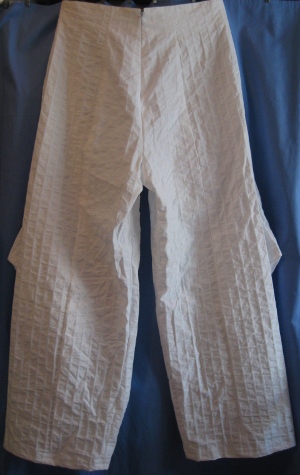
The quirky curves in front and in back (below) are functional — kind of.  The skirt can be buttoned back to front to make it into “pants”.   The look is something like a gang-banger gone wronger than usual, but you gotta love the option:

The buttons and buttonholes are artfully designed to allow this, but you’ll have to figure out the placement yourself by referring to the photographs in the book.  They’re not marked on the pattern.

You can also twist the skirt a quarter-turn to the side and button each curve to itself to make the skirt angle inward at the ankle, too, but that doesn’t work quite as well, since the side seams do hug the hip.  This inevitably means that they bulge a bit when you rotate the skirt.  Or you can just button the arches closed for yet another look:

The variations are all photographed in the book; some of them might work better in a lighter-weight fabric than the the Jo-Mar mystery yardage I used.   (I think it’s linen.)

The pattern is drafted very nicely; I was really impressed at how well it went together.  It’s a whole different aesthetic from anything European/American, though, and that’s obvious even in the shape of the basic skirt.   In the most fundamental way, the design is conceptually  completely “other” from my perspective.  So cool!

The waist is supposed to have a drawstring, but I hate them almost as much as I hate skinny elastic, so I constructed the waistband the way I was supposed to, and then threaded the wide elastic through instead of making a channel for the drawstring.  The top of the skirt is a bit bulky, owing to the substantial fabric, but it’s very comfortable to wear, either at the waist, or further down on my hips.  I love this skirt, and expect it to become a favorite.

Related:  We Wear Clothes Oneself:  Japanese Pattern Book

Posted in Skirts | 4 Comments

Vogue 7997: “Muslin” Version

It’s an off-the-shoulder tee (essentially), sleeveless, with 3/4ths sleeves, or with long sleeves:

This one turned out to be a genuine muslin.  I’m never going to finish it!  Even so, I’m very, very happy with it:

Yeah, my collar’s completely different.  That’s because the Vogue collar isn’t wide enough to gather at the sides as shown in the pattern.  Or at least it didn’t work at all in my rayon/spandex knit.  It just lay there, limpishly, looking kind of cheap.  If you really want the look of the collar on the pattern envelope, I’d recommend cutting it at least 50% deeper so that there’s something to gather, and some substance to the thing.

However, I said I’m happy!  Here’s why:  Ever since I first saw Countourwear‘s hoodie, I’ve wanted it.  Making this pattern was the first step toward recreating this:

The point of the exaggerated hood is versatility.  It can be a hood; it can be a cowl worn backwards or forwards; it can be an over-sized, off-the-shoulder “cuff”; it can rest around the neck like a loopy, over-sized turtleneck.  All things to all women!

But I wanted it to fit me just the way I preferred, and that meant making it myself.  (Not to mention that it’s no longer available at Countourwear.) Wrong!  A new version is available; it’s just impossible to find anything on their website.  Not to mention that you don’t get even the slightest hint of how versatile this top is from anything on the current website.  Here’s the hoodie available now (I can’t link directly to their current page, thanks to their really dumb web design):

The princess seams are a really, really nice touch that the original didn’t have.  Mine doesn’t have them either, but that’s OK; it’s exactly what I wanted.  I made my “muslin” version with three-quarters length sleeves:

When the Vogue collar on my muslin flopped, I drafted the collar I really wanted — it’s just an extended version of the old one. Really extended — it’s 16 inches longer.  I just grafted on the extension for this practice run; that’s the ugly serged seam you can see in each picture.  When I added the new cowl, I sewed it onto the shirt opposite to Vogue’s instructions.  Attaching the collar right side to right side means that the finished seams show when I’m wearing this as a hoodie.  Here’s the hood, in the draped configuration, in back:

The collar piecing is ugly — that’s why I’ll never finish it — but later in the week I’ll be making the real top.  Size-wise, I cut a 10 everywhere but the bust, where I enlarged it to a 12.  This quasi-FBA works well for me with the right knit.  I did use thin twill tape to stabilize the back of the neck from shoulder seam to shoulder seam to keep it from stretching; the fit there was nice, and I wanted to keep it that way.

Vogue calls for elastic in the side seams as well as the collar, to make the top look gathered, but I wanted to control the look each time I wear it, and liked the top extra long, so I skipped that step.

Related —  Vogue 7997: The Real Thing

Posted in Tops | Leave a comment