Burda Polo Triplet

I’ve been away, and working on several projects of various kinds that aren’t yet finished, but one thing I did manage to do before I left was to knock off a couple more of my favorite tops, from BurdaStyle’s 09/2010 issue, pattern number 121.  These make up incredibly fast, and wear sooooo comfortably!

I used the cotton/poly/spandex cord mentioned in this post, but carefully examined each bolt so that I didn’t end up with the fade stripe on the fabric I took home.  (It took trips to three different JoAnn stores to find bolts without the fade issue!).  These three are a dark purple, gray, and black — great basic colors.  This “winter” has been so warm that I probably won’t be wearing them again until next fall, but they’re ready to go when the weather turns cool again.

By the way, there are more Minoru Jackets up on my round-up post today.  Take a look, and see what people have done with Tasia’s fantastic pattern!  (Scroll to the bottom to see the newest additions.)

Posted in Tops | Leave a comment

Minoru Jacket Around The World

More Minoru Jackets! Scroll to the bottom to see (updated 17 March) (and again on March 20)

Two more (September 5); Scroll to the bottom to see.

Ever wanted to make outerwear, but didn’t know where to start?  Sewaholic’s Minoru  jacket is spectacular for inspiration.  Don’t believe me?  Look at all the different variations people have made over the last few months since the pattern was released.  It’s a wonderfully drafted pattern, and within the reach of advanced beginners.   I love, love, love this pattern!

Click on associated links to go to each sewist’s blog to get all the goods on the Minoru choices each made.

Here’s mine (USA), to start things off, of purple corduroy with a red floral lining and added external pockets.  I made many small changes and added a few features; you can read the details beginning here:

KristenMakes (UK) a perfect country coat, updating a traditional classic with corduroy elbow patches and collar facing, and adding a flannel lining:

Damselfly’s Delights (Canada) put a batik lining in her Minoru, and added  inseam pockets:

four square walls (USA) Andrea B’s version is tweed, with a bold lining, and cute pockets from remnants (this is where I got my own pocket inspiration):

Sophia Sews (USA), with re-drafted lower front, vertical pockets (take a look; they are incredibly RTW!), and zebra lining:

Savory Stitches (USA) used a bold cotton print with dark gray rayon lining:

Beau Baby (USA) made hers in bright orange denim, with a print contrast (she lined the hood, but otherwise made the pattern exactly as designed):

Sew I Think I Can Sew (Canada) made hers with a splashy floral cotton lining and side seam pockets:

Did you make that? (UK) Minoru, the luxury version, made with camel wool and a silk lining:

JuliaBobbin (Australia) proves that  luxe doesn’t have to be silk, with a gilt skull and crossbones lining, and a whimsical button on the pocket:

Nikol, of Hubbahubbadingdong (USA), made her Minoru of scarlet velvet (re-purposed curtains!  you go, girl!) with a golden silky lining:

Sewly a Harpist (USA) went for iridescent polka dots and a pink lining:

Stitch and Witter (UK) made hers of gray corduroy with royal and white polka dot lining:

My Own Inspiration (Australia) is charcoal marle gabardine with a nifty cotton lining, and welt pockets:

biblioblog’s (USA) is of uncut rust cord and leopard lining (go peek — it’s wonderful):

SewMentalMama (Ireland) made hers waterproof (click the link for great advice on waterproofing), of bright coated cotton, and put the hood on the outside, using hook and loop tape at the bottom of the collar, instead of pulling the hood through a zipper (she also shortened the jacket above the waist):

How good is that? (Australia) added additional zipper pockets to her Minorou; check her blog for tips (great idea for travel!):


MalleQ (Denmark) made  Minarou the Parka  with a faux fur-trimmed hood, faux fur lining, thinsulate for warmth, and hot pink zipper trim:

Rocket Sews (Australia) did a serious job of making proper outerwear of her Minoru, with waterproofing, reflective piping, welt  pockets with flap, hood toggles, and a zipper underlay (she also chose to leave the cuffs off):

The Traveling Seamstress (USA) denim made chic, with coordinating cozy plaid flannel lining:

Needles and Haystacks (Ireland) choose a gray and rust print corduroy with a polka dot lining, and made a cuff-less version without the hood:

Nette (Germany) made her Minoru of camel-colored linen, and added a cotton floral lining:

It’s a Sewing Life (USA) used raincoat fabric, added side pockets, and decided against the interior pockets:

Alison Rea Mason (Canada) went for bright red with a metallic zipper (and says she’s ordered fabric to make another Minoru):

Sew Fearless (USA) made hers in a rich, blackberry corduroy, with a matching zipper, and a marvelous striped lining (you can just see a hint here):

sew make believe (UK) used cotton drill with piping down the front, a striped lining, and in-seam pockets:

Sew Well (USA) made this smashing version, and has a pocket tutorial on her blog, as well:

bubala’s (Australia) Minoru is denim, with a flash polka dot lining, and glorious topstitching:

Wendy, of west 38th (USA) made a canvas hooded raincoat with a great cloud lining, and a zipped interior pocket:

PepperTreeRoad (Australia) made hers in crisp red and white, and added in-seam pockets:

Last (for now), but by  no means least, is Miss Jackson’s version (Japan) which also goes all the way to parka, made in grey, with faux fur trim, plaid lining, faux-flapped pockets, strapped cuffs, and a buttoned flap over the zipper:

More arriving!  I added this latest batch on 17 March.

Here’s Christina’s from this, that, the other thing (USA).  Hers is tan, with Kelly green zippers (for the side pockets, too!), a subdued plaid lining, and Kelly green rayon bemberg sleeve linings:

From Mama Pluis (The Netherlands), a raspberry version with a tiny floral print lining (made with a hood but without pockets):

VickikateMakes (UK) a version in waterproofed cotton canvas (using NikWax), and with the body lined in an argyle cotton flannel, and (whoo-hoo!) reflective zippers.  (She also did an FBA, and shortened the torso and sleeves)::

La Petite Chouette (Canada) made her Minoru jacket of red polyester, with a a polka dot lining (black mini dots on white)

New additions, March 20:

From Steph A, at escapades in sewing (Canada), a Minoru with super polka dots lining (or maybe they are bubbles?  glorious, in any case!).  The fiber is a micropolyester/cotton blend, and the lining is quilting cotton; sleeves and collar are lined in black Bemberg; lined hood and side seam pockets:

From Stitch me Softly (UK), red cotton twill with a brushed plaid lining, side seam pockets, and no hood:


LEC’s Miscellany (USA) made hers out of red wool crepe, with a joyous starburst (or are they chrysanthemums?)  lining of quilting cotton, and metal zippers:

scuffsan (Sweden) used nylon for the exterior, for water repellency, a floral cotton for the lining, and black polyester in the sleeves to make it easy to get the jacket on and off.  She added outside welt pockets, using a bit of lining for a cute touch beneath the flaps:

Tasia does not recommend plaids for this pattern, but take a look at what Pauline of Dessine-moi un bouton (France) did, using a subtle wool plaid (she calls this her “Sherlock Minoru”) and gold Bemberg lining:

Added March 29

Susan (USA), of Knitters Delight finished her Minoru.  It’s got a hood, and a gorgeous abstract lining (you might have to look for an earlier post to get a good look a the lining.) She made side seam pockets, and pleated the neck instead of gathers.  She’s also planning her next Minoru:

Adrienne (Canada), of All Style and All Substance, made hers of black oil cloth.  She calls it the “Catwoman” Minoru — whoo-hoo!  Check her blog for tips on working with the fabric; she skipped the cuffs as an accommodation to the material.  Adrienne made her Minoru in one weekend!

CherryPix (USA) made hers of black twill, lined with poly polka dots with a gingham lining for the hood and collar:

Lindsay Pindsay’s (USA) Minoru is gray twill with a bright yellow and black lining, slippery fabric in the sleeves, an unlined hood, and side seam pockets:

Annabellebumps (USA) chose pink cotton twill with a pink and green mini-print lining, and a two-way front xipper:

Sew Brusnwick (Australia) wanted a light summer jacket, and used a “pale pink/beige/mauve” cotton and metal (!) crinkle fabric with a Japanese cotton lining:

Suzy (UK) of Suzy Patterns used Leopard fleece, with a pale yellow poly lining. She kept her Minoru simple, skipping the hood and inside pockets when she made this cozy (and sexy!) version:

Two more, from Susanna (Sweden).  Here’s the first, in a vibrant red (Susanna’s lining, in keeping with Minoru tradition, is excellent — go to her blog to see it):

Susanna’s latest Minoru is this mixed print version. Love the way these prints pop!

This is my inspiration archive — I know I’ll be making another Minoru!  I hope all these marvelous jackets inspire others, too.

Got a Minoru you’d like added to the list?  Leave a comment, and I’ll put it in the post with a link to your blog.

These examples don’t include Tasia’s pattern testers:  Click over to Sewaholic and search on Minoru to see even more brilliant jackets.

Posted in Jackets | 32 Comments

Ten Minute Skirt (Almost)

Rhonda, of Rhonda’s Creative Life, posts a free pattern — instructions, really — nearly every Friday.  In the midst of making my Minoru, I wanted something I could knock off fast, and call “finished”.  This skirt was perfect:  It’s made of eight bandanas sewn together, and required no hemming at all.

(If buying really cheap bandanas, as I did, check the hems carefully.  Many will be sewn badly, but you’ll be able to find eight that are fine.  Trust me.)  Here’s a (lopsided) close up of the lower skirt:

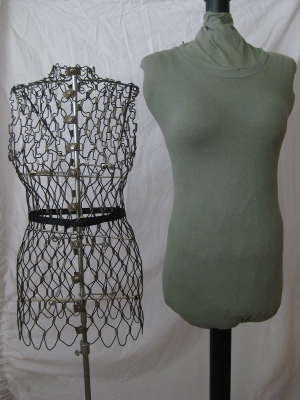
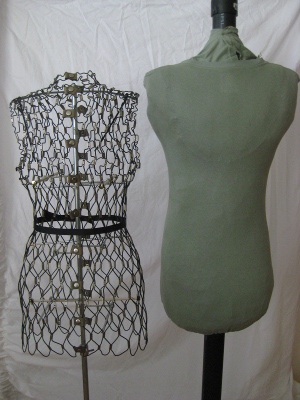
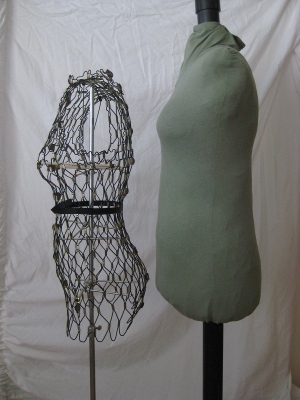
It’s pinned to my duct tape dummy; unfortunately, it and I are no longer the same size.  Or maybe that’s a good thing?  Anyway, there’s a new DDD in my future — just not now.

Stitch the bandanas according to Rhonda’s instructions, add a casing for elastic, and wear it.  What could be easier? And what could be better for those long hot days of summer than a weightless, airy skirt?

Rhonda’s skirt is stunning — she found, and used, much more wonderful bandanas than I turned up:

Kind of puts mine to shame, doesn’t it?  There’s the rub:  I had a terrible time trying to find bandanas that 1) didn’t scream “bandana” and 2) weren’t pink camo or covered in skulls.  Also, I was only willing to spend one dollar each for this trial run.

With Rhonda’s eye, though, and a little more dedication to finding the right thing, just imagine what you could do!

Shams, of Communing With Fabric, has a tablecloth skirt tutorial that is similarly wonderful, though different.  It’s on my list, too, but finding an appropriate tablecloth has proven difficult.  I want a plaid, and I’m picky about my plaids.

Posted in Skirts | 6 Comments

My Minoru Jacket

It’s finished!  I wore it out today, and I loooove this garment!  It’s everything I hoped it would be, and next year I plan to make an actual parka from the pattern.  Here’s the front view, with the hood inside the collar (my poor dummy is a bit tipsy, and I generally forget this when I take pictures — please forgive us both):

As designed, the Minoru has no pockets.  I added very large exterior pockets (and a floating pocket on the inside,  too).  There’s no way I was ever going to adapt to a jacket with no outside pockets.  Mine are too big, probably, and  I had to reduce the size of the hem because the pockets interfered with the top-stitching.   (My jacket is about an  inch longer than the pattern should have been.)  This length is prefect on me, though, and I’ll keep it for the next one.

The fabric is a dark purple corduroy from JoAnn’s (with no apparent flaws!), and the lining is a print poly from stash.  I’ve had it for a long time, and have no idea where it came from originally.  Why did I buy it?  No clue at all.  But, hey, my new jacket counts as stash-busting, so I’m not complaining.

Here’s the back view, with the hood rolled into the collar:

I worried about those shoulder gathers, suspecting that they might be bulky, or look frumpy, once the jacket was made up.  They don’t; not on mine,  nor on any of the others I’ve seen.  Tasia did something clever in the back, too:  The gathers don’t extend all the way across the center back.  As  a result, there’s no extra emphasis there.  Nice if you’re round-shouldered!

Here’s the front view, with the collar open:

The pattern calls for an unlined hood, and that might be fine, but, for me, part of the fun of this jacket was the wacky lining, and, anyway, the thought of a single layer of corduroy for a hood just didn’t hold any appeal at all.  The hood is over-sized — really over-sized  — so some people might want to alter that.  I love the Jedi look,  though, so I left it as-is.

All of my knock-around jackets have shock cords so that the waist can be cinched, but, no matter what, when I wear them, they still look like chunky rectangles.  I LOVE that the Minoru has a defined waist!  Although Sewaholic’s patterns are designed for the pear-shaped woman, there was so much ease in the bust of this size 10 that I was able to make it without an FBA.  The hip is really roomy, but since I wanted to add a pocket for my wallet in the “skirt”, that worked in my favor, too.

I added the red shock cord and toggles (details below).   I’m  not sure how you’d get the hood to stay up without them, but this was also a great chance to use some colorful hardware I had lying around.

Here’s a glimpse of the inside of the jacket:

The corduroy pocket above is part of the pattern; I added a floating pocket, large enough for my wallet, to the other side of the jacket, below a small pocket identical to this one (details  below).  I was hoping this would be a “no bag, just throw it on” kind of coat, and that has worked out perfectly, thanks to my additional pockets.

The most critical things you need to know about this pattern:

~ This jacket uses a ton of thread.  I bought two 500m spools of Gutermann Sew-All, and there’s not much thread left.   I don’t even remember how many bobbins I wound.

~ The pattern illustration shows the jacket zipper level with the bottom edge of the jacket.  You’ll need a longer zipper if you want that look; the instructions are for a zipper that stops well short of the hem.

~ I love me some long sleeves, but the Minoru’s are gorilla long.  Normally, I add sleeve length; not in this case.  I shortened these sleeves.  Check before you cut.

~ If you follow the pattern directions for the collar, the interfacing on the lining side (or on the wrong side of your fabric, if you don’t interface) will show when you wear the hood out.  If you don’t want that look,  you’ll need to line both sides of the collar.  Allow enough lining; the collar’s big.

~ The hood itself is humongous.  If you intend to line it, plan for that when you buy your lining material.

~ As designed, the pattern has no pockets.  If you want  them, plan for them when you buy your fabric, unless you choose to add in-seam, hidden pockets.

I made a lot of modifications to my jacket, but not to the pattern itself  (other than adding the exterior pockets).  Below are some of the details, followed by a list of all the changes I made.

Instead of making a self-fabric loop, I used a piece of flat cord.  I use loops to hang my jackets all the time, so I wanted something super-sturdy, and also something thin enough to slip onto small hooks:

This type of braid is hard to find.  Sometimes it’s available at office supply stores, attached to identification sleeves meant for use by people attending business meetings, and sometimes it’s attached to really, really bad hooks or “charms” meant for use as key chains (think any junk store like Walmart, Kmart, dollar stores).  I stock up when I see them, as I frequently have use for the braid.

The seam line in the center back, above, isn’t  in the pattern.  It’s  the pleat I added to the lining for wearing ease.

For the hood, I added elastic shock cord (red!) threaded through a tiny, interfaced, button hole.  The bead at the end keeps the compression toggle from sliding off..

Where did I find the toggle?  I always check the clearance bins in electronics departments — they are a treasure trove of dumped cords, hardware, etc., for iPods and the like. This particular toggle is from a set of six different colors which came with matching cords.  The set was a dollar, which made this perfect little piece a real bargain, even if I never use the several fluorescent colors that came with it!

Apart from all the extras I can’t help but add, there was one serious blip in the design of the pattern.  If you follow the pattern instructions, but choose to interface the collar facing, this is what you’ll see when the hood is pulled out, and not on your head:

Uuuuugly, non?  That’s interfacing looking at you.  Too bad I didn’t think this out before I sewed the lining to the jacket. When I realized what was going on,  I hadn’t done the final turn, so I cut another collar piece of my (fortunately very thin) lining, and hand-tacked it in place.  The final topstitching will hold it where it belongs, but this is sooooo the wrong way to do this.  Add the lining to the inner collar when you add the interfacing.  It’s much better that way.

Here’s the zippered, internal, floating pocket I added to hold my wallet.  It’s supported by an interfaced corduroy band (sorry about the pins — at this point I hadn’t attached the small pockets that are part of the pattern:)

This pocket really is symmetrical.  I don’t know what’s up with the rumple!   The pocket just floats inside the coat, easily accessible, but totally secure.

Here’s the list of changes I made to the Minoru pattern:

~ Shortened the loooong sleeves (if you do this, remember to alter the lining, too)

~ Added a shock-cord drawstring, and toggles, to the hood

~ Customized the interior pockets to conform to the way I use them (sewed the included interior pockets a bit larger  than the pattern piece, and made a floating, zipped pocket in the lining).  I can’t remember if the pattern calls for two small interior pockets, or one.  I made one one each side.

~ Replaced the self-fabric neck loop (cute!) with a more practical one made of nylon braid (I use these loops a lot)

~ Added a center back pleat to the lining for wearing ease (I goofed this up, and made it too narrow)

~ Added biiiig exterior pockets

~ Added a loop inside each exterior  pocket to secure keys, subway passes, etc.

~ Used a two-way separating zipper.  When I sit down, to drive, for example, the last thing I want is my coat bunching up around my hips.

~ Altered the too-long zipper I had to buy to get the length I wanted

~ Took the zipper to the lower edge of the jacket, since it can be opened from either end

~ Raised the waist elastic by about 2.25 cm

~ Took a smaller hem because my big pockets turned out to be tooo big!

The sew-along, my first, was kind of a bust.  It started in mid-January, and was supposed to conclude about a month later — a nice leisurely pace.  It still wasn’t finished when I posted this, on March 5, and Sewaholic’s Tasia has indicated it will finish around mid-March.   I probably won’t do a sew-along again — for me, the point was to maintain some sort of momentum, and this one didn’t meet that goal very well.  Although I started late, waiting for the next installment got very frustrating.  Tasia’s directions are excellent, though, and her tutorial (start here with step #1) should be a perfect supplement to the generally more spare pattern directions.  I’ll add a link to it once the sew-along is over.

Pocket details here:  Exterior Pockets for the Minoru

Various pocket options here: Minoru Pockets

Shortening the zipper here:  Minoru Zip

Related:  Minoru Sew-Along

Buy the Minoru Pattern here (I don’t get a cut!  It’s a great pattern, though, and you should own it!)

Posted in Coats/Capes/Wraps, Jackets | 13 Comments

Minoru Zip

I couldn’t find a 28-inch (or 30-inch, for that matter) jacket zipper  in dark red for my Minoru jacket, so I bought a much-too-long one in New York, and shortened it myself.  Generally speaking, nylon/plastic zippers are pretty easy to shorten; just chop them off, and tuck the cut edge into the seam, or whatever finish you’re using.  That leaves a bulge at the top, but it works .  .  . sort of.

My jacket zipper needed a stop at the top, but I didn’t want that bump, so  I experimented using a left-over piece from the zipper I cut to fit for for the Minoru hood.

First, I cut the teeth off the top of the zipper to the length I wanted:

(This is the sample zip; on the one I actually used you’d see the plastic bar at the top that serves as the zipper stop if it were unaltered.)

A daub of Fray Check, or the equivalent, is probably a good idea right where the cut ends.  I didn’t do that on this experimental piece.

That gave me the right size, but no way to keep the pull from sliding off when the jacket was zipped up.  After experimenting a bit, I discovered that this worked as a zipper stop:

That’s a tiny seed bead, in a matching color,  hand-sewn to the wrong side of the zipper, between the teeth.  It doesn’t show on the front, but it prevents the zipper pull from flying off at the top of the jacket..

The excess tape, above the zipper teeth, just goes into the seam allowance, the way an unaltered zipper would.  The cut area has been thoroughly Fray Checked, for extra security, though virtually all of the cut bits will be in the seam.

Neat and tidy, no?

Posted in Jackets | 4 Comments

In My Drawers

Sadly, this isn’t a post about knickers.  It’s about kitchen drawers.  Our kitchen cabinets are classic metal cabinets, installed in 1952.  Though they show a few of the ravages of time, we love them.  Call me crazy, but I much prefer them to modern wooden cabinets.

However, there are occasional issues.  For instance, the drawer fronts are held on by tabs that have been bent onto the sides, and melded in place.

Over time, the upper tabs on our most-used drawer separated, leaving a gap at the top of the front panel.  You can see it in the faint red circle above. (That printed stuff?  Ancient contact paper.  It will never come off, but fortunately it’s plastic, and scrubs clean.)

Using my trusty Dremel, I was able to drill a hole in each side of the drawer, and another one on the back side of the front.  A girl’s best friend is her Dremel!

The dark spot in the red circle is a hole on the  interior side of the drawer front; it’s the same shape as the tab that is supposed to be holding the drawer together.   It’s also the trick that allowed me to do a proper fix on the drawer.

Using long tweezers, I was able to insert a nut behind each of the holes I’d drilled on the drawer fronts.  I then placed an angle bracket in each corner, holding a hidden nut behind the bolt as I screwed it in place.

That’s all there was to it.

Posted in Home, Misc | 8 Comments

Material Politics

Bunny has sung the praises of Walmart’s faux leather, and has made some amazingly creative bags using it.    Though I’m not convinced that its competitors are a lot better, I admit that I’m no fan of Walmart, and I try to avoid shopping there.  That’s not difficult to do, but several times a year, for one reason or another, I do find myself wandering the aisles in search of something I can’t find elsewhere.  Last time that happened, I found this:

It’s a woven, herringbone tweed corduroy.  Be still my heart!  From a distance, it looks like a deep, charcoal gray. This is my dream fabric (sad, I know — I must have been imprinted to corduroy when I was too young to resist).

I couldn’t believe it when I spotted this out of the corner of an eye while power-walking through the store.  It’s all cotton, from Pakistan, and was $4.47 a yard.  Next fall, it’s going to be, I hope, a favorite pair of pants, and maybe trim on a pair of Au Bonheur jeans.

Several years ago, Walmart pulled fabric from most of their stores.  So many people complained that they’ve now begin carrying material again, along with a selection of notions, and an expanded craft inventory.  Walmart’s prices are one-third to one-half those of JoAnn; the flannels are thicker and better quality, and Bunny’s synthetic leathers are much nicer than any I’ve seen at JoAnn.  However, the notions and fabric selections are extremely limited at Walmart; it would be awful if it were the only local source for these goods.

Walmart’s cotton wovens are, generally speaking, nothing to write home about, and our local store, at least, has very little of interest in the way of knits.  Stock is very  much a hit-or-miss proposition; it’s like a consignment shop, in the sense that  it’s best to buy what you see immediately, since it may never return.  I’m sure that some inventory is made to order for Walmart, but suspect other items are mill ends; oddly, it seems that Walmart does a far better job of quality control than JoAnn, even for what look like remainders — go figure.

The last few pieces I’ve bought at JoAnn were also produced in Pakistan; it’s likely that the same factories turn out goods for both companies.  That’s how it works in China, and it’s probably reasonable to assume that Pakistan follows the same model.  I’m not thrilled abut buying from either country (anymore than I am about shopping at Walmart), but avoiding doing so has become nearly impossible.  It’s also getting more and more difficult to find anything interesting stocked locally (except at the crazy, unpredictable, and eclectic JoMar), so I end up feeling grateful for the occasional treasure, like this cord.  The old days, they’re not coming back; it’s a case, maybe, of adapt or die.

Posted in Misc | 6 Comments

Trike and Trekking

Cidell and Trena will not be impressed, but I have a new vehicle (new, that is, as of last fall):

It’s my favorite form of transportation around town (though I’ve also taken it on vacation).  It’s much lighter (only 62 pounds) and smaller than any similar vehicle I’ve seen, and riding it feels amazingly like flying on a two-wheeler.  I love that cargo basket; surprisingly,  it’s saved me a bundle in gas.  Who knew?  (The basket, by the way, folds down if you’re not carrying cargo.  I almost always am, so mine stays up, but the versatility is  a nice feature.)

The rear basket holds groceries and anything else I need to haul — I’ve made a few trips to and from the hardware store — but I wanted a way to keep my bike lock in the basket without needing to attach  it to the frame while riding.  I also wanted to be able to carry miscellaneous things without worrying that they might fall out, or through, the basket.

Naturally, then, I made a liner.  It’s orange ripstop — not my preferred choice of color, but not many people cycle on the streets where I live; visibility trumped any aesthetic considerations.  I plan to do a more refined version once I know how I’m using it, so I just winged this one.

Here’s the layout of the main pattern pieces, along with a fetching picture of my helpful assistant.  The assistant in question is big — the main fabric piece runs about 40 inches from side to side.  The sides of the basket are angled, so I measured top and bottom, and then drew the center strip right on the material — down one side, across the bottom, up the other side — and cut it all in one.  Then I cut the two side panels, and connected them to the center strip.

My assistant was a bit put-out when I began sewing, and, I’m afraid, found himself literally “put out” when he insisted on helping more actively.  Let’s just say that he ‘s not a bobbin’s best friend.

The liner top was cut to fit across the top of the basket, and attached to the body of the liner with zippers.  Because this was a quick and dirty project, I took rough measurements and cut flanges to go around the top flap, and then connected zippers to them.  The zips are two lightweight robe zippers, and I arranged them so that they open behind the seat, rather than in the back.  It’s a nuisance deterrent, like the flaps, so that it’s not immediately obvious how the liner opens, and so that it can’t be easily accessed from the back of the trike.

This is one  feeble sewing job, I’m afraid.  Sadly, that flange is not attached carefully at all, thanks to my having whipped this up just before taking off on a bunch of errands that required the liner, stat.  The corners are a mess, with some gathers and puckers instead of neat joints.  (I guess that makes this a usable muslin, right?)  The liner is held in place with hook and  loop fasteners, but I plan to replace them with snaps and snap tabs if I don’t remake the whole thing.  The liner costs a bit, aerodynamically speaking, and I’d like to be able to drop it to the bottom of the basket when not carrying cargo, to eliminate wind resistance when the basket isn’t full.

This is a hybrid vehicle, meaning that it has an electric assist, which I thought I’d need regularly, partly because I remember the clunky and incredibly heavy adult trikes of old, which weighed over 100 pounds — which is to say, most of my own body weight.  However,  I rarely use it unless I’m climbing a hill so steep that my current level of physical conditioning can’t handle it.

Because of an intermittent balance problem, I thought I’d never pedal again — and I’m thrilled to have been very, very wrong about that.  Though most of my ramblings around town are considerably shorter, I’ve taken several trips from 12 to 15 miles long, and loved every minute.   That’s not at all impressive if you’re a serious cyclist, but it’s not bad for a former couch potato.  And did I mention that I can break the speed limit in parts of town?  Without electric assist?  (Just call me Hot Dog.)  (OK, I might need a hill in spots, but this is a light trike, and it flies!)

I’ve been told that this nifty little vehicle is used in refineries, where nimbleness and and the electric motor are necessary advantages.  It’s turned out to be the perfect vehicle for me, too.  I love not having to drive into town, and knowing that I’m getting exercise even when I’m picking up human fuel at the grocery store.

By the way, guess which demographic LOVES my red trike?  12-22 year old males — go figure!

Posted in Adventure/Travel, Misc | 16 Comments

Exterior Pockets for the Minoru

I’ve been dithering, seemingly forever, over what to do about exterior pockets on my Minoru jacket.  I even wrote a blog post rounding up choices other sewists had made, in an effort to sort out what might work best for me.  They were all good options, but I quickly decided that patch pockets were the answer.  It took a lot longer to figure out what kind of patch pocket I wanted.

Andrea B’s pockets were the ones  I kept remembering.  I really like the way she incorporated the pockets into the side seams, and decided I wanted to do the same thing.  I copied that feature, squared the corners, curved the top edges, and added cross-grain trim:

It’s difficult to see here, but the left side is curved to match the Minoru’s side seam.  The right side will be parallel to the front placket on the jacket, about an inch and a half from the placket seam.

I always line my patch pockets, and interface them, too.  Both steps increase their durability, and help with shape retention if you use pockets as avidly as I do.  Instead of cutting the lining in one piece, I used the trim pattern to make a self-facing of corduroy — my main jacket fabric — which is not only nice to touch, but also adds to the stability of the pocket.

Here’s a closer view of the crosswise trim.  Dark purple is nearly as hard on detail as is black, but you can probably get the gist:

(The raw edge — the one that goes into the jacket side seams —  is on the right,  here.)

Stitched together, these pockets are about 12 inches by 10.5 inches.  They’re big, but that’s no accident!  The Minoru pattern allows for far more ease than I needed in the hip area, so I don’t anticipate the size will be a problem for me, but hip ease is something I would have had to think about if the tolerances had been smaller.

There’s a loop inside each of the pockets.  If my pockets don’t have a closure, I like to be able to clip things inside them, so that I don’t find that I’ve lost something when tossing the coat around.  When I’m in New York, my MTA pass case will be clipped onto this loop, and the other one will be useful for keys or my pocket camera or whatever else.

Here’s the pocket set in place on the front of the jacket:

I still haven’t added the front plackets or, of course, or the zipper, and I won’t be able to tell how these work on the jacket as a whole until I can baste the side seams together, but, at the moment, I’m pretty pleased with the way they’ve turned out.

This is what the pattern pieces look like.  (I did this on the fly; can you tell?)  There’s a 5/8ths of an inch seam along the joint between the pocket and the trim, and another 5/8ths inch seam along the side that lines up with the sides of the jacket.  Everywhere else, I used a 1/4 inch seam; I prefer this when making patch pockets, as it means I can turn them without having to trim anywhere except at the corners.

There’s one last structural dilemma to resolve before I can do the final assembly of the coat shell:  how to handle the drawstring I want to add to the hood.  I’ll probably never use it, but I’ve got both red elastic cord and purple toggles, so how can I resist?  But that’s for another post.

Posted in Jackets | 4 Comments

Vogue 8771 – The Sweats Version

I’m supposed to be sewing my Minoru jacket, but other things have taken precedence, and I still haven’t gotten to it.  Fortunately, the sew-along is moving at a relaxed pace, so I’m not out of time quite yet.

In between some critical house projects, I did manage to sew up this weird and wonky tunic.  I’m desperately searching for some alternative to rectangular sweatshirt tunics to wear around the house.  I live with five toddlers cats, so I need some serious, indestructible shirts to loll about in.  This looked as if it might fit the bill, and I knew it would make up in less than an hour.  My assessment was right on target.

I don’t think this is a flattering style on anyone, although doing the front panel in a contrasting color might help.  (So would having the proportions of the women in Vogue’s illustrations, which I’ve never seen on a living person  It’s always a bad sign when the pattern company only shows a pattern in sketches, with no photos.)

Back view:

The full sleeves exaggerate the width of the top, and make it look clumsy and super-wide.  For wearing comfort, this is excellent.  For style, not so much.

The sleeves gather into the gauntlet-like cuffs, which run from the elbow to the wrist. (The sleeve is unhemmed here; I was still making up my  mind about the length.)

I actually think this is very practical for a wear-around-the-house, utility garment.  The top is nice and warm, but the fit is so close along the lower arm that the sleeves stay well out of the way when performing domestic tasks (or sewing, for that matter).

The “tail” on the tunic is very long, but the front isn’t quite long enough — when it rides up, as it inevitably does when worn, it neatly arcs over the lower crotch area on my leggings.  This is fine at home, but perhaps not the effect anyone would prefer when running around in public.  The rear hem length does a nice job of making leggings respectable, though.

This pattern is meant to be sewn in something drapey and fluid.  I didn’t do that.  Instead, I used some black sweatshirting I’d picked up at that “craft”  store that sells fabric, because sweats were what I needed.

Although it’s priced at $13 per yard, this stuff is the nastiest sweatshirt fabric I’ve ever seen.  My local JoAnn stores have replaced their sturdy but wearable 60/40 cotton/poly sweatshirting with this dreck, and it’s awful.   I did realize, to my horror, that it was almost all polyester  before I bought it, but, hey, it was for knocking around the house, so I figured I could live with that.  What I hadn’t counted on were the sparkles (yes — sparkles!) in the material, which I assume are all the hard plastic bits that give it a truly awful hand once it’s washed.

Do.Not.Buy.This.  Even at steep discount!  It’s worth — and I use the term loosely — four dollars a yard at best, but only if you’re upholstering plywood with it, or doing something similar.

See the horrible little plastic flecks?  Yuck.  The alarming plasticity of this stuff made it poof peculiarly where the sleeve curve met the bodice.  That’s my fault, not Vogue’s, due to my choice of fabric.  I edge-stitched all around the sleeve seam, which reduced the plastic pouf a bit.

Because there was absolutely no stretch to my material, I cut the size Vogue recommended (it’s usually waaay too big for me), and used a smaller-than-usual seam allowance.  I also raised the neckline; I think Vogue’s doesn’t work very well, and makes the shirt look more droopy than drapey.

Would my result be more flattering if done in a lighter weight knit?  Possibly.  Maybe I’ll give it a try.  I do like the cut of the center panel, but the unflattering sleeves, not so much.  Overall grade:  Meh.

(Ignore the baby gate in the background.  Did I mention that we had a houseful of toddlers cats?)

Posted in Tops | 10 Comments