Of Course, There’s a Cat

I write several blogs, and have so far managed to avoid mentioning cats (except once, tangentially, when it was appropriate — and it wasn’t my cat). Leaving Emma out of my sewing blog, though, just seems wrong. Here she is, in her favorite place, just to the left of my sewing table.

Emma is a Cat Angel Network rescue baby with a traumatic history. It took a year to get Emma to this point of bliss, purring in her own window on her own shelf, with her own human and the hum of a sewing machine to keep her company.

Posted in Home | Leave a comment

Vogue 8323 – Cowl Neck Tee

I cut this shirt out last year during the week I made my Soho coat when my spouse and I were vacationing with my in-laws.

Only the front and back seams were done by the time we got home, and somehow it got set aside until now, when finishing it became important. I’d cut out View B (on the right, above), but I’ll be making View C (on the left) the MIni-Wardrobe Contest, so getting this muslin finished mattered tonight. What was I thinking when I chose this fabric for this shirt? That’s right, folks: Itsy, bitsy stripes and princess seams. Curvy princess seams. In days gone by, I used to pride myself on my ability to match complicated plaids (and I really was very good at it). But that was a long time ago, and, if memory serves, half the battle was choosing the right pattern in the first place. This was not the right pattern. Just to prove that I actually can match stripes, though, I offer this:

You can hardly see the seam. Needless to say, I didn’t do as well on the bust curves, nor at matching the sleeves. In fact, I pretty much tossed in the towel after multiple tries. This was a muslin, after all. All of that said, I really do like the shirt. I’ll wear it under a fleece, and no one will realize that my stripes are an eighth of an inch off in strategic places. (And worse on the sleeves; they’re not quite as bad as they look in the photo, but they’re not good.) The pattern itself couldn’t be simpler, or more flattering — the shape really is wonderful, and, as is (size 12) fits my bust perfectly.

If you have the good sense not to use stripes, it should make up extremely quickly. The cowl is very, very long. In fact, it works well as a hood, and I’ll wear it that way with a fleece vest once the weather gets cooler. This pattern is definitely a keeper, and I’m eager to see how it works in my turquoise cotton knit.

Update:  “Epileptic” said my poor spouse, shielding his eyes from the horror of these stripes as I modeled this shirt for him.  I see his point, sort of, but what’s a little eye strain compared to the relentless boredom of one solid color after another?

Posted in Tops | 2 Comments

PR Mini-Wardrobe Contest 2008

Here’s my storyboard for the PR Mini-Wardrobe Contest:

I went for the two tops, two bottoms option. The first top is Stretch and Sew’s City Tee, the long-sleeved version. This should be interesting — it has a built-in shelf bra, and I’ll be using power mesh for the first time. This pattern’s been hanging around for a year or two, and I’m glad to finally have an excuse to use it.

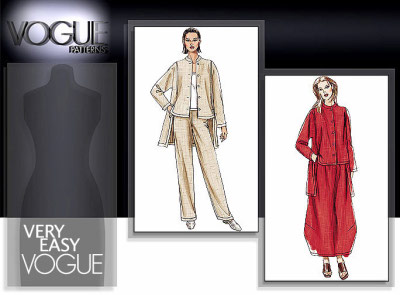
My Vogue 8499 muslin turned out so well that I’m really eager to make another pair. They’ll be very different in stretch cotton sateen. I’m not quite sure what to expect, but I’m sure I’ll like the results. The “stretch” will be largely irrelevant, since the pants are so full. This particular fabric has very little stretch and a nice resiliency, so it should work well and be very nice to wear.

The Vogue skirt is less of an experiment: the black linen-like fabric will give it a different look from my first version, but it should feel much the same to wear.

I’m a little dubious about Vogue 8323 — not the pattern itself, but the fabric I’ve chosen. We’ll see how it works up in one of those non-lycra cotton knits. (Got to use up that stash!). I cut out the cowl version of this shirt last summer, and didn’t quite finish making it. Today or tomorrow I’ll finish it as a warm-up to doing this new view.

There’s nothing really exciting here, but four good pieces to give my wardrobe a boost. The fabric and notions are sitting on my cutting table, ready for May 1, when we start our engines!

Note: There’s a typo on my storyboard — that pants pattern is 8499, not 8397. Correction as soon as I can manage it. This poor storyboard went through a few revisions, and I missed the old pattern number when finalizing it. 4/30/08:  Corrected storyboard added.
Posted in Fun | 1 Comment

Vogue 8499 – Marcy Tilton Pants

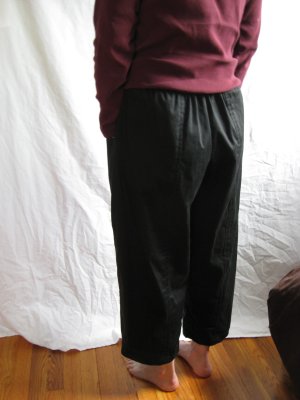
This pattern is turning out to be one of my all-time favorites. This time I made the pants.

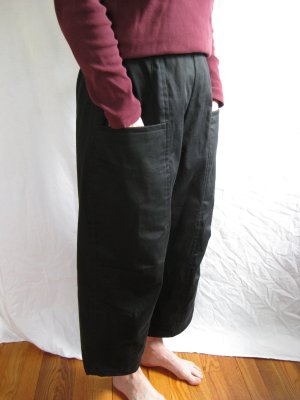
I love, love, love them! Yesterday was cold and rainy, and after running a few errands I retired to the sewing room and whipped them up. Mine are made of the same quirky linen blend I used for the skirt, and it turned out to be a great choice. It’s heavy enough so that the pants hold their shape, but it also flows very pleasingly.

(Apologies for the horrible wrinkles on the great pants. I made them, I wore them, I abused them. If you look at this fabric, it creases. I should have ironed them again before the photos, but I did not hesitate when the photographer was free. So the good news is that the pictures are on a real body. The bad news is that the fabric’s a disaster.) Side view:

The pattern directions were very clear, and construction is very simple. There’s a lot of topstitching, which takes some time, but nothing complex to deal with. However, be forewarned that the sizing is more than a little strange. Theoretically, I should have cut a size 14 (I wear an 8 or 10 in RTW, unless it’s really expensive RTW, in which case it’s a 4 or 6). BilllieJean’s review on Pattern Review confirmed my suspicion that these would run large: I cut a size 8, hedging my bet by cutting the crotch seam as a 10, and it was perfect. They’re still plenty big and flow-y, but that’s clearly the point.

The pants are also peculiarly long. I’m only 5’2″, so it could be argued that anything seems long to me, but I made View B (the cropped pants) and the length is right where I think it should be for View C (the long version). I may add one inch next time, but these are pretty good just as they are. I deliberately chose not to alter the pant leg length. There are wonderful darts that shape each leg, probably bracketing the knees on people of average height. Without a proper alteration, the top dart hits just at the top of my knee, instead of both bracketing it symetrically, with one dart well above, and one well below. I chose to view the darts as a structural detail rather than an accommodation to a joint; I think they look fine on me right where they fell.

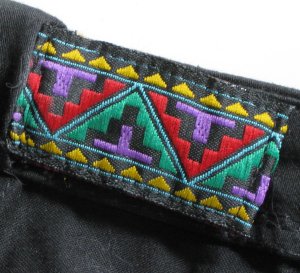
I made one change: The waistband is flat in front (nice!), with a casing for elastic in back. I sewed two flat buttons to the inside of the front waistband, and made reinforced buttonholes in the elastic that I ran through the casing. This not only allows for some future adjustability, but also will let me replace worn elastic easily later. This is a simple trick I especially like for anything I wear when traveling.

This version was meant to be a muslin, but it’s turned out to be very wearable. Eventually, I think I’ll have to make them out out of my namesake fabric; they’d be spectacular in silk noil.

Posted in Pants | 4 Comments

A Chair For My Sewing Room

Finding a chair for my new sewing room hasn’t been easy. I didn’t want to spend a fortune until I was sure of exactly what I wanted, and none of the inexpensive chairs I’ve seen came with hardwood-floor-friendly casters. (One office supply place did offer to order them for me at $45 for a set of four, but with no guarantee that they’d fit the chair I bought. I declined.)

This week, IKEA came to the rescue. I found this chair, called “Snille”, and discovered that it fits my body perfectly. It has a primitive height adjustment system — turn the seat until it’s where you want it. I won’t miss a fancy hydraulic lift, though, since I don’t expect to be raising and lowering the seat regularly. For a total price of $19, I can live with it.

Snille wouldn’t have solved my problem if IKEA hadn’t just begun selling special casters for hard floors. Oddly named “Paragraf”, they’re about $11 for five. (They’re mentioned on the IKEA site, but only as options for other chairs.) When I snapped them into the chair frame, I was a initially dismayed, since it was a little difficult to push the chair. Once I sat in it, though, it sailed across the floor; apparently the casters need some weight pressing on them in order move smoothly.

It was a real surprise to find a chair this cheap that works so well, but I’m very happy with it. It’s easy to zip between my machines, and even over to the cutting table. Good thing I don’t have a long hallway; I’d be racing up and down it just for fun!

Posted in Home | Leave a comment

Vogue 8497, Take Three

Yes, I did it again. It was my spouse’s fault. He took one look at my mini-wardrobe storyboard and said “You’re nuts. Marcy’s right. If you make that shirt again in that cotton, you won’t like it.” (OK, he was a little more diplomatic, but that’s what he meant.)

To refresh our memories, here’s Marcy Tilton’s Vogue 8497, looking smashing:

Marcy asserted the critical role of lycra in her comments on PatternReview.com. So I looked for lycra-enhanced knits in our fair village. And elsewhere.

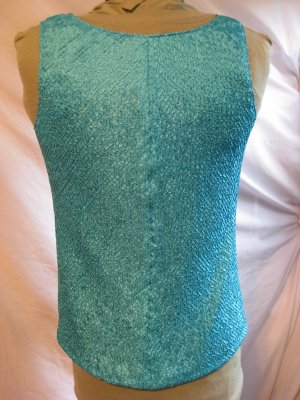
This charming stuff was all I could find. It was cheap; I bought it in two colors. I made the shirt. It fits better (It actually fits me quite well; my dummy, not so much. Must replace dummy.) The fabric (poly/lycra) was awful to work with. (Another note: must learn to sew knits.) Details follow.
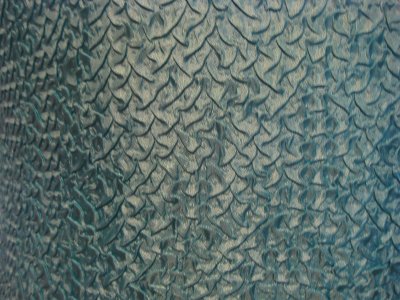
First, the alterations: I effectively shortened the sleeves by only one inch, instead of the two I’d taken up previously. I added two inches to the length all around, and took the side seams in to fit my actual body. I bound the collar, folding Vogue’s band over to make just a half-inch binding. I was very careful with the neckline, and think I’ve now got one that is what Marcy meant it to be, at least in terms of its size and shape. (Though not, of course, its width.)

For reasons that are still unclear to me, I also added an organza ruffle. It’s made of bias strips, about an inch deep, and folded double. It was quite twisty, so I pinned it to my cutting board overnight, which calmed it down quite a bit. Here’s a picture:

To stabilize and control the ruffle, I zigzagged it to one-quarter-inch twill tape, which worked perfectly. Then I basted it between the overlapping right front and the left front, and assembled the front per Vogue’s directions.

When it was all done, I put it on and walked downstairs to show my spouse. “Good God!” he exclaimed, later claiming that his eyes were too watery from pain to actually see how well it fit. This is not the reaction I expected from a man whose Hawaiian shirt collection has electrified an entire wall in our attic for a decade and a half. Who knew he had a secret streak of conservatism?

He suggested I donate the shirt to the deserving poor, but not before agreeing that it fits very well.

I’m making this one again, as soon as I can get my hands on some cotton/lycra. If anyone comments, references to “pigheadedness” will not be appreciated. This is just reasonable persistence. Really.

Oh, yeah. The storyboard’s getting edited. But not tonight.

Posted in Tops | 6 Comments

DIY Reversible Copycat Bag

kbag1.jpgI loved the looks of this Keen Rose City shoulder bag when I first saw it (and every time after). The shoulder strap is very long, giving the bag a funky look, but also making wearing it pretty versatile — it drops from the shoulder, or can be worn across the body. It’s also got four very cool, hidden pockets.

What I don’t like, though, is the stiff, unforgiving, rubbery feeling of the Keen bag. It’s puffy around the edges, and probably wouldn’t feel very nice to wear — unless you’re really, really into industrial chic. I love my Keen shoes, but I think carrying this bag would be a little like wearing the shoes on my arm.

Fortunately I sew, and this basic design is simple (even, you might say, timeless, except for the lengthened straps). (I know, it’s all wrinkled in the picture. 100% cotton — go figure. Yes, the photographer was too lazy to re-iron it for the photo shoot.)

teal300.jpg

I whipped up this muslin from memory, and was really happy with it. Well, except for the fabric, maybe. That lining is not weaving’s finest hour. (But now it is out of my stash!)

tealreverse400.jpg

This style was a natural for a reversible bag, and the full lining meant that I could have a total of six hidden pockets. There’s just one main pattern piece, which I drafted on freezer paper:

I cut two pieces of each fabric. I installed invisible zippers in the center seams of the main fabric and the lining, and added an extra layer of cloth between the main fabric and the lining in the body of the bag to divide the space into two separate pockets, accessed by the zippers on each side.

tealnb400.jpg

I cut small pockets to insert into the widest part of the shoulder strap, and then put one more invisible zipper in each inner strap seam, making small hidden pockets in the strap.

I assembled the bag like a vest. The shoulder strap is quite wide; much to my surprise, when I saw the Keen bag after I’d made mine, I’d actually gauged its width within an eighth of an inch of the Keen’s. I’m not sure how the width works on the original bag, as the strap is fairly stiff. I fold mine in half to wear it, which is very comfortable.

The exaggerated length of the strap is a lot of fun, but not as practical as it could be (especially since I’m short). I’ll definitely make this bag again, but will probably shorten the strap a little. And I need to work on my invisible zipper technique; I had some trouble with the short zippers set into the curve.

Posted in Accessories, DIY | 17 Comments

New Look 6483 – Woven Tank

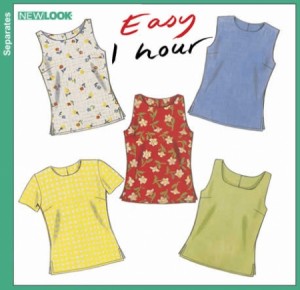
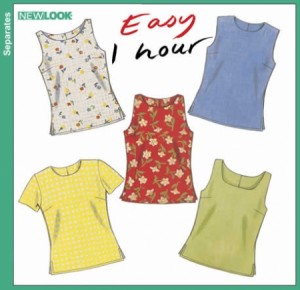
I’m desperately looking for a top to make for PR’s Mini-Wardrobe Contest. Marcy Tilton’s new tee shirt (Vogue 8497) was on my story board, but I haven’t yet worked out the issues I wrote about last week. Since we’re only a week away from the contest start, I went for something super-simple, and made this New Look tank.

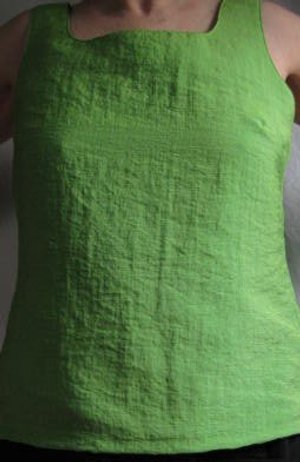
I made view D (the green one on the lower right). The fabric’s a lighter weight linen; I made the facings of a poly-cotton I had on hand.

I like the neckline very much; it turned out very well, and it fits nicely. It’s designed with a slit in the neck in back, which closes with a button. I dislike these closures, so I eliminated the center back seam, and added a zipper to the left side seam.

Because there are small vents at the bottom of the tank, I inserted the zipper so that the opening is toward the hem, making a neat placket insertion.

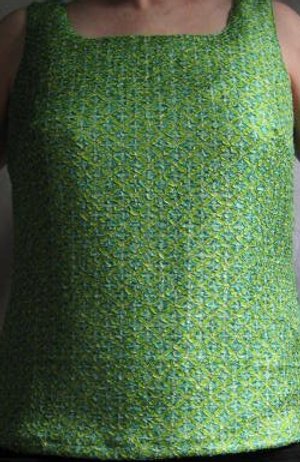
The zipper stops at the same point that the vent begins on the other side, so there are still vents on each side of the tank. My machine doesn’t have fancy decorative stitches, so I used a crosshatch pattern to finish the neck, armholes and hem. Everything looks fine, but it just doesn’t send me. It’s also not right with Marcy’s skirt (Vogue 8499) either; in fact, both it and the skirt look frumpy when combined. A plain old sleeveless cotton tank — a snug one — looks a lot better with Marcy’s skirt. This is crucial; that skirt is on my storyboard. Sigh. I guess it’s back to the drawing board. Eight more days — should I panic yet?

Posted in Tops | Leave a comment

Dollar-Store Dream

Longing for elegance, but lack the bankroll? Take a look at what one craftster did with ten dollars worth of supplies from a dollar store:

Impressive, no? Even more amusing than the picture itself are the details, which the creator, witwhitherwilt, covers thoroughly in her post on Craftster (including shots of her wearing it). Look out, Vera, ya got nothin’ on this gal!

Via the ever-wonderful Dress A Day.

Posted in Fun | 1 Comment

Handle Mod for a Straw Bag

My new fuschia dress called for a spiffy bag, but one that still managed to keep the retro theme (at least a bit). Black wicker seemed like the right answer. I didn’t like the handles on the bag I found at all, though:

blkwicker400.jpg

They just didn’t fit the mood. The original straps were sewn in place, so I removed them and bought webbing to make alternate straps — plus a little extra for a key chain. I wanted my new straps to be interchangeable, so I also bought a set of rectangular loop holders.

blkwickernotions400.jpg

I attached small pieces of black webbing to each of the rectangular loops (you can see one of them in the picture above, at the lower right), and sewed them in place along the top of the bag.

Then I sewed decorative buttons to one side of each strap, and a flat, plain black button to the other side. Final step for the straps? Buttonholes, so that I could loop the ends of the strap through the rectangular holders, and button the strap (on the wrong side) to the flat black buttons.

I love the way the rectangular loops give such a professional look to the bag. Sewn loops just wouldn’t have done the job. Here’s a close-up look a the finished straps, attached:

wkrhandl300.jpg

I attached the key chain inside the bag, at the top, toward the front (as I’ll wear the bag). I tested several positions, and this one worked best for me. It’s placed so that the keys will rest on the bottom of the bag, so that any distortion of the rim of the bag will be minimized.

wkrkeychain400.jpg

Here’s the bag (with the fuschia straps) on my dummy:

wkrfuschmod300.jpg

And with the black straps:

wkrblkmod300.jpg

My bag came with an inner pocket sewn into the lining; if it hadn’t, I’d have added one. I still may enclose the opening and add a zipper for access; the jury’s out on that. In general, I prefer closed bags. This one’s designed to hold right under my arm, though, so securing the contents in that way may not be necessary. We’ll see.

Posted in Accessories | 2 Comments