DIY Cash Envelope

You might think that a well-educated, theoretically sophisticated person like me (back off, folks, I said “theoretically”!) might feel a little silly carrying money around in an envelope. I don’t, though, because I learned to do this by following some basic, commonsense financial advice from a guy named Dave Ramsey. He advocates using envelopes with budgeted amounts as a way of keeping a eye on expenses.

I carry just one envelope (groceries/household/food funds), and formerly used Dave Ramsey’s own envelopes. Unlike the office supply variety, Ramsey’s are just the right size for currency, making them convenient to carry around. But they’re paper, and mine tended to get a little ragged, so I laminated them with contact paper. Then I duct-taped the edges, like this:

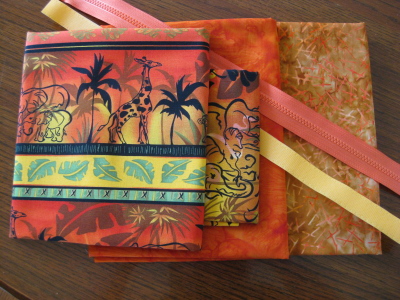
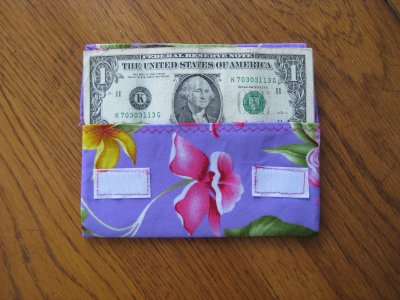
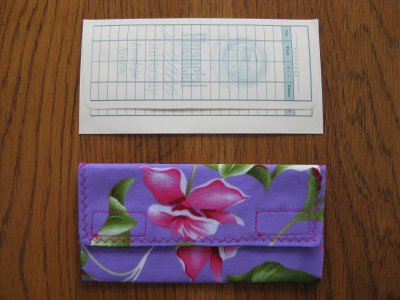
Ugly, no? When I couldn’t take it any more, I hauled out some iron-on interfacing, a thrilling tropical print, and set to work.

First, I opened out one of the original paper envelopes and traced it on the interfacing. Then I cut out a corresponding piece of fabric, adding an allowance for the side seams, around the fold-over flap, and along the top edge. Then I applied the interfacing to the fabric.

This was a quick and dirty project, so I just stitched up the side seams, turned it right side out, and then folded the fabric over the top flap and the top edge. I sewed those edges down with a decorative stitch. Then I added two sets of velcro to keep it closed.

The result, while perhaps way too flashy, is a lot of fun, and much more durable than the paper/laminate/duct tape version.

This envelope is so slim (that polyester crepe was positively filmy before I applied the interfacing) that it’s hardly noticeable in my purse — much sleeker than a fat wallet. (I use a small card case for ID and debit card.)

You, of course, don’t need an actual Dave Ramsey envelope to whip this up, but can whatever paper currency is in your wallet to gauge the size of your envelope correctly.

Posted in Accessories | 4 Comments

Final Mini-Wardrobe

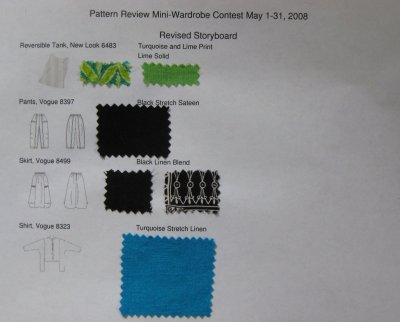
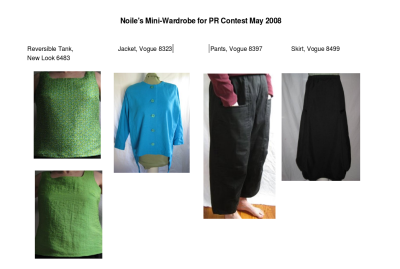
Here are all four pieces on one storyboard:

(I really did this just so that I had a URL to add to PR’s discussion forum.)

Posted in Fun | Leave a comment

Vogue 8499 – The Skirt, In Black

Final piece for Mini-Wardrobe, 2008 — and it’s still an hour and forty-five minutes to the deadline! Whew.

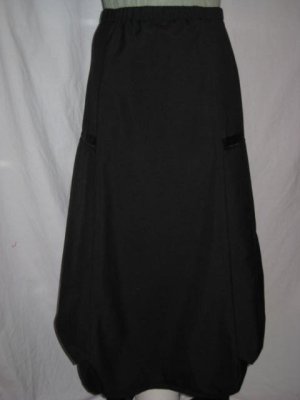
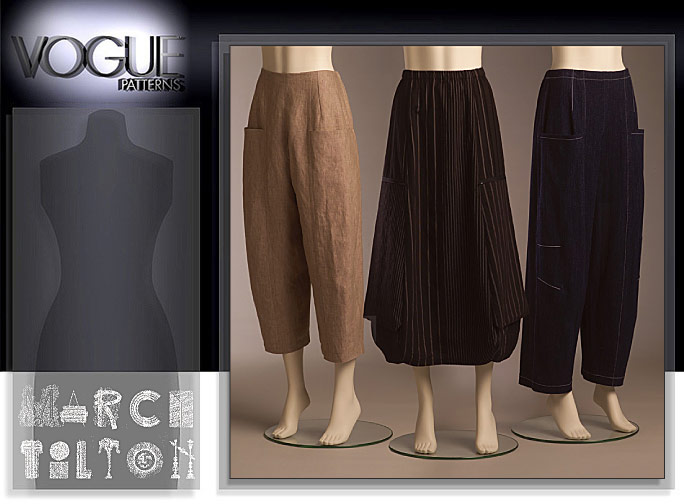
I have a fantasy about this skirt. It’s constructed with long, narrow pockets attached to the side panels. I want to go to an artisan bakery, pick up a couple of incredible baguettes, and bring them home in these pockets. Or maybe put a baguette in one pocket, and a couple of smaller chunks of cheese in the other. This is a garment that seems perfectly suited to my favorite portable meal.

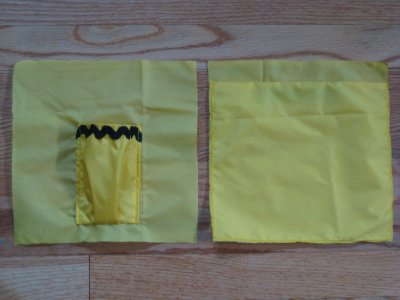
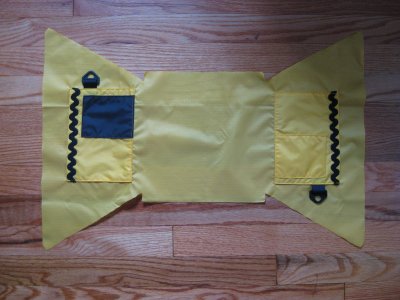
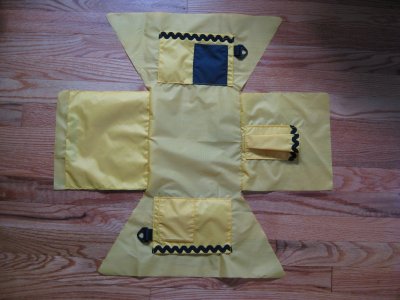
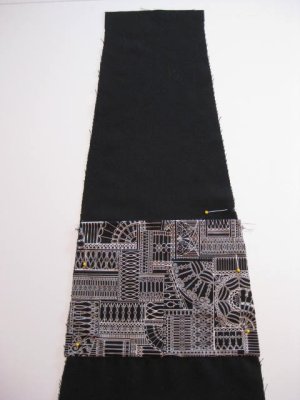
When my spouse saw these pockets on my muslin, he suggested sewing smaller pockets inside the large ones. I thought that was a brilliant suggestion, so that’s exactly what I did this time around. I love a little hidden, subversive flash, so I chose a cotton print for the secret pockets. Here’s how they looked as I assembled them:

I cut them to fit the side panels, added a small pleat in the middle, hemmed the top edge, and double-stitched the bottom edge before folding them up. Now I’ve got functional pockets inside the funky large ones.

Otherwise, the skirt is pretty much as suggested by Vogue, except that I shortened it by two inches, and used strips of grosgrain ribbon along the top edges of the zippers. The pattern calls for leaving them ‘raw’, but that’s not a look I fancy. At least not with ordinary zippers.

This is the final piece for my entries in PR’s Mini-Wardrobe Contest. Talk about a photo finish! Now, I’ve got to get the last two reviews onto PR, and get my pictures into the gallery.

Fantasy Realized!

Posted in Skirts | 2 Comments

Storyboard Redux

Some nerve, huh? It’s the last day of the contest, and I’m posting a new storyboard. What can I say? This month’s been a wild and wacky ride.

Here it is:

As of this posting, three of the garments are done. But hey, I’ve still got 15 or so more hours, right?

Posted in Fun | Leave a comment

New Look 6483 – Reversible Tank II

When I confronted my spouse wearing the muslin version of this tank, he took one look and said “You’re puffy!” I detected no admiration in his tone, so I’m taking some comfort from knowing that this version is “puffy” on only one side. The other side is an interesting, somewhat textured, somewhat variegated green. It’s conservative, and flat. I’m expecting a slightly more positive response to this one.

Last night I dragged myself out of bed after 40 hours of vertigo-induced nausea and managed to put it together. Things didn’t start out well — my first move was to sew the two fronts together at the shoulders, but once I’d straightened that out my brain picked up speed and things went well.

Pictures tomorrow — that way I can take them in natural light. Print side:

And of the solid side:

OK, seriously bad pictures here — and what’s with the solid top?  Wrong undergarment, I think.  And I took the print picture before I’d pressed the hem.  But you get the idea.  (It’s less than two hours to the end of the Mini-Wardrobe Contest, so I won’t be taking new pictures tonight.

As with the muslin, I made a few changes to the pattern: first, making it reversible; second, removing the side vents; third, eliminating the button at the top of the neck. I also dropped the darts to accommodate my bust. This is a “1 hour easy” pattern; it took two hours (after cutting it out, which I did two days ago) including serging all the seams and making the two tanks so it reversed.

The “puffy” side is a heat-treated poly print; the solid side (which looks vaguely bamboo-ish) is a poly/rayon, if I remember correctly.

This is the third of four pieces for the PR Mini-Wardrobe Contest, which terminates tomorrow night. Tomorrow I’m making the fourth piece — Marcy Tilton’s skirt from Vogue 8499. Wish me luck!

Posted in Tops | Leave a comment

Vogue 7914 – Jacket

Here’s another piece for the PR Mini-Wardrobe Contest. (Will I actually make it to the finish line?) This pattern has appealed to me for a long time — it’s got easy lines, and that long tail in the back (which stretches around to the side fronts) gives it some extra interest.

According to the size chart on the pattern envelope, I should have cut between size 14 and a 16 (37 inch bust, 28 inch waist). I made a size 8, which is just about right. If anything, even that borders on the larger end of things, rather than the smaller. There are adjustments for petites; I had to double the amount Vogue suggested to shorten the sleeves sufficiently, though.

I made the jacket collar-less; I didn’t particularly like the look of the collar, and think the jacket will be more comfortable to wear in summer without it. I top-stitched around the neckline, too, matching the rest of the jacket. I’m not sure that worked — at least, the buttonhole looks a little odd fighting with the topstitching.

The directions are quite clear, except for the curious omission of adding buttonholes. Somehow they got lost between page 1 and page 2. This is unfortunate, especially since I, personally, like to be reminded of which side I’m supposed to put them. Bad editing, it seems, is becoming a Vogue trademark.

My fabric’s a turquoise linen with just a little bit of stretch. The buttons are JHB; mine are seven-eighths of an inch in size, though the pattern calls for three-fourths. I had considered going down in size, and had even ordered the smaller buttons, but realized that they would get lost in the massive expanse of the jacket.

However, this was the source of a serious miscalculation on my part. Instead of relocating the buttonhole location, I simply started them at the point closest to the edge of the jacket. This meant that the small amount of extra length leads out toward the sleeve. Net result? when the jacket isn’t buttoned, the buttonholes look a bit off — as if they were placed a little bit too far to the left. Which I guess they sort of were. I’ll have to watch that next time.

This jacket’s not lined, so I used a Hong Kong finish to give it a clean look inside. I’m happy with the jacket on the whole; but, in the end, it’s sort of neither here nor there. In spite of the fun tail, a great color and interesting buttons, it’s really sort of a plain, boxy jacket. I’ll wear it, I’ll enjoy it, but it’s sort of nebbish.

My Pfaff still doesn’t have a check spring, so I was fortunate that I was able to keep a very close eye on things and keep the thread tension where it belonged through this project. It’s really odd that the buttonhole function works perfectly when the machine is so hobbled . . . but I’m not complaining!

I remembered to sew an extra button inside the jacket. Replacing one of these buttons would be non-trivial.

Posted in Jackets | Leave a comment

Five Fingers for the Feet

I tried on these shoes last year at a sports store in Philadelphia. I didn’t get them at the time because I wasn’t quite sure how I’d use them, and, well, the clerk was a real jerk. (It’s the principle of the thing.) This year I have a brand-new kayak, and the idea of paddling with almost-bare feet was irresistible, so I bought these Vibram Five Fingers shoes from REI.

The “fingers” are really your toes, of course. There’s one protected pod for each of your little piglets. Wearing these is like going barefoot, but without the incidental pain or discomfort of stepping on random twigs or small pebbles when you’re outdoors. They provide enough protection that you can stride around without fear, but you also feel the ground in a way that is almost wonderful.

Putting them on the first time is a bit of a strange experience and getting used to putting each toe into its own little pocket seems weird at first, but quickly becomes second nature. I always wear shoes with roomy, boxy, toes, but the feeling of freedom this footwear provides surpasses anything else that goes on my feet.

I do spend much of the year going barefoot in my home, walking on hardwood floors. People who don’t go barefoot regularly might find that there’s some ramp-up time before they’re used to Five Fingers. The manufacturer even recommends wearing them only a couple of hours at a time until they’re familiar. I padded around the house for a few hours a day a couple of times, but on me they felt right instantly.

They’re perfection in the kayak. I have to wear a life vest, but otherwise, I prefer as few layers as possible between me and my boat. It’s smart to wear shoes, though — there’s nasty stuff on those there lake bottoms and river banks, and sometimes we like to hike in a bit and picnic while on a longer paddling trip. These feel like a second skin, but protect like a shoe.

Five Fingers sells the model above specifically for water sports, but I didn’t like the fit of the top of the shoe, or the way the strap lay on my foot. The worry is that you might lose an unstrapped shoe if you go overboard. So I did a simple mod — I just wrap elastic straps around each shoe while I’m in the kayak. I suspect this would be enough to keep them on my feet, and it’s easy enough to pop the strap off once I’m on land.

Making the straps took all of five minutes. I used black one-inch wide non-roll elastic, folded one end over a rectangular loop, folded under the raw edge at the other end, zig-zagged everything in place, and added hook and loop closures. I put the rectangular loop next to the side of my shoe (where I won’t feel it), and tuck the part that hook-and-loops closed under my instep. Eventually, I might wear out the elastic under the sole, but making new straps obviously won’t be much of a strain.

Five Fingers are machine washable (some reviewers — mostly runners — have noted that they get pretty grotty) and they are vegan-friendly. If you order them directly from Vibram, there’s a re-stocking fee; REI doesn’t carry them in our local store, but they are typically fantastic about returns, and there’s no shipping charge if you pick them up at an REI store. City Sports has them on their website, and may still carry them in their Philadelphia store, too.

Update:  April 2010 — our local REI has Five Fingers in stock, though they’ve been going fast. And Mr. Noile loves his, too.

Posted in DIY, Kayak Stuff | Leave a comment

Return of the Pfaff

On Wednesday, I discovered that, owing largely to circumstances beyond the store’s control, my Pfaff was still waiting to be fixed, and not likely to be touched for at least a few more weeks. So I retrieved it, since I couldn’t live with the idea of storing it at the repair shop.

The problem seems to be the check spring, which keeps the thread from going too slack on the front of the machine on its way to the needle.  That’s it in the picture above — the part is both the spring (normally the thread would go under the spring), and the curved metal part it’s resting on.  The check spring is catching and grabbing the thread where it shouldn’t, for some reason.

The jacket I’m working on right now is linen, so the fabric isn’t particularly demanding. As a result, I’ve been able to use my Pfaff through the expedient of bypassing the check spring, and tightening up the tension discs a bit. It’s working for this woven fabric, but the next garment in the queue will be made of silky polyester, so I’ll probably have to go back to my Singer Fashion Mate for it.

Whatever’s wrong doesn’t seem to affect the buttonhole function (in spite of the fact it’s tension-related), and I really can’t do quick, simple buttonholes with either of my other machines. So I’ve now finished the buttonholes in my black Vogue 8499 pants, and am getting on with my next garment — a Vogue jacket.

So my Pfaff is home, but it and I are kind of in limbo while I figure out the next step. Which may be ordering the part on the Internet, and slapping it in. I haven’t decided yet if this is a less-than-bright move, but the motivation level is high. The fortnight I went without this machine was not fun. If my kind-of-local shop can’t fix it, and I send it away, it could be months before I see it again. That would not be good.

Update 5/26/08 — Added photo.

Posted in DIY, Home | Leave a comment

Unusual Buttons, Fast

Is everyone as frustrated with the button selection at Joann’s as I am? If so, it’s easy to imagine how pleased I was to find this promising button at Joann’s. Unfortunately, it was stocked only in a larger size than the one I needed. I bought it anyway, took it home and hit the Internet.

This is a JHB button, so I went to the JHB site, and typed in the style number on the back of the card. That gave me the name of the button — Hanauma (which turns out to be a beach in Hawaii). Searching on Google using the style number was hopeless, but using the name turned up DanaMarie.com. Dana Marie didn’t have the larger size button, but she did have my size.

She also has an absolutely fantastic collection of buttons for sale — everything you’ll never see at your local Joann’s. Better yet, if my experience is any example, her customer service is amazing: She must have mailed my buttons the minute I got off the phone. West coast to east coast = three days!

The website offers a huge assortment of independent patterns (Dana Marie was formerly Purrfection) from several designers, and lots and lots of craft/artist ideas and products.

Using Dana Marie’s search box is frustrating. Instead, try this neat trick: in your Google search box, type “danamarie.com: your button name here”. (Make sure there’s a space after the “.com” colon.) That will take you right where you want to go. (This trick works for any website, so you don’t ever have to be at the mercy of a poor search program again.)

Posted in Tips | Leave a comment

Vogue 7280 Reversible Skirt

This is one of a series of posts I wrote for a previous website.

I got inspired after re-reading and reviewing Kate Mathews’ “Sewing a Travel Wardrobe” recently, and wanted to make a reversible outfit. I decided to start out with the skirt — how hard could it be? — and to use Vogue 7280, a terrific pattern with three skirts to chose from. Naturally, to make it reversible, I devised a fourth skirt, but never mind . . . it’s still one terrific pattern.

vp7280-400.jpg

My fabric stash includes 10 yards each of a bright dark raspberry and a bright royal blue polyester. I’m guessing it’s meant to be a crepe de chine. I bought this fabric just to play with (the colors are fabulous!), but never intending to wear it — at 50 cents or so a yard, I could do a lot of playing without any risk.

I began with view C, which is an eight-gore skirt, no waistband, sitting below the waist, closed with a rear zipper. Because I had no intention of putting a zipper into a reversible skirt, I cut the pattern in a size 12, a size larger than I would normally make. I didn’t make any hip adjustment, because I intended that my skirt would ride a little higher, since I didn’t want to fuss with an elastic band anywhere my body isn’t naturally smaller. (I wanted that band to hug me gently without slipping or needing constant adjustment.)

This isn’t a fabric I’d normally voluntarily wear, but now that my skirt’s made, I might. In a single layer, it floats like a dream, and it’s still pretty floaty in two layers. . .

pinkreverse300.jpg

Making up was very straightforward — cut it out, sew the gores. I made both skirts, then joined them at the waist, right side to right side. Then I edge stitched the top — I’m not crazy about the way this looks, but it was the best way to keep one color from rolling to another.

Next step was fitting the elastic. I joined the elastic ends by abutting them, and then placing a small piece of the fabric across the join. I zigzagged over the join and the fabric, then trimmed to make a very flat joint — perfect where I didn’t want any additional elastic bulk.

Then I slipped the elastic between the two skirts, into the pocket formed against the waistband on the wrong sides of the skirts. I pin-basted all around the waist right under the elastic, and then stitched the casing with the elastic already in place, removing the pins carefully as I came to each one. Perfect! I was thrilled — nearly done, and it had taken no time at all. How hard could it be?

bluereverse300.jpg

Uhhh . . . the “hard” I had conveniently forgotten about was, of course, the issue of hemming two high contrast fabrics in a skirt when you don’t want to see either color from the opposite side. This skirt’s gores are cut on the grain, so it’s not as if I had a bias problem, but, nonetheless, there were a few minor issues to deal with to adjust the lengths so that I didn’t get the dreaded peek-a-boo effect. An eighth of an inch here, a quarter inch there solved the problem, but not without a lot of fingernail biting. I probably failed to treat this polyester with the respect I would have given silk — I pinned instead of using weights, for instance, which was not, in retrospect, a good idea.

The only other alteration I made was in the length, which I shortened to accommodate my height. And I just serged the lower edge, turned and topstitched for the hem. I wanted to eliminate the frustration of doing a curved hem with the poly, and also keep the weight of the hem to a minimum.

It’s a terrific skirt, and feels wonderful to wear. However, next time I’ll make my reversible with a couple of changes:

* I might actually use polyester again (great travelability), but I think I’d make both layers of chiffon, so the skirt would still feel more “floaty” with two layers
* Next time I’ll use consonant prints, or a print and a solid, so that contrast issues won’t be such a big deal.
* I’ll probably try to chose two prints that look very, very different from each other, so the skirt will have two characters. I bought a wonderful reversible skirt from Coldwater Creek several years ago which remains the acme of this style (in my mind at least) — the two side have two very different moods — one multicolor floral, one two color abstract

I did add one extra feature. Before joining the two skirts, I serged two 4 inch by 5 inch pieces of the fabric together, attaching about a 9 inch string to each corner to make a floating pocket. I attached this to the right side of the top of the waist of the raspberry skirt, and then went ahead and seamed the waist.
This very light pocket “floats” and is worn on the inside of the skirt, but can be pulled to the outside. It’s a security pocket for passport, and extra 20 dollar bill, or whatever. I closed mine with tiny nylon snaps, but a light-weight zipper would work fine, too. I don’t notice it inside the skirt, but it’s handy to have when travelling. It also tells me where the front of the skirt is!

It looks as if I didn’t pull the pocket completely out when taking the picture. The strings are actually a little longer.

My guess about the size was just right — the skirt gathers a bit at the waist, to allow for the elastic, but the rest of the skirt just skims across me — no bulky waist/hip gathers as with most elastic-waisted skirts. These colors are far more vibrant than my usual choices . . . but I love this skirt! I may have inadvertently tuned into a wild, suppressed side. This could be the start of something fun!

I’ve planned a reversible top, but am having trouble overcoming my fear of wearing two layers of this kind of poly next to my skin. Still, the skirt cries out for the same flamboyant colors in a top, for mix and match.

Posted in Skirts | 3 Comments