From Tee to Cushion (With Fungi)

I have a dear relative whose life’s work has revolved around fungi.  You can imagine, then, how thrilled I was to find this in a shop last fall:

I’d been looking for “mushroom fabric” for quite a while, but everything was too kitschy, or cutesy, or just plain horrible.  I didn’t have any specific project in mind, and the pickings were so dismal, it looked as if nothing inspiring would ever turn up.  Then, when I least expected it, I stumbled across this:  not only beautifully reproduced mushrooms, but mushrooms with their Latin names appended!

There was one problem.  This is a tee shirt.  My relative does not “do” tee shirts. What, then?  The best idea seemed to be to turn this tee into a cushion.  Not, however, a pillow of the stuff-the-tee-shirt-and-call-it-done variety.  That fungi graphic needed some respect.  I went looking for loamy corduroy, and found a nice mid-wale in the right shade of brown.

I measured like mad, decided on the dimensions, and cut the tee shirt apart.  (I would have liked to have dumped the “mushrooms” text at the bottom; it worked on the tee shirt, but not so much on the cushion.  I couldn’t, though, without sacrificing important fungi labelling.)

I framed the knit on either side by cutting strips of corduroy carefully along the wale, and then pinning in the ditch where the knit attaches to the corduroy.  The precise cut allowed the seam guide on my presser foot to keep an exact distance from the “ditch” that the needle traveled while sewing the pieces together:

Corduroy has always been a favorite fabric of mine, and I used to wear it quite a bit.  I’m a bit picky about wales, and I really wanted the seam between the knit and the cord to follow the line of the corduroy wales perfectly.  This kind of persnickety requires mad basting, or, in my case, precise pinning, and that fine, fine accessory foot.

See what a beautiful edge this made?  The seam follows the wale perfectly:

I wanted this pillow to have a removable cover, so that it could be washed, if necessary, so I cut the back in two pieces, and inserted a zipper under a flap.  Then I used the technique described above to attach the back to the front sides, so that the seams would be just as smooth there as on the front of the pillow.


Here are the front and back, assembled, but without the pillow form:

The usable dimensions of the tee shirt had determined the size of the cushion, so I couldn’t use a store-bought form.  Instead, I whipped up a liner of muslin, filled it with the nicest poly stuffing I could find, and stitched it closed.  Then I popped it into the newly made slipcover, and this is what I had:

There’s a bit of a fish-eye affect going here, but you get the idea.  An alternative method would be to put a gusset all around the pillow — that would keep the shape more obviously square — but I wanted a slightly more informal cushion, and one that would be more scrunchable.

Corduroy was a good choice for the ancillary fabric; it gives the cushion a little gravitas, which I hoped would allow it to fit into my relative’s rather nice living room.

Tee shirts, it turns out, might be well worth mining for the kind of quirky or idiosyncratic fabric themes that are so lacking elsewhere, whether you think of them as apparel or not.  If you’re lucky enough to stumble across that one-in-a-million wonderful tee shirt, but can’t bring yourself to wear it, this might be just the trick to enjoying it anyway.

Posted in Home | 8 Comments

Vogue 1277 – Koos Lite

My version of this coat (?) jacket (?)  is “Koos lite” because I changed a bunch of things to make the construction and planning simpler. For me, at least.  Your mileage may vary.

My duct tape dummy lists a little bit, but you get the idea.

Here’s the back:

I was in love with the Snow White collar at first, and may still love it when I’m wearing it in a brisk wind, but Jilly Be cut hers down, and that might be a good idea.  It’s one tall collar.  Folding it down makes it more human scale, but reduces the drama a lot.  Here it is with the collar turned down, reducing the size and showing some contrast:

Patternreview bizarrely describes this as a “cape/coat” or something along those lines, but it’s not any kind of cape. It’s an open swing coat.  It’s not at all difficult to sew, but the construction of the primary side is time-consuming, and requires some care:  For instance, nearly every piece of this coat is bias, so stay-stitching is absolutely critical.  Here’s the photo from the pattern envelope:

I wanted the look of the Koos design, but not the bother, so I did quite a few things differently from the Vogue instructions.

~ I made the two sides of the coat entirely separately, treating the solid side as a reversible lining.

~ This allowed me to top-stitch instead of flat-felling.  I have vowed to never do another flat-felled seam, not just for 2012, but forever.

~ I did not quilt the two layers together.  This makes my solid side much less interesting, but saved me hours of aggravation. I’m not a quilting fan, either.

~ Although I made a special trip to New York to find bias trim (make-it-yourself bias trim is also on my “nyet” list), I decided not to use it, or any trim, along the seam lines.

~ I didn’t make the welt opening on the pieced side, because I didn’t want to interrupt the flow of the fabric.  The pattern calls for a single pocket, attached to the solid side of the coat, with openings on both sides.  I attached the pockets on the solid side of this open coat, but skipped the access from the pieced side.  Not having pockets on one side may drive me crazy, but, if so, I’ll deal with it later.

My reverse solid side, front:

My pockets are larger than the Vogue ones.  I always use a narrow seam for patch pockets, and since I love over-large pockets, I didn’t alter these to reflect my seam size preference.  I always line my patch pockets “patches”, and these were interfaced, too.

The Vogue instructions call for quilting along the seam lines on the pieced side, so that the solid side gets quilted.  The quilting looks fantastic in the Vogue photos, but I have neither the patience nor the skill to attempt anything that ambitious, so my reverse side is much simpler.

Here’s the back:

I’m not thrilled with the finish on the cuffs, so I may re-do them (it’s Noile issue, not a Vogue issue), and I made a horrible  mistake that I was unable to correct (after three tries!), which I’m not going to confess to.  Not in detail, anyway.  I’m hoping it will go unnoticed by all but the most observant sewists.

Vogue made things unnecessarily complicated by using two different numbering schemes for the pattern. One is for the pattern pieces themselves; the other is for the contrast panels. The pattern pieces for the largest, lower, coat band are numbered 5A, 5B, 6A, 6B, but the band is meant to be cut of a single fabric choice.

Several other pattern pieces have different numbers than their corresponding sections.  Why?  Why not make the numbers identical?  Visualizing that bottom band would have been much easier if both the section on the coat, and the pattern pieces, had been named “5”; why not name the tissue sections 5A, 5B, 5C, 5D?

Vogue calls the reverse, solid, side of the coat “Contrast 1”.  Why not call it “reverse”, or, if they must, “reverse contrast”?  If you’re using different fabrics for each section, surely simplifying the process would be a boon.  I ended up photocopying the relevant illustration (above), and making my own road map, which was a bit of a pain that could have been avoided with a little more thoughtful editing.

Although I wasn’t using contrasting fabrics for each section, I did still have to keep the individual pieces in mind as I cut and sewed, so calling each by a single, consistent, number was far more useful than trying to deal with two different designations.

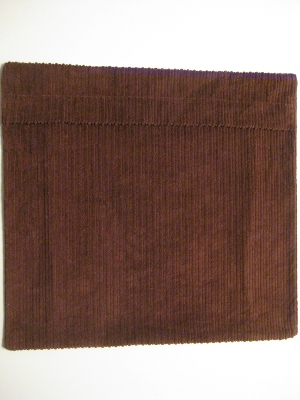
I did want something of the Koos crazy-quilt, wonky-contrast appearance, but didn’t  trust myself to choose fabrics.  I’m seriously design-challenged, and Mr. Noile would tell you that I’m not very good at color selection, either.  However, I had this in my stash:

I fell in love with the colors (no knowledge required!), at least partly because it’s like nothing I’ve ever worn.  There’s a lot of textural variation woven into the fabric, which is impossible to see here. It’s “Richloom Studio Valliant Spice”, from JoAnn.  Yes, “valiant” with two lls. Classy.  Incidentally, I see that the price on the website is over 10% higher than the store’s regular price.  Plus shipping, of course.  Don’t do buy it online; it only encourages them.

It’s 58% polyester, 42% rayon (no label in the store, naturally, so I found this information on the website), and washes, gently, in cold water, just fine.  I dried it in the dryer, too, being careful not to over-heat or over-dry.

Washing created a bit of puckering in a few (consistent) spots, which just added to the interesting texture, of which there’s a lot already.  The price is JoAnn ridiculous, even in the store, but that’s why the deities invented coupons.  And remnant bins.

I didn’t have enough to make the coat face entirely in that material, though, and, in a stroke of amazing luck found this:

It’s also upholstery fabric, with a light backing, from Jomar.  JoMar is a Philadelphia-area institution; bargain prices, and often, fantastic finds, but the stores are filled with junk.  Lots and lots of junk.  Did I mention that you’ll score fabrics, even luxury fabrics, at JoMar that you can’t find anywhere else?  For pennies?

JoMar’s best for stash-building, though, since you can never know what you’ll find. This was a JoMar miracle, as I walked in desperately needing a second contrast for my coat, and didn’t want to resort to corduroy.  On this particular day, I found exactly what I needed, immediately.

I never let the fact that something’s technically “upholstery” worry me.  I tossed both fabrics into the washing machine to soften them up (and make them less sensitive to liquid in the future), and they were set to go.

Vogue calls the reverse side of the coat Contrast 1; I think it would have been better to call it “reverse” since there’s already so much “contrast” to track here.  Mine is a luscious rust from Kashi at the wonderful Metro Textiles; it has a burgundy note which isn’t at all obvious here, but works perfectly with the my main fabrics.

There’s nothing really to fear when approaching this pattern.  (At least not once you’ve made your fabric selection.)  You do end up sewing miles and miles of seams that involve attaching inside curves to outside curves, but a little diligence and care (and some careful basting or pinning) will make short work of that.

The reverse side couldn’t be simpler, and this coat would look wonderful made with two solid sides, as well as work up very quickly.  Since I made the two sides separately, I started with the reverse, just to be sure there weren’t any basic construction challenges.  There weren’t; it went together quickly and easily.

However, there are some unusual challenges to the overall project.  Assembling the pattern is a whole step of its own; you’ll need space and a fair amount of time.

The sleeves have a wonderful bias seam, so shortening them requires some creativity.  I shortened the sleeves by about an inch (I like my sleeves quite long, but I have short arms) by  pinning the pattern together, drawing a horizontal line at the lower bicep (JillyBe did hers at the wrist), cutting, slashing, adjusting, and  redrawing the side seam.

Laying out and cutting the material requires a huge flat space.  You’ll need to clear the floor in a large room, unless you have an amazing sewing studio.  (Alternatively, borrow a conference room from your workplace or the local library; you’re going to need the space.)  In my case, I also had to wait until  it was naptime for all five cats.  Need I mention that they were all exceptionally alert on the day I’d chosen for the big event?  Naptime is 2 PM; they finally crashed at nearly 4.  How did they know?  I might as well be herding toddlers here.

Then things get complicated, if you’re following the Vogue directions and going Koos all the way.  His design is fabulous, and will yield a result that is much grander than my coat, so I recommend it highly.  But, for those who, like me, follow the virtuous programmer* approach to life, this was too much.

Instead of quilting both sides of the coat together, I constructed them separately, sleeves and all, and joined them all around the hem, sides and neck, leaving an opening at the side hem to turn it.

Since I wasn’t using bias trim, I simply sewed each section together, right side to right side.

I trimmed and hand-tacked every single seam allowance.  I thought this was a good idea for two reasons:  one, because the bias tape would have supplied some (possibly quite necessary) support for all those bias sections, and two, because that helped to keep the seamlines smooth, and reduced bulk inside the coat.

Then I finished the sleeves by turning the hems in along a stitching line I’d previously made, and carefully hand stitching them closed.  With practice, this can be done invisibly by catching the machine-sewn stitches.  Top-stitching ensures that everything stays in place.

One last tip:  Buy the giant spool of thread.  I didn’t do any quilting, and this was still a five-bobbin project.  Admittedly, my Pfaff has smaller-than-some bobbin capacity, but you’ve been warned.

Jilly Be and Jan are in the middle of constructing this coat, as it’s meant to be constructed, and their coats look as if they’re both going to be beautiful.  Check them out for a different take on making this marvelous jacket.

*The three great virtues of a programmer, as described by Larry Wall, are laziness, impatience, and hubris.  I’ve incorporated these into this project in this way:  Laziness — I wanted the best result with the least effort; Impatience — I wanted it done in three days; Hubris — I determined to do this my way, no matter what those silly Vogue instructions said.

Needless to say, you can get into a lot of trouble following this credo, but it will be fun trouble.

In the Noile family we have one programmer, and one cat, who believe absolutely in this credo.  It’s rubbed off.  Literally, in the case of the cat.

Posted in Coats/Capes/Wraps, Jackets | 20 Comments

A Sewing Day

I spent last Saturday with  a group of fellow sewists at a Sew In hosted by Annette, of Fabricate and Mira.  It was a convivial and productive day, and a lot of fun to re-unite with some favorite sewing friends, and meet a few new ones.  Annette had never held a Sew In before, but you’d never have known it; everything was organized beautifully.  She’s written up some tips on how she prepared — they’re a perfect blueprint for hosting your own.

Annette suggested that those of us who participated might write up how we prepared; I thought that was a great idea.  I’d never attended  a Sew In before, and, about a week in advance, I suddenly realized that I’d need to plan — especially if sharing even a large table with six or seven other sewists.

First item on the agenda was a rolling case for my travel machine.  The one in the photo above isn’t meant for machines; it’s a “yarn tote” from JoAnn, but my mini machine fit perfectly into it:

All of JoAnn’s rolling sewing machine cases are ridiculously overpriced, but the yarn totes were less so, and with a 50% coupon, this was a reasonable purchase, although it probably has a durability rating of zero.  That’s OK; I’ll baby it, and it will probably serve the purpose for years.  The wheel and handle construction appeared to be the same as on the bigger machine totes costing three times as much, which made this seem worth the gamble.

Then I gave some thought to what project I should take. This is what I settle on:

I had just finished my Koos coat (Vogue 1277), and knew that a project with huge pieces like that one wasn’t a good idea in a shared space, so I decided to begin work on  a coat for Mr. Noile.  This one’s unlined, so I knew I’d have lots of Hong Kong finishing to do, and it’s also full of epaulets, pockets and flaps — small pieces that could be easily managed if space was tight.

For a long time I’ve been trying to convince myself to make a roll-up fabric sewing kit, but I could never decide on the configuration, or how I’d carry it, once made.  For Annette’s Sew In, I used a plastic tote that fit into the open pocket on the front of the rolling tote.

There was plenty of room for all my sewing accessories and all the notions I needed for my project.  It’s easy to put a container like this on the floor, out of the way of other sewists, saving table space, and easy to grab things from it, too.  (I removed the jacket zippers before I took this shot; this box was full!)

I keep my small travel rulers and my Ginghers in another small, thin,  plastic case just to make sure they don’t get bent in transit, or the points nicked.  Everything in this box is s duplicate of supplies I have at home, so that I don’t have to unpack it after venturing out.  (That’s a legacy from the days when I sometimes traveled 800 miles to Mr. Noile’s parents’ home and sewed there.)  Keeping this gear packed up minimizes the chance that I’ll forget something on any particular day.

My project went into a zippered, mesh, double-sided packing cube.

I cut out everything (except interfacing, as it turned out), and put the small cut pieces on one side of the cube, and large ones on the other.  Love those packing cubes! This one served as a handy file system, and kept the project pieces I wasn’t working on confined neatly and out of the way.

The packing cube and all my miscellaneous non-sewing stuff went into this tote:

And that was it for luggage.

My secret weapon, though, for portable sewing, is my little Kenmore 1030.  It’s a small metal machine, made back in one of the rare eras when Kenmore made a good machine.  (My 1030 was made in Japan in 1973-1974. The mid-seventies were kind of a golden moment in Kenmore sewing machine history.)

The first machine I ever bought was  a Kenmore 1040, which was the model just above this one, with a few more features.That machine was the only one I used for years, and I was knocking out Vogue Couturier patterns on it with no trouble at all.  It was a fantastic machine, and I’ve missed it a lot over the years since.  When I went looking for a travel machine, I knew what I wanted, and found this one on eBay.  The owner had loved it just as much as I do; I felt honored to give it a new home.

I packed several days in advance of the Sew In, which turned out to be a good thing, since I walked into the sewing room the day before and realized that I’d failed to pack the 1030’s controller.  Whoops!  That’s a detail you’d want to check carefully; they’re just too easy to overlook.

It was so good to see Andrea, Karen, Lee and Mimi again, to meet Annette in person, and to meet two (new to me) sewists, Val and a very nice woman whose name I am horrified to realize I never got.  (Bad ears, and worse memory, I’m sorry to say.)

Annette’s blog post has a very helpful list for hosts, so I’m going to follow her example, and provide a check list for Sew In guests:

~ Choose a project that will be easy to manage in a group. Lee assembled quilting squares, Val made fabric bowls, and Karen whipped up three tee shirts during this Sew In.  Andrea wasn’t able to join us until later; she was in the early stages of making a gorgeous coat, and still prepping the individual pieces.

~ Prepare your project with an eye toward space constraints (cutting pieces in advance, etc.).

~ Pack your project pattern (if you’re using one) and notions. Remember interfacing, zippers, buttons, cording and any other extras you might need.

~ if you are starting a new project and want to save time on the day, wind your bobbins.

~ Make sure you have the tools you’ll need:  scissors, rulers, measuring tapes, pins, pin cushion, extra needles, and any personal favorites that make your sewing life easier, etc.

~ Double check to be sure that you’ve got both machine AND power cord/controller.  Mimi had left hers at home, just as I almost did.

~  If acceptable to your host, bring any magazines, stash or other items you are willing to part with (but be kind, and take away whatever isn’t acquired by the time the day is over).  I was thrilled to take home a couple of Burdas and Threads I didn’t have, and a couple of pieces of yardage I’d never have purchased, but can imagine using for fun.  One womans’s stash is .  .  .  another woman’s stash!

Annette wisely decided that we’d step out for food, and invited us to bring healthy snacks.  (It is just post-holiday season!)  Her home is ideally located for lunching, with a lot of eateries just around the corner, which was an advantage, of course.  We brought pizza and sandwiches back to the house.  Getting take out meant no fussing at the Sew In, no need to clear the table of our projects and machines, and no major clean up, either.  In a less congenial area, everyone could potentially bring an easy-to-eat, fast lunch, and get back to sewing just as quickly.

Posted in Accessories, Adventure/Travel | 2 Comments

AG Doll Clothes, Vintage Version, With Bed and Trunk

They’re vintage because I made them for Noilette, when she was very little.   Years ago, before Mattel bought American Girl, the dolls (and their clothing) were excellent quality (unlike the books, which, despite their “educational” pretensions, are pretty weak all around).  The size of these girl-shaped dolls makes sewing for them fast and rewarding; you get a lot of bang for your sewing efforts.

Running across various posts about others’ AG sewing prompted me to finally get out the camera and immortalize Noilette’s collection.  Here are the garments I made for her AG dolls a long time ago. (And, at the bottom of the post, pictures of the trunk and bed I made for her, too.)

First up, a sou-wester slicker and hat, made from a flannel-backed table cloth, and lined (badly, I’m sorry to say) in navy nylon.  The dark nylon is why the coat looks darker than the unlined hat.  You can’t tell here, but the brim of the hat is elongated, just as it would be in a proper, full-sized version.  The coat’s collar is a very, very fine pinwale cord, in brown.  Much more comfortable than PVC next to the chin!

The back of the slicker has a little vent:

The little chrome “snaps” are fake; there’s hook-and-loop underneath.  All of these items were made on my Pfaff 1229, and most of what I’m posting here was made from American Girl patterns. Does Mattel still sell them?  They were quite wonderful.

Here’s a prairie dress, complete with bonnet, simple bloomers, an apron (with pocket) and a floating pocket that also wrapped around the waist.  I’m not sure why I made a pocket on the apron, since it’s a bit redundant.  Because I could?

You can barely see the “growth tuck” about an inch above the hem.  That’s so frugal mamas could let the skirt down as the child grew taller.  The hem is faced with blue gingham; I did that on a couple of the garments, probably  just because it seemed like fun.

Moving forward to Victorian times, here’s a very badly wrinkled little cotton pinafore, trimmed in rick-rack, with a pink gingham dress underneath, complete with mini leg o’mutton sleeves:

My iron and I are not getting along these days.  I have a vague recollection that I made Noilette a matching outfit.

Naturally, I made a full-circle poodle skirt, though it’s very much the worse for fuzz.  This wasn’t the best quality felt around.

Here’s a surprisingly badly-made tutu.  I’m not a fan of pink, and I see that I managed to find a rather mauve-y shade for the leotard:

There was only one slipper in the trunk when I unpacked it today.  If these little treasures get passed down someday, I’ll have to make a new pair.

Here’s another dress; a generic drop-waist style that, I think, was also supposed to be from around the turn of the century:

I know; wrinkle city.  It’s all-cotton.  Those are little, tiny, woven checks.  Lovely stuff!

This little sweater set was supposed to have matching mittens, and may yet acquire them:

I didn’t use a pattern for these, just copied some larger ones.  Fitting was not much of an issue, so they worked up very quickly.  I think the checkerboard pattern on the hat may be traditional; anyway, I liked it a lot.  The figure on the hat is skirted, wiht doubel stripes between, all around the crown.

I’d forgotten about this little sweater:

It was also a very quick knit, but I was surprised at the infinitesimal button holes.  Easy to do, though, since you  just drop a stitch, and then pick it back up.


I’m not sure what possessed me to use quite so many buttons.  Probably an attempt at miniature verisimilitude.

This is my favorite outfit:

It’s a separate blouse and skirt, with a little Russian flair.  The hem is faced with red-and-white gingham checks.

This Victorian cape set, complete with beret and gaiters, is made of practical polar fleece, and lined with the same navy nylon I used to line the sou-wester.  Wool would have been authentic, though probably not if it were white.

The collar has a lovely shape, only part of which can you see here:

Little corduroy overalls, with a pocket on the bib, and the same faux snaps as on the slicker:

The turtleneck is open down the back, and closes with hook-and-loop fasteners.  It’s not very inspirational, but a necessary accessory.

Naturally, there are nighties in the collection.  This one is of a lovely heavyweight all-cotton flannel, with ruffles at the shoulder, wrist and neck, as well as mauve ribbon woven through lace trim on the bodice:

Everyone needs a cloud nightie, don’t you think?  Noilette had a matching one, of course:

I made the wooden trunk Noilette’s doll wardrobe is store in, as well as the wooden bed that fits inside.  I love unexpected challenges, and, at the time, my father was handling the plumbing, so I had to look elsewhere for projects, unlike these days.

The bedding is just a ticking mattress, with matching pillow, and a little quilt — a thin quilt, like the ones my great-grandmother used to make.  She used flannel for the batt, so that’s what I did, too.

Naturally, I used scraps for the patchwork, and the doll’s doll is wearing a copy, sort of, of the white flannel nightie.  Yes, those are miniature Little Golden Books.  I hate them, and wouldn’t allow them in Noilette’s library (not that the issue came up), but apparently I thought they were good enough for dolls!

I’m no pro at stencilling; I was very relieved when this turned out.  However, I think that was because I faked it, and pencilled the design, then painted it.

The trunk lid is made of extremely thin plywood, like that used on vintage plane wings, and nailed and glued into place.

Because we had cats, I made a cozy for the lid; the elastic needs replacing, but it still provides protection from the depredations of the current herd of cats:

As it turned out, Noilette was never very fond of dolls, possibly because, unlike her mother, she has always been very social and very fond of living, breathing people.  Nonetheless, she still appreciates handmade things, and one day may pass all this stuff down to a child of her own.  If not, it may eventually become someone else’s treasure.  Or not .  .  .  regardless, her mother had a great time constructing every piece, and that’s quite enough, all on its own.

Posted in Misc, Vintage | 11 Comments

Minoru Sew-Along

Tasia, of Sewaholic, is hosting a month-long sew-along, beginning January 16th,  featuring her latest pattern, the Minoru jacket.   Here’s the illustration from the pattern envelope:

Tasia’s patterns seem geared more toward pear-shaped women, and my body type is nearly the opposite.  That shouldn’t matter a lot for this style, though.  I’m sure I’ll be doing an FBA for this jacket, but I like its lines, that great tall collar, and the hidden hood.  Also, I’m in the mood for a sporty new spring jacket!

I’ll be making mine out of a mid-wale purple corduroy, and lining it with a red poly that is printed with, among other things, purple flowers.  I have no idea what I was thinking when I bought the print, but I’m expecting that it will be fun, not horrific, as a lining.

Both cord and the print look blue here, but they’re actually a deep purple. According to my Ultimate 3-in-1 Color Tool, the corduroy is 14-17, or, on colorhex.com, it’s f1865:

I’ll be using bright red zippers; in for a penny, in for a pound. My jacket is meant to be fun, not safe or arty.  (Stash-busting that poly is going to feel good!)  Matching thread was impossible; I settled for a slightly darker Gütermann, which isn’t photographing any better than the corduroy:

I’m not sure about the gathers at the neck, but I’ve seen so many marvelous versions of this jacket already that I’m willing to give it a try.  Google “minoru jacket” under “images” and you’ll turn up a bunch; Tasia also has a number of them on her website.

The Sewaholic blog is already full of tips for using the pattern, including a tutorial on sewing with waterproof outerwear fabric.

So far I’ve seen this jacket made in poplin; twill; canvas; a linen-cotton blend; a jersey; and a fine-wale corduroy, every one with a wild and wacky lining.  Inspired?  Stash-busting?  You could make this jacket from almost anything!

Posted in Jackets | 5 Comments

Half-Circle Napkins

Need a quick, last-minute gift?  These napkins are fast and easy to make and can be folded in a number of ways, depending on your mood, or whatever is going on at the table.  If you use appropriate colors, you can achieve a “Christmas tree” effect, which is how you’ve probably seen them done around this time of year.

To make them, I drew an 18 inch circle on paper, then folded it in half.  I cut the circle along the fold, took one half, and added a seam allowance to it.  I used a one-quarter inch allowance, because I think it makes a nicer edge, and I didn’t want to trim the seam after I’d sewn it.

Then I cut my pattern out of cardstock, and used it as a template to mark the shape on my fabric.  In this case, since I wanted something festive, durable, and quick-drying, I used two tablecloths with a damask-like texture for my fabric.  Tracing the template made the cutting go very quickly, and was quite accurate, as well.

I sewed them up, right side to right side, all around, leaving a small opening to turn. Then I edge-stitched all around, closing the opening in the process.

Most of the folds are simple to figure out, but the tree fold is little tricky.  Start with the half-circle, laid out flat, and then fold about a third of it underneath, on the right side.

Then imagine two lines from the point of the napkin to the outer edge, equally spaced.  Make a fold along the imaginary line that is closest to the left upper edge of the napkin, bringing the fold to the top of the napkin.

Do the same with the next imaginary line, also bringing that fold to the top, straight, edge of the napkin.

That’s it!

I thought that “half” napkins would be too small to be practical, but discovered just the opposite.  These are nice and big, and stay on laps much better than similarly-sized square napkins.

Wouldn’t these be charming as smaller cocktail or tapas napkins?  There’s no reason they couldn’t be all one color, either, or any of hundreds of other variations, in prints or solids of all types.  Anyone could work the evergreen theme by using this red and green, or green and brown, if yours isn’t a Chrismas household.  A couple of shades of blue,  or blue and silver, would be nice for Chanukkah, too.

Here’s a close-up look at the folds.  I’m sure there are many more variations; this is just what I did immediately.

A fan fold, red side:

The same fold, green side up:

Side pleat:

Bishop’s mitre:

And the tree, right side up:

I actually purchased a single-sheet pattern at the fabric store; it was a little silly, since these aren’t difficult to make, but I like to support entrepreneurial pattern makers.

However, when I got home, I discovered that, though the page was nicely produced, the instructions weren’t very helpful.  Instead of using half-circles, the author’s layout used full circles, which wastes a lot of fabric, and I found her directions for folding to be incomprehensible.  Sigh.  At least she got an “A” for effort, and whatever profit she made on the single sale, even if I can’t recommend her pattern here.

Posted in Home | 5 Comments

Zoë

Peter, of blogging fame, is apparently not content with collecting a small army of sewing machines, or an actual army of Ken dolls (all of whom look as if they’re ready for some sort of leisure-suited Armageddon).   Nooo, now he’s gone and acquired a Patti Playpal doll.  From a Manhattan thrift store.  For the grand total of 15 dollars. (She’s even wearing her original pinafore!)

Does Peter have supernatural help in finding these things?  Or a secret army of spies, ever-alert, walking the sidewalks and scouting the shops? Because the most exciting thing I ever found in a Manhattan thrift shop was a Sherlock-Holmes-style cape with moth holes and several buttons missing.

But I digress.  Peter, meet Zoë.  Admittedly, I didn’t score her from a consignment shop on an exotic island, but she’s just as useful for freaking out the spouse:

I did, however, make her myself.  Or, rather, I designed and made her inner armature myself, modified her body, and assembled her limbs and head.  (Without the armature, she’d have been relegated to life in an assistive device).  Her skeleton is made of flexible plumbing tubing, which makes her less stable than Patti, but more posable.

Mr. Noile finds her creepy (and this from a guy who used to feed baby dolls to a giant preying mantis puppet!  Talk about creep factor!).  He was pleased to learn that Michael felt similarly about Patti.  And no, I don’t sew for Zoë, but I do have a whole box of 1940s and 1950s children’s patterns in the attic, and, next to Patti, Zoë’s apparel looks awfully modern, doesn’t it?  Maybe I should do something about that.  There may not be enough eccentricity in the world already.

What?  You say that I haven’t posted on this sewing blog since August, and then I write about a life-size doll?  Yeah, what of it?

Posted in Misc | 6 Comments

Vogue 8499 – Mom Jeans Version

A couple of years ago I cut out these pants and sewed them mostly together at the home of my in-laws.  (This version is the one on the right in the image below.)  Then I came home and, well, put the unfinished project in a safe place.

Thanks to a bunch of re-organization that’s going on right now at Chez Noile, I re-discovered them, and have attached the waist band facing and finished them off.

Since first cutting these out, I’ve vowed to wear clothing that fits my body, rather than shapeless things that just overwhelm me, so this isn’t something I’d  necessarily either be sewing or wearing now.  For one thing, they’ve got something of a granny tush, thanks to the elastic back waist:

These are the smallest size in the envelope (8).   I’m theoretically supposed to wear a Vogue 12.  Riiiiight.  They billow all over, and definitely have a granny tush, along with an over-all “mom jeans” look when made in denim!   So beware:  This pattern runs large, very large.  It’s designed to be roomy.

Also, note the length — they’re just to the ankle on short old me (5 feet, 2 inches), but they don’t look cropped at all on the pattern photo, do they?  That’s because Vogue put them on tippy-toe dummies to make them look elongated, and to change your perception of the proportions.  Thought they’re long on me, they’d be quite cropped on a tall woman, and noticably short on a woman of medium height.

However, I recently  made a one-day round-trip drive to Brooklyn (on a weekday!  baaad idea!)  and spent more than two full hours travelling ten blocks in lower Manhattan on my way home.  Sitting interminably, and virtually immobile, in my little car, I was delighted that I was wearing clown pants with a granny tush.  I couldn’t have been more comfortable.  So there’s a time and a place for pants like these, and that was it.

The front pockets are fun, and this garment’s best feature:

The elastic back waist does make for the fastest rest stops ever.  No muss, no fuss, no bother.  That is, of course, if you’re not gridlocked in lower Manhattan.  These are super-comfortable pants, and nice and airy when the weather is over 90 degrees, and even when the fabric is a light, but firm, denim.

If I ever make them again, I’ll take in the legs as well as the tush; there’s just a lot more fabric there than is really needed, certainly for style, but even for comfort.  This is the third time I’ve made these pants, but I’m so over this kind of fit .  .  .  it’s time to celebrate my shape, not hide it.  In size 8, these fit me, but this is not a flattering look!

Related:

Vibram “Barefoot” Mary Janes!

How to Carry a Baguette (Or Two) In Your Skirt

Vogue 8499 – The Skirt, In Black

PR Mini-Wardrobe Contest: Vogue 8499

Vogue 8499 – Marcy Tilton Pants

Posted in Pants | 8 Comments

MPB Day!

I’m back home after several days in New York, including a Saturday spent celebrating (the first annual?) Male Pattern Boldness Day.

(Photo cribbed from MPB; that’s our fearless leader, front and center, looking, as he himself points out, quite tall.  How did he do that?  I think he’s discreetly en pointe, myself!  But you can hardly tell .  .  . )

Peter was a most amiable host and shepherded a good two dozen of us through a perfectly planned day full of New York City treats.  (We even met Michael, though he was a bit difficult to spot in the sea of humanity that we were at Brown Cup for lunch.)

Those of you unfortunate enough to have missed the day are encouraged to enjoy Peter’s excellent re-cap; I suggest that you do this immediately; those of us who are regular readers of MPB realize that a day that starts without an MPB post is hardly worth getting up for.

Since I’m leaving recounting the actual day to Peter, I’ll  just sneak in a few random notes here, to immortalize the unexpected joys of any day in New York.

For example, as I was walking from one floor to another of the Chelsea Flea Market, I discovered this marvelous vehicle parked in front:

It’s a Thunderbird, of course, and according to its owner, a 1957.  Of course, it’s owner is obviously a madman, since he actually drives this treasure in Manhattan.

Next to the Brown Cup, where we all ate lunch  (just down the street and around the corner from FIT), was a little Korean place, apparently run by the same people. It smelled heavenly, and they sell Kimchi pancakes.  Next time!  (Peter vouched for them, too, so they’ve got the MPB endorsement, though, sadly, not nearly enough seats for 25 ravenous fabric tourists.)  No picture, I’m afraid; too busy eating a tasty avocado and mozzarella sandwich from the Brown Cup at the time.

Kinokunyia is always full of surprises; we got there too late for me to buy onigiri for my trip home the next day, but many of us were treated to the sight of these otaku:

(Along with lots of Japanese sewing books, Kinokunyia sells a ton of manga.)

On the north side of Bryant Park, as I was heading off to do one last errand before packing in the day, I saw these portable racks of books (a “Reading Room”) for visitors to read while sitting in the square:

(For the electronically-inclined, or those of us, like me, who often have a rooted Nook in hand, Bryant Park, like many parks in the city, also has free wi-fi.)

In other news, I’d actually seen Peter at Metro Textiles on Thursday, where I’d gone to find some wool for a jacket. I hadn’t recognized him, go figure.   (Some fan, huh? — hey, it’s all about the fabric; focus, focus, focus!)  Kashi, Metro’s proprietor, isn’t usually open on Saturdays, so I’d figured (correctly) that Metro wouldn’t be on the agenda for MPB Day.  I even spoke to Peter’s shopping companion, Lynnelle, because the wool she was holding was such a great color.    On Friday morning, I realized my error when I saw Peter’s post, and the photos of both Peter and Lynnelle.

Metro Textiles is on West 37th Street, and it’s a great place to find fabrics at much better prices than you’d think, but it’s very hard to spot these days.  Kashi is on the third floor of a rather elegant-looking building which has had this rather inelegant looking façade for far too long:

No need to remember the floor; the men who operate the elevators are expert at spotting Metro shoppers!

All in all, it was a splendid day.  What else has Peter got in store for his legions of fans?  I wonder .  .  .

Posted in Misc | Leave a comment

Vogue 8737 – One Pattern Piece Top

OK, it isn’t literally one pattern piece, since there’s a single facing piece, too, but close enough .  .  .

The front and back are identical, and the only “trick” to the construction is that the front and  back pattern pieces must both be cut right-side up, which is a little counter-intuitive.  (Ditto for the facings!)

I couldn’t help myself; I had to see how it looked in a stripe:


The upper half is pretty standard, except for the interesting neckline, but the lower half is gathered at the side, giving the top a twisted look.

The hem can look asymmetrical in back (I didn’t straighten it for these too-spontaneous photos), and I kind of like the look:

I cut a size 12, and did a fake FBA by bumping out the pattern at the bust a bit; this works pretty well with knits.  The fit is quite comfortable, but the neckline is a little too big; I’ll change that next time.  This is a quick and easy top to make up; the neck facing  gives a fast, clean finish that I like very  much.

Posted in Tops | 9 Comments