It’s a baglet because, even though I made the largest size in the pattern, it’s still quite compact. But for my purposes, it’s a great size, and the design is just plain fun. Contrary to what you see here, this bag is more or less bright red, because all the black and white clothing I’ve made lately needed something bright to offset that starkness.
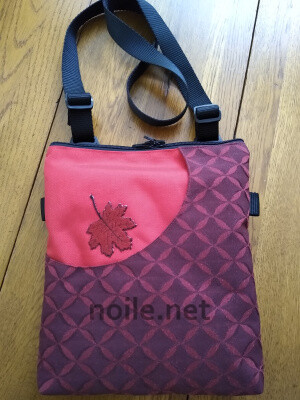 Stuffed to the brim.
As with Green Pepper patterns generally, the drafting was on point and the instructions were clear. Naturally, though, I couldn’t leave well enough alone, so I changed things up a bit. And, equally naturally, I got into a bit of trouble along the way.
But first, let’s consider the bag itself. The best part is that lovely “moon” swoop! I’m not sure how practical that open pocket will prove in actual use, though I did add a hidden loop for keys near the upper edge. Open pockets make me nervous, and I’m careful how I use them — but this one is so interesting that I think it justifies its existence on that basis alone!
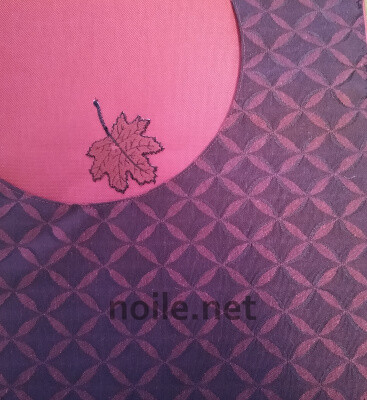
This is the front before the bag was assembled.
The leaf applique is a souvenir from Montreal.
My phone camera is awful; the Cordura is bright red.
and the front panel is a darker red.
The front panel of my bag is made from an odd, stiff, almost upholstery-like material. The rest of the bag is 1000 denier Cordura; it’s lined in ordinary ripstop nylon. Green Pepper allows for a stiff interfacing or padding, but it took the strength of Hercules to turn my bag right side out, once finished, and I can’t imagine the nightmare stiffer support would have caused. I think any materials other than light cotton would provide sufficient shaping and stability for the bag without the need for interfacing.
On to the difficulties I made for myself. The pattern calls for 3/4ths/2 cm inch webbing. I despise 3/4ths inch webbing! It’s neither thin enough to be a decorative statement, nor wide enough to be properly useful — and it’s more difficult to find hardware to suit the smaller size. I used 1 inch/2.5 cm webbing instead.
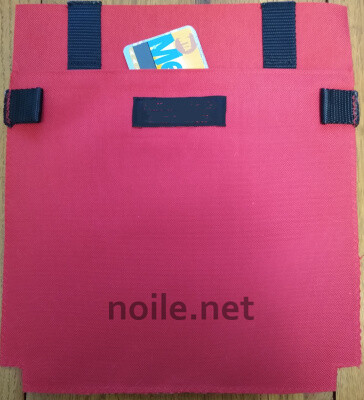 The center black rectangle isn’t functional;
it’s my personal sewing label.
The MTA card is peeking out of
a hidden pocket beneath the larger back pocket.
(I made this back pocket a lot deeper than the one in the pattern.)
Changing the size of the webbing got me into trouble when I failed to notice that changing the width of the webbing requires changing the webbing placement. Happily, I noticed just before stitching it all in place.
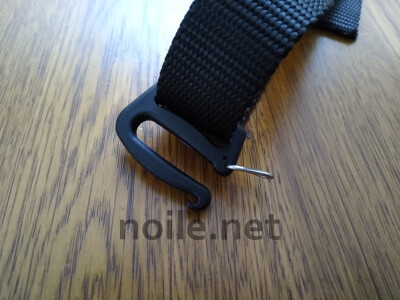
Green Pepper cleverly slides D rings onto webbing stitched to the back of the bag. Instead of doing that, I used the slide buckles below — they’re sleeker than the usual hooks that accompany D rings, and make a nicer hip belt, too. The slide buckles just slip onto the attached webbing — no other hardware required.
However, I ran into another difficulty once I’d applied the zipper, and turned it to topstitch along the edge: the bulk of the curve made by the Cordura and the webbing was great enough that the Cordura rippled — in order to fix that, I had to rip the stitching from the webbing, and reapply it allowing for the additional length the fold required. Possibly the thinner, recommended, webbing wouldn’t have posed this issue?
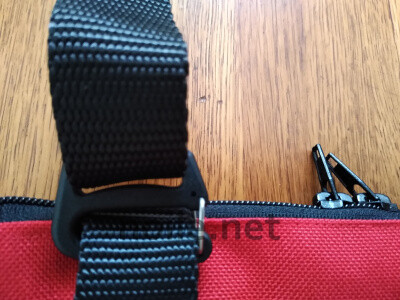
The webbing on the back of the bag is designed to accommodate a belt, and the external back outside pocket is shallow to allow access to the loops.
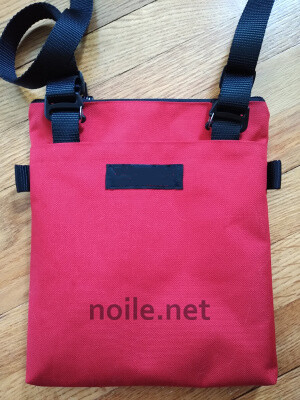 Here’s the back pocket and hardware
once the bag was finished.
Instead of relying on that system, I made the back pocket a lot deeper, and added a webbing loop at each side. When I want to wear the bag on my hips, I just switch the slide hooks into those loops.
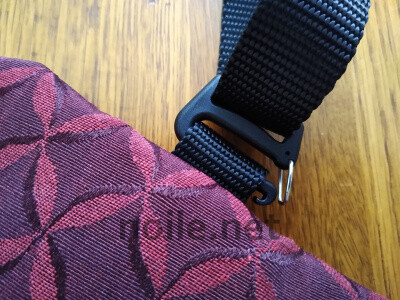
The side loops don’t look elegant on the bag, but they’re still fairly unobtrusive, and necessary since I rarely wear belts, but often want my arms and shoulders free when rambling about, as we once did, in the Before Times.
Interestingly, Green Pepper gives instructions for installing the top opening zipper using zipper-by-the-yard, which surely isn’t a very common practice among home sewers? I was working from stash, and used a double-headed purse zipper, and cut off the unneeded excess length. In either case, getting truly square corners at the top of the bag is hopeless — the zipper is too bulky.
Using a pre-measured zipper just smaller than the opening would help a lot here, even if it meant making the usable opening marginally smaller. I’m living with my choice, given that I no longer run out to buy exactly the right notion, but sewists who care a lot about that perfect corner, take note!
Regardless, making this bag was a reminder that I don’t care much for these zippers that only run across the top of a thin bag.
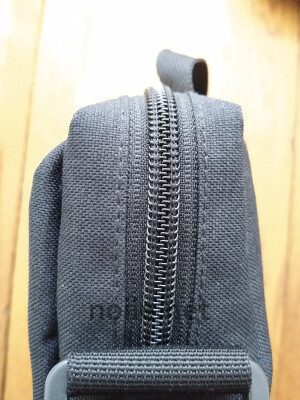
Instead, I much prefer a box installation, like the one above, where the zipper is installed between two strips of fabric, and then stitched to the sides of a bag. That’s a cleaner, easier installation, and also helps to square the bag — and makes it easier to use.
In fairness, though, the Full Moon pattern is a lot faster to make up because there is no boxing at the side seam (the bag is just shaped by stitching across folded triangles at the bottom edge), and it is meant as a small, minimalist bag. It’s a fine pattern for what it is — my own general preferences aside!
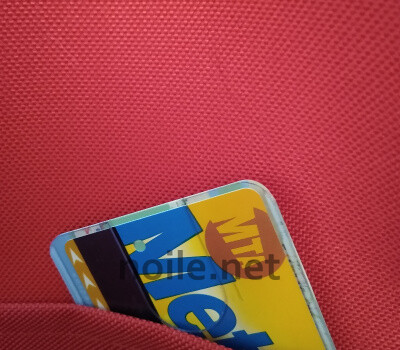
Per my usual practice — and in spite of the fact that I’m not likely to see a subway or a train for another year or so — I added a secret transport card pocket behind the back external pocket. I like being able to get to my card without having to open my bag, and being able to replace it easily while on the run to wherever.
The pattern allows for one rather small, zippered, internal pocket. There was no way that was going to be useful for me, especially since the zipper was quite short, and set into the pocket, making the opening super-small.
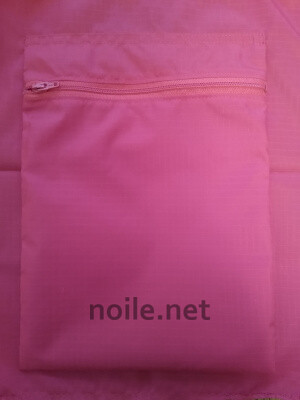
I failed to stitch the lower edge
of the pocket to the lining until after the bag was finished.
Don’t do this — it’s a pain to do later, and if you don’t,
every time you use the pocket, it will pull up and flop all over the place.
Instead, I ran the zipper across the entire top edge of my re-drafted pocket, and made it deep enough to hold either my wallet, my huge phone, or both. And I made another, open, pocket on the other side of the bag lining, for my e-reader or other miscellaneous stuff.
Green Pepper doesn’t remind the sewist to anchor the lining, itself, inside the bag, to the inside of the exterior. This is a major pain! But it’s also necessary, since, as with the flopping pocket above, otherwise the lining will follow whatever you remove from your bag, and drive you mad. Just a few quick stitches at each lower corner does the trick.
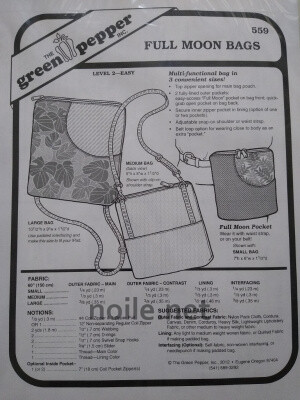
All in all, it’s a terrific pattern, and would be very quick to make, providing you didn’t make any changes! (And even with my changes and mis-steps, I was able to make mine in less than a day.)
