I made a bag (quite a while ago, actually):
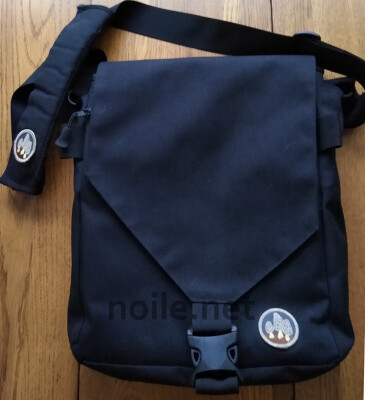
It’s a copy of one I saw online. I didn’t buy the commercial one because, as designed, it didn’t have features I knew I’d want, but I loved the look of it, and, well, the adventure began.
But, before I write about my experience, a couple of notes:
No. 1 — Let me say this: Do not attempt to make this bag! If you love the idea, head over to TomBihn.com and spend the eminently reasonable sum of $75 or so (USD) for the beautifully made, totally practical USA-made inspiration, The Medium Cafe Bag. You’ll love it, and save yourself a fortune in time and dollars.
I figure mine cost $500 (USD), at $10/hour for my labor — which, I assure you, is a lot less than my labor is worth. And that’s only labor: Sourcing materials isn’t easy, and they aren’t cheap, either. And making my own pattern took a massive amount of time. Bihn’s bags are a smart buy!
(See you when you get back — Bihn’s site is truly drool-worthy and well worth the time you won’t spend trying to make your own bag! Look at those color choices!)
No. 2 — Don’t ask me for a pattern. There isn’t one; I winged it. Even if there were, I wouldn’t share it. Copying certain aspects of a product for a single iteration for personal use is just fine; selling a copy, or the means to make one just isn’t. So don’t ask!
But on to my bag: I’d have gone for the Tom Bihn version in a heartbeat, except that I’ve been making and modifying my own luggage for decades. It’s rare for me to leave a retail bag purchase unaltered; there’s always something I “need” to add, or just want to modify. I’d reached the point where I wanted to make a bag with all. the. features. This is that bag.
Based on the theory that there’s no way to have too many zippered pockets in anything, I added one under the front flap:
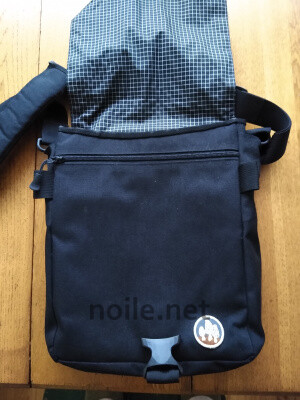
The webbing “wings” at the sides just below the opening
are so that I can move the straps, or add accessories.
The outer material is a 1000 denier (I think) Cordura, and the lining is a heavy corded ripstop. Since I love making bags, I usually have both of these fabrics around, and just pull from stash when the mood strikes. That’s helpful, since, as noted, both are sometimes hard to source. Padding for the shoulder pad was cannibalized from an unused dense foam pillow.
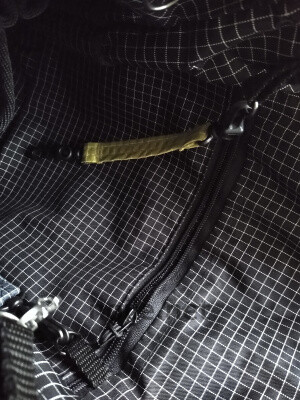
The interior is where I really go bonkers. There’s another zipper pocket, and there are loops and clips everywhere (this is an open bag, and I don’t like to leave anything to chance — anything inside needs to be tied down).
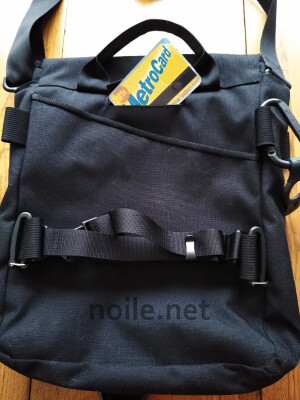
Since I have trouble with my shoulders and arms sometimes, I added a removable waist strap to the back.
Uh, yes, that’s cat fuzz. Tom Bihn recommends a different weight of Cordura if you have pets. I didn’t have it around, so I didn’t use it for my bag. Sigh.
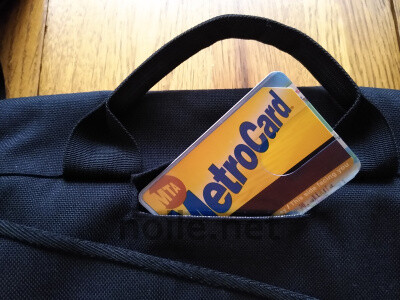
I padded the handle by folding the wide webbing over, inserting padding, and stitching it up down to about two inches from the seam. I really like having a grab handle on shoulder bags and backpacks.
Every bag I’ve ever made that had any chance of being used in a city has a transit card pocket at the back. This one has a little flap covering it, which you can see in the image above.
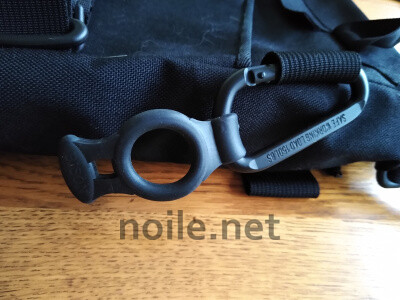
Since it’s not particularly easy to grab a water bottle out of a flapped bag, I attached a carabiner clip with a water bottle loop through one of my accessory tabs.
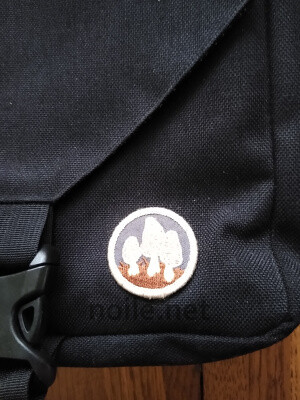
And, naturally, I added an embroidered patch from diy.org — fungi, in this case. There’s one on a corner of the bag, and one on the shoulder strap pad.
Building this bag was a thrilling experience, and I’m really happy with the way it turned out. But, ironically, I also learned that I really don’t like using bags with front flaps. I just don’t!
That flap just gets in my way . . . and, truth be told, I’d always choose to have a completely enclosed compartment, too, rather than an open one, even under a flap. (Must be that zipper fetish!) Live and learn, eh? Isn’t that what experiencing new things is all about?
Here’s the list of features or changes I made or added to the basic bag, none of which would have been easy to implement without starting from scratch:
1. Made the strap removable, not sewn-on;
2. Hid the hardware, so it looks sewn-on, and the hooks aren’t easily accessible when I’ve strapped the bag to a chair (for instance);
3. Padded the handle;
4.Added tabs on the sides so that I can used the strap to turn the bag into a backpack;
5.Added tabs for a removable waist strap to support the bag if biking, or if it’s extra heavy;
6. Made an extra deep zippered wallet pocket, and a second one below it to store the waist strap and the triangle rings for the backpack feature, as well as the collapsed water bottle sleeve;
7. Made a transit pass pocket beneath the handle in the top back of the bag;
8. Added tabs to both sides of the bag so that I can move straps around, or remove them completely (no hardware left behind);
9. Added fabric loops to the inside of the external back pocket so I have the option of clipping the phone or camera there securely (fabric loops won’t tear magazines or paper I might carry there);
10. Designed the internal pockets to suit my own purpose;
11. Customized tiny internal D-ring placements where I’d use them most;
12. Put narrow pockets in the side panels — one to drop keys into, the other for snacks or whatever;
13. Interfaced the bag to the stiffness I prefer;
14. Made the shoulder pad out of Cordura, an old dense foam pillow and a new mouse pad;
15. My front angles are reversed from the Bihn Cafe Bags — I liked this better, especially considering the way I’d reach into it;
16. Bihn’s Cafe Bags have vinyl piping in the external seams; he does that for structure, but I don’t like working with vinyl piping — and prefer the internal support from the interfacing.
The internal pockets are always tricky; I lay out what I want to carry, anticipating potential changes as time goes on, and then pin and fuss until I think they’re right. This is pretty laborious and frustrating, but does seem to work (for me, at least).

Wow, really impressive, great job! I am so happy you are blogging again!
Lisa! How nice to hear from you! (I’m reading your blog, but can’t comment (see the “About Commenting” page. I’m really enjoying it!