
Tactile lap quilts can provide various types of stimulation for those who are in lower stimulation environments, or for others who are soothed, in care residences or not, by their weight and various textures. Or at least that’s the theory!
I made six for donation to a care home — they were a welcome donation, and not a bad antidote to all the depressing Nordic Noir I sometimes watched while making them! They aren’t my finest work — I don’t have any experience in working with quilted goods — but I’m hoping “sturdy” matters more than “finesse”.
The idea of a tactile quilt is to provide a variety of touchable surfaces along with a few activities that can be done alone or with the guidance of a helper. Ideally, these quilts have just a little bit of weight to them, which makes them easier to handle, and hopefully there’s a fair amount of visual stimulation as well.
For makers, planning is the secret. Once that’s done, though, this is a great project for evenings, and very easy to do just a bit at a time. I based my lap quilts on eight-inch (20 cm) squares, and sewed using 3/8th inch seams. I used this template, drawn on an IKEA cutting board and cut out with ordinary scissors, to outline the squares on the different fabrics. A quick zip around with the chalk marker, and my base squares were quickly and easily cut out.
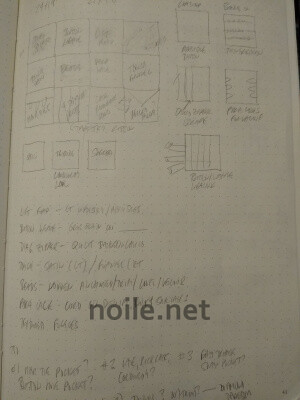
I spent a lot of time with the plan, referring regularly to several websites, and changing things up as it all began to fit together. Though the planning was laborious, it was also a lot of fun –the best kind of puzzle! Once the plan was finished, I tackled the hard part: sourcing and organizing the bits and pieces, and adapting my scheme as I went through my stash. Since these are Covid times, I wasn’t able to go out to buy the bits and pieces I needed, so I used the guidelines I found and adapted them according to what I had on hand.
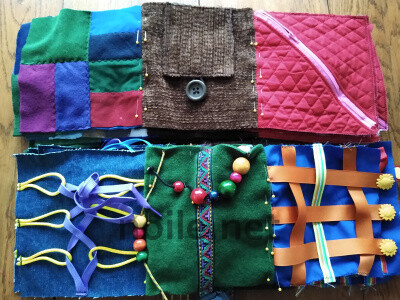
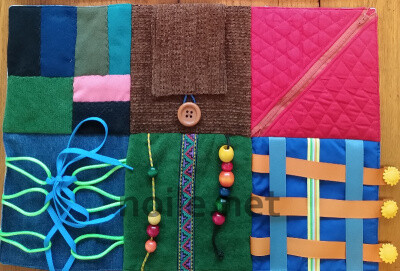
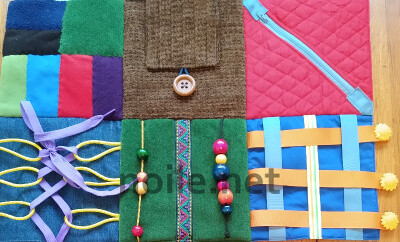
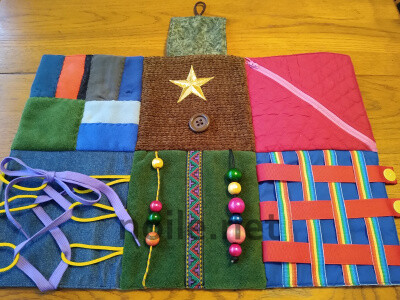
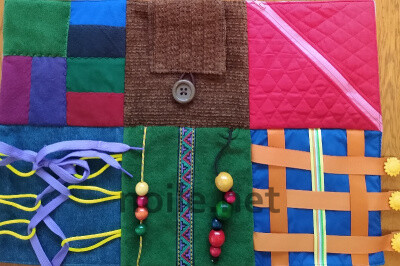
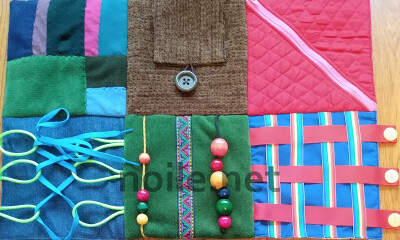
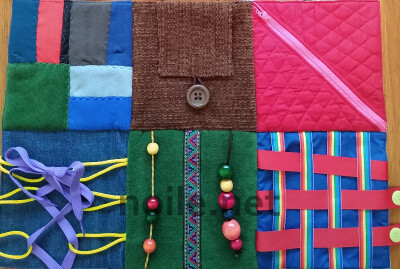
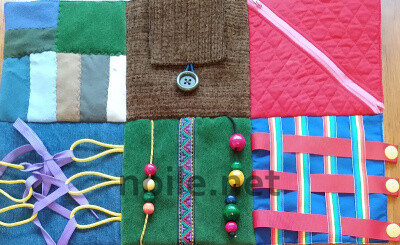
Each of my lap quilts has six squares. Above, from the upper left, clockwise: different textures and colors, just to see and touch; an upholstery-like fabric with a button flap; a zipper to open and close set into quilted fabric (with an actual pocket behind it); ribbons to weave, with buttons to help grip and add interest; beads on a fixed string and on a dangling one on top of soft polar fleece and an embroidered band; paracord loops with a broad lacing ribbon made from athletic shoelaces.
I laid everything out as I gathered the notions, and cut and prepared all the additional pieces before beginning to assemble the squares. This meant sewing buttons on the ribbons, making the flaps and button loops, burning the edges of the paracord, and so on.
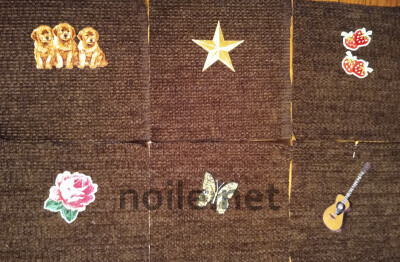
The squares are pretty self-explanatory, but my favorite is one you can’t see in most of these images. Beneath each flap and giant button on the brown upholstery-like square is an applique:
There are the six different appliques, culled from a long-term collection that I knew would come in handy some day. I lined the flaps with a botanical print, and used hair ties for the closure loops, figuring that they would be easy to manipulate — which is also why the buttons are so big.
I put all the bits in a box with the unused backing squares, and just pulled out what I needed as I worked. This assembly line approach was surprisingly efficient, and meant that I never had to stop to make or find a part I’d forgotten. I dedicated an old cookie tin for completed squares, and a drawer in my sewing storage for whichever set I was working on at any given time.
The patchwork square is backed with thin cotton for stability, and the zipper square has a bright cotton backing, facing front, so that it forms a real pocket, and gives a bright visual reward when the zip is opened.
Doing each type of square all at once was the only way I could stay sane, and organizing all the pieces before beginning to sew was a huge help — and kept frustration to a minimum during what was a very manageable, but very lengthy, construction process.
Once all the squares were assembled, I sewed them together, and backed the top with a thin layer of batting for a bit of heft and stability.
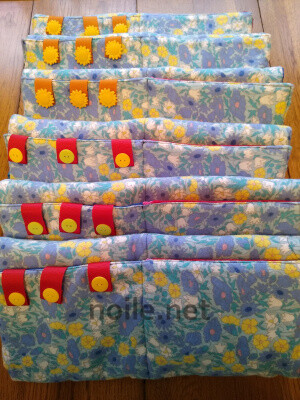
Then I lined the quilt with a nice brushed flannel — a deliberate choice because the nap helps to keep the quilt in place on a lap.
Because I had no convenient way to acquire binding, and not enough cotton to make it myself, I simply turned and stitched the top and lining. Then I quilted along the seam lines between the squares to secure the flannel lining to the top.
I would probably have made some different choices if the Covid limitations hadn’t been operative, but overall I was happy with the end result. Naturally, though, I already have a short list of things I know I’ll do differently next time, and I’m hoping to get feedback from the home so that the next batch can meet the residents’ needs and wishes best.
Next time:
— I used a thin cotton for under the weaving ribbons; that was a mistake. A heavier cotton twill would be a better choice, and would be more interesting to see and touch.
— The laces are synthetic, and I’m concerned they won’t hold up well. I’ll look for cotton, and hope the colors are as bright.
— Plastic beads might be a better choice, if really nice ones can be sourced.
Using the 8 inch/20.3 cm template, and 3/8ths inch/1 cm seams, my quilts measured about 15 1/2inches by 22.5 inches (or 39 cm by 57 cm) when finished. This seemed like a manageable size not only for laps — allowing access to all the squares — but also a good size for putting on a table if someone wanted to use it that way.
If you’re thinking of making your own tactile/fidget quilts, a good place to start for internet inspiration is Golden Carers, but you’ll find lots of ideas once you search. Golden Carers reminds people that dementia patients (and sometimes others) need supervision when using lap quilts; it’s also important to keep in mind that all stitching should be as sturdy as possible, especially for the extra attachments.