
It’s literally been years since I posted here, but now, in the middle of Pandemic 2020, there’s been time to clean things up and re-start. And what better post to begin anew with than Klum House‘s Maywood Totepack? It might be coffee time — this is a loooong post!
Sheltering-in-place, for nearly five months now (as of this writing) has meant sewing from stash. A lifetime of bad habits has left me well-prepared for this aspect of dealing with Covid-19, and when I saw the Maywood pattern, I reached for my substantial supply of Cordura and went to town.
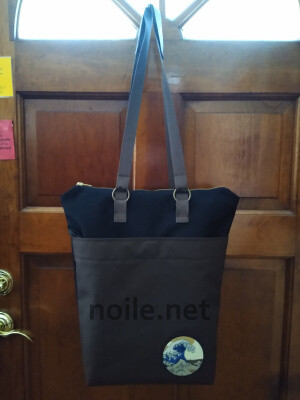
Using this pattern was a joy — it’s really well-thought-out, carefully drafted, and the instructions are clear and understandable. And there’s so much “clever” built-in! The neatest feature lies in the strap design; one tug up, and you’ve got a tote, no fuss. One tug out, and you’ve got a backpack, ditto. And the clean lines are lovely . . . this is the nicest-looking “totepack” ever!
Much of the very polished look of the Maywood is owed to the leather straps; my bag lacks some of the élan of Maywoods made strictly as designed. When I chose not to use leather straps, I gave up any claim to that more upscale, sophisticated look. And using webbing also meant that there was a huge amount of extra work for me as I figured out the strap requirements, and how to use my own hardware. But I’m still very happy with the result.
Klum House also offered the most useful top-stitching tip ever: they suggest using two strands of standard thread through a size 16 needle instead of that horrid thread sold specifically for top-stitching. This doesn’t give quite as thick a line as the real stuff, but, on the other hand, unlike using the real stuff, this method was completely and utterly trouble-free. And, I’d say, looks great!
So what did I do? These are the changes I made:
- figured out how to anchor my straps
- calculated lengths for my straps, and how to accommodate the ways I’d have to anchor them since they were stitched on, not riveted
- planned my own inner pockets, including one for a small water bottle and/or equally small lunch
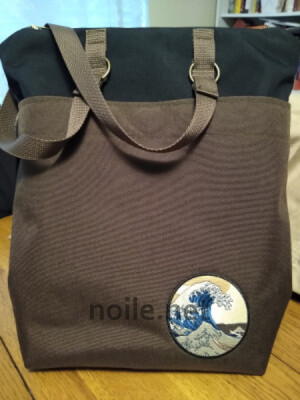
- used 1000 denier Cordura instead of waxed canvas
- interfaced with thin thermolam-type stiffening so that the bag would keep its shape
- added hooks and d-rings inside for practicality and security
- added a hidden outside pocket for a transit pass
- added a hook to the outside so that the zipper could be “locked” close when the bag was worn in backpack mode
- used a metal zipper which required a little finagling
- made the straps adjustable for summer or winter use
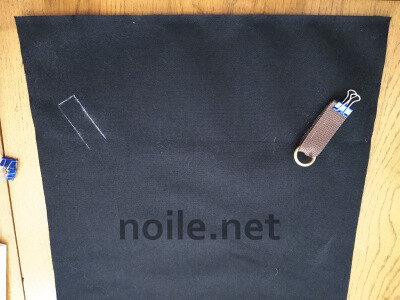
I used clips to hold together each section I was working on, and used a fine chalk marker to draw the placement for the anchor straps. If you’re using rivets, the pattern is well-marked, and you won’t have to fuss with this step.
Instead of a magnetic snap, I sewed a magnet into to the top front pocket of the bag. Inside the large pocket I put the small pocket for a transit pass, and added a hook on one side (for keys and to act as a zipper lock) and, on the other side, a small d-ring for whatever else I might want to secure in the open front pocket.
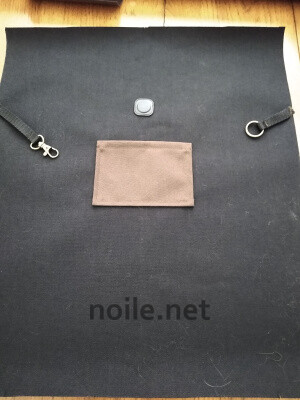
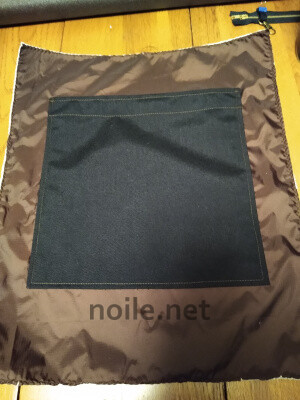
The pattern calls for a large inner front pocket, which I made of my main Cordura color. This pocket — it’s large enough to hold a laptop — doesn’t go all the way to the bottom of the bag, which is a neat feature if you’re ever anywhere near someone who might slash the bottom of your bag — whatever’s in that pocket isn’t going to automatically fall out of the bottom, giving you a little extra security. (It happened to an acquaintance — a slash right through a heavy leather Coach shoulder bag. But I acknowledge that this is an unusual occurrence!)
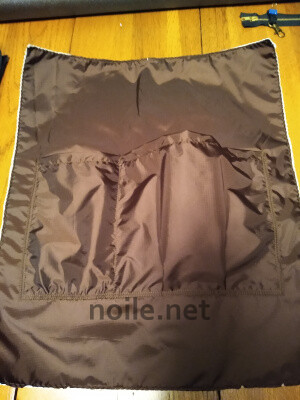
Then I added internal pockets made from the same ripstop as my lining, purpose fit for the way I knew I’d use them. However, I completely miscalculated here, and later added twill tape, with a drawstring and a dongle, along the top edge. The right side pocket gapped too much to be useful with my favorite water bottles. I should have paid a bit more attention; usually I’m a lot more careful with my pocket design. Let this be a lesson!
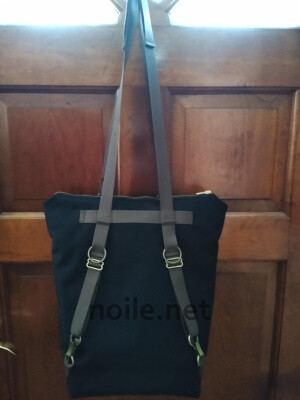
The Maywood has a strap across the back which works as a handle, but behind which the rear straps pass. There’s a small strap of leather — or, in my case, webbing — sewn over the top of the shoulder straps, on which a bit of hardware is put. D-rings, or, in my case, brass rings, stop the straps from pulling too far when in tote mode.
The handle is out-of-the-way, but, well, handy, when you just want to grab the bag quickly.
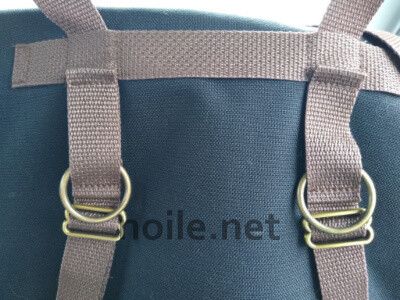
On my Maywood, the folded edge of the webbing acts as a stopper, and I probably didn’t need the ring — but I liked the look, and thought the rings might make a good spot to clip a shopping bag or whatever.
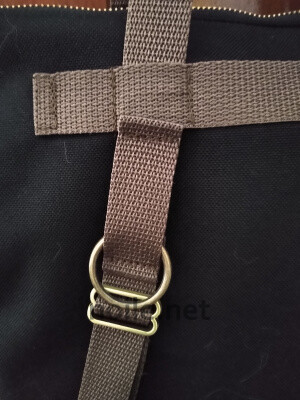
As designed, the Maywood uses buckles to adjust the leather straps. I achieved the same end by using the brass slider you can see in the image above, just under the brass ring.
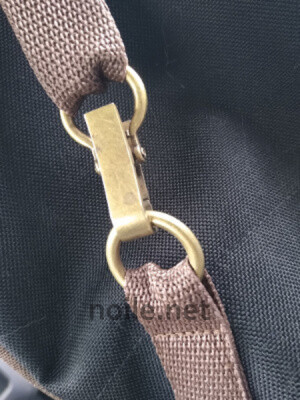
I bought the snap hooks quite a while ago while on a trip to New York, from Pacific Trimming (it’s Ring Snap Style 140219) without knowing what I’d use them for, or even if they would work on a backpack. I was pretty thrilled to have something different to use on my Maywood. It’s a distinctive touch this totepack deserves!
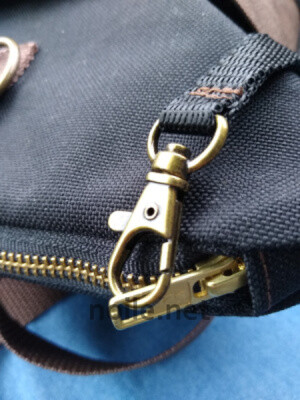
The upper corners of my bag don’t resemble the original at all; the brass zipper I had in stash was the wrong size, and a trip to NYC during which I could get it trimmed was out of the question. So I cut a bit of Cordura and popped it over the lacerated zipper end my pliers produced. On the tab end of the zipper, I added a “zipper garage” meant to house the zipper tab. I miscalculated that, though, and it’s not really useful as a place to stash the tab.

The end result is that the top of my bag is angled at each end — a look I rather like!
The snap hook here is something I often add to my bags — it provides a little more security on a backpack, and, at the least, suggests that getting into the bag without me noticing might be tricky. When not in use, the hook drops into the front pocket.
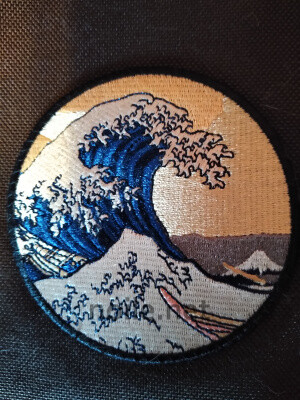
I gratuitously added this embroidered patch (The Great Wave, after Katsushika Hokusai, bought at The Metropolitian Museum of Art, New York) because I could!
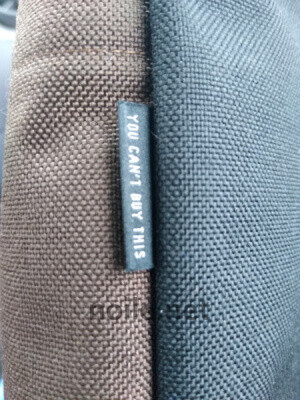
And this silly little, discreet, tag from Kylie and The Machine (Australian, but Etsy is a good source). Because you can’t buy it; you have to make your own!
Do you have to be a bag fiend (like me!) to make a Maywood? I’d say no, but it’s a good idea to know your way around a sewing machine, and to expect that there will be some manipulation challenges posed either by the waxed canvas Klum House recommends, or another thickish fabric like my Cordura. Given that experience, I suspect that nearly anyone willing to go slowly and carefully could make this bag. Bonus points for simplicity: if you choose to use leather straps, every single connection point is marked for you (which isn’t the case if you use webbing as I did).