
This bag was a real disappointment when I first made it, and I put it aside while I decided what to do about the failure. Would I try to fix it? Cannibalize it for parts? Use it anyway and hate it every minute?
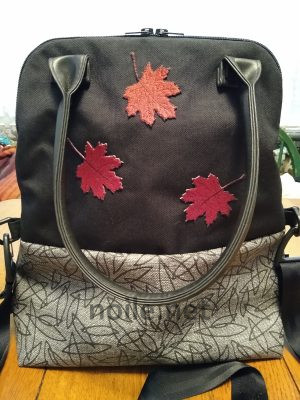
Photo of a bag made of black Cordura (top) and a gray and
black abstract print vinyl (bottom). The bag has three red
appliqued maple leaves stitched on the Cordura, and long
vinyl shoulder straps. The bottom third of the bag is sagging.
First I had to figure out what I didn´t like about it. It wasn´t the appliqued leaves (though I considered removing them) — it was the waaaay too floppy nature of the lower part of the bag. My bad — this was the first time I´d worked with a heavy vinyl, and I failed to interface it.
Luckily for me, Mr. Noile happened by as I was preparing to eviscerate my unfortunate bag. He suggested adding a firm external interfacing (an extra-facing?) to the inside to support it at the bottom. Brilliant!
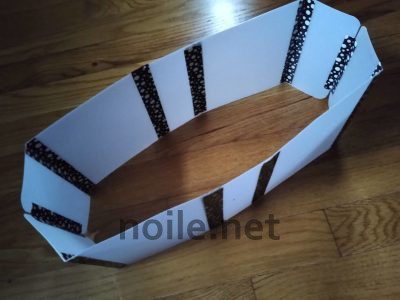
Photo of cobbled together light plastic pieces joined
by thin strips of black and white polka-dot tape. The height is
the same as the vinyl bottom of the bag.
I grabbed one of my thin, super-flexible, cutting boards, chopped it up, and taped it together as I fit it to the bag. The process took a couple of tries, largely because turning the finished bag right side out was a real pain. Eventually, I got it, though, and then covered the plastic with mesh, tacked it to the inside of the bag, and ended up with a poorly planned, but far more usable, bag. What a difference!
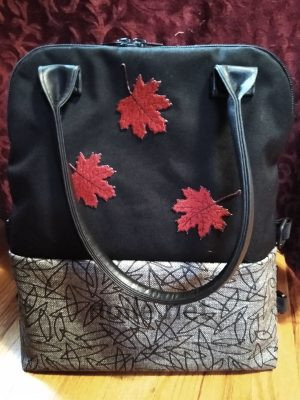
Photo of a two-tone carpet-style bag made of black Cordura
and gray and black abstract print vinyl. The vinyl lower third of
the bag is well-supported by an light internal plastic fitting.
The pattern is the DIY Foldover Bag from Sewing Times. I was thrilled to find it because there I wanted a kind of a carpet-bag sort of container for day trips when I´d have noise-cancelling ear phones, a spot of lunch, etc. with me. This classic shape is exactly what I was looking for! Sadly, I don´t have much in the way of notes from the construction, but, in general, I think the pattern is well thought-out, and well-executed. And it´s a free download!
I did make changes, per my usual habits. I added a large D ring to the back so that I could thread the straps through backpack-style.
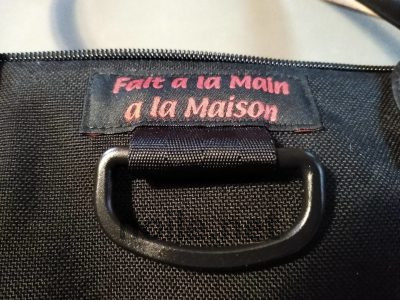
Photo of the back side of a carpet bag showing a large D ring attached
beneath a black and red label reading ´Fait a la main a la maison´
(accents missing; US label maker).
They´re hard to see here, but I added my usual key loops to the lining (right and left at the tops of the pockets). Being able to clip things in place makes for better organization in my world.
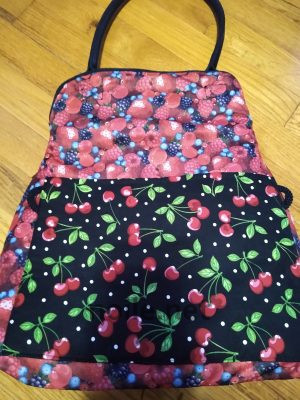
Interior of a carpet-bag showing a colorful and realistic berry print
lining of raspberries, blackberries and blueberries. A set of large
pockets cover most of the side of the bag; they are made from a
print of red cherries and green leaves printed on a black background.
Two black cord loops are barely visible at the top left and right of the pockets.
Since I was using stash, I didn´t quite have enough of the berry fabric to do the pockets as well as the lining, so I made up the difference with a cherry print.
Instead of sewing up the lining I inserted a zipper — I have way too many in stash, so this was an easy call — which saved me the bother of trying to close up an open seam in the finished bag. I just zipped it shut!
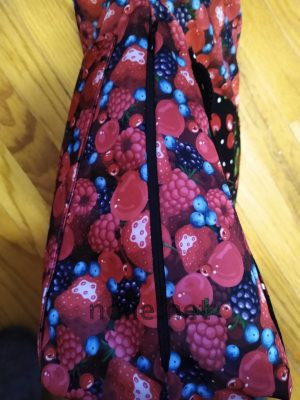
Photo of a berry-print lining of raspberries, blackberries and
blueberries, with a black zipper running up the side seam.
I also changed the length of the opening zipper because I wanted the bag to open as far as possible. Mine runs the full length of the contrast top. And I added a zipper ´garage´ to the external zipper on the back. The handles were from stash, too, having been removed from a discarded tote years ago.
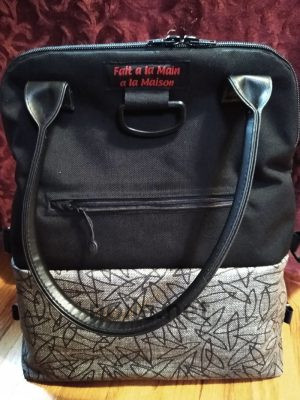
Photo of the back of a black Cordura carpet-bag with a gray and black
abstract print bottom third. There is a large D ring at center top, a
black vinyl handle folded down, and an external zipper pocket
above the vinyl. There is a small zipper ´garage´ to the left of the
zipper opening.
As I mentioned above, this is the first time I´ve sewn with a heavy vinyl. I knew to use a longer stitch — a short stitch in vinyl can amount to perforations, and the vinyl neatly separating along the line! As heavy as it is, though, this vinyl — irresistible because of the print — still needed support in the form of a rather firm interfacing. That´s one mistake I won´t make again!
That cheery lining material was a royal pain to sew; it´s a synthetic bonded to a knit base and it stretched. Ugh. Most of my frustrations in constructing this bag had to do with poor choices I made regarding materials.
The pattern itself is terrific, and you´ll find a ton of great bag patterns on the Sewing Times website, but it looks as if most of the patterns and instructions are video-dependent. This is a huge problem for me — not uniquely, but unusually — as I can´t follow video at all effectively. This meant that I had to watch frame-by-frame, and transcribe the instructions laboriously before I could start to sew. Sigh. In spite of that extra bother, I was very, very happy to find the pattern, and delighted that I didn´t have to draft it myself!