
This is one of those garments I really should have drafted on my own. It looks simple, and it is. But Burda offered a few details I really coveted, and wasn’t sure I could get right without a lot of experimentation, so I bought the pattern.
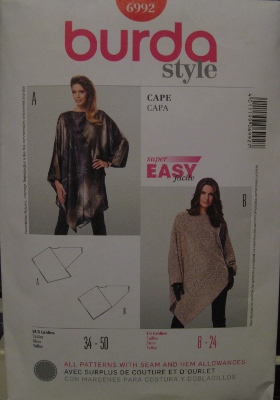
I love the bat-wing sleeve (it’s on the left in the photo below). I wear mine reversed (and that’s how it is on my dummy, too) since I am right-handed and would rather have the fitted sleeve on my dominant arm. There’s an opening in the drape on the right for the left arm of the wearer, but no sleeve, and it’s this asymmetry that I found so appealing. There are just two pattern pieces: a rectangle, which, optionally, can have a longer, slanted, hem, and a triangular piece that forms the sleeve for the right arm.
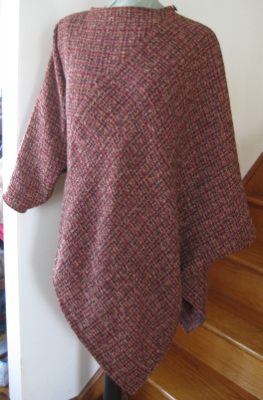
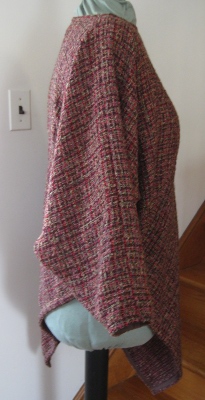
Here’s a side view of the sleeve. I really like the geometry of this wrap, and the added interest from the angled hem. On the right, the garment ends at the high hip, but dips to below the knee on the other side. Or much longer: I removed several inches all around.
 There’s a drafting error or two: one set of notches does not meet up, and one side seam is longer, not intentionally, and doesn’t end where its mate does. Correcting this is simple; just lop off the longer edge. (This is a different matter than the intentional, extra, length of View A.) That’s very sloppy, especially considering how simple this pattern is in the first place.
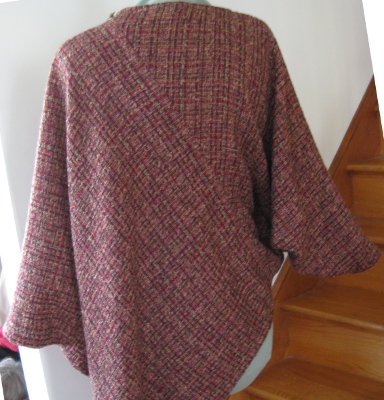
Because of the way the sleeve falls, the back looks quite a bit different from the front. Eventually, I’ll try to get some pictures up showing the cape worn; I’m not sure these really do it justice.
One thing to keep in mind when making this pattern is this: It looks as if varied sizes are included in the envelope. In fact, there’s even a size/yardage table on the back. But this is a one-size-only pattern; close scrutiny reveals that the yardage is the same for all sizes.
I half-followed Burda’s directions, until I realized that they seemed to be complicating what was, in reality, a pretty simple project. I found the directions completely baffling — which is really ridiculous, since there’s nothing very complicated here at all.
No, Burda, one size does not fit all from size 8 to size 24 — especially if it’s an over-sized pattern to begin with!
I don’t wear the smallest Burda size, but if I’d left this pattern unaltered, I would have found it unwearable. I trimmed this baby everywhere, and raised the neckline, too, so I wouldn’t swim in it.
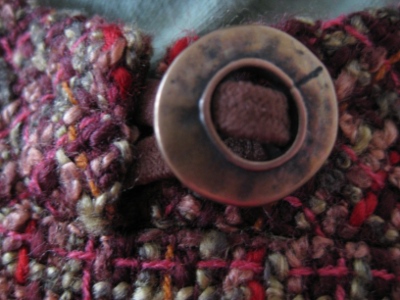
However, when I altered the neckline, the combination of the one Burda direction I followed and my alteration left me with an opening in the neck edge, on the left shoulder. Since it didn’t look terribly out of place, I could have left it. Or I could have sewn it shut, which would just have continued the seam line on the rest of the garment. Instead, I decided that a decorative button and loop were called for.
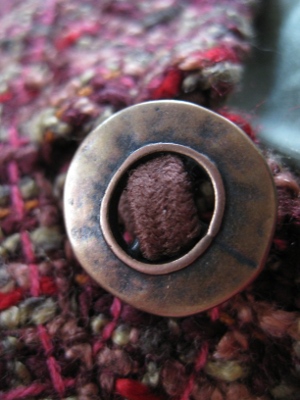
That’s a hair band, cut to size, looped around the button. (Hair accessories: Best source of colored elastic bands anywhere!) I’m not sure whose mistake this was, Burda’s or mine, but it worked out just fine.
The fabric is a bouclé that’s very similar to a silk and rayon one I love. This one has the same weave (though different colors), but is probably an acrylic blend. The texture is visually interesting (and there’s some rayon there in the bulky yarns, which are softer than the rest of the weave), but it’s ever so slightly on the stiff side. That’s probably a plus, since it’s also less fragile than my beloved silk/rayon bouclé.
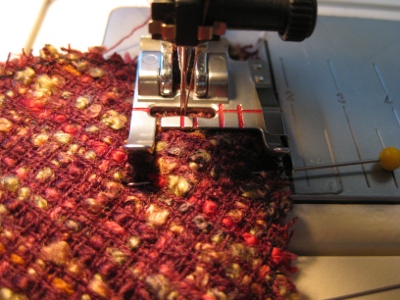
Before assembling the cape, I carefully zig-zagged all around the edges of each piece, to prevent ravelling and distortion. This probably isn’t the “right” thing to do if you’re doing couture sewing, but was a sensible thing to do for this project.
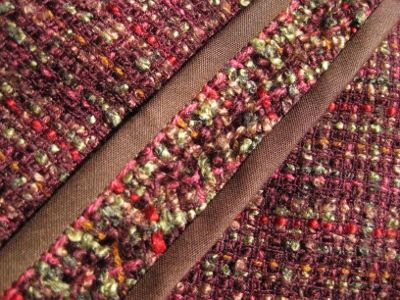
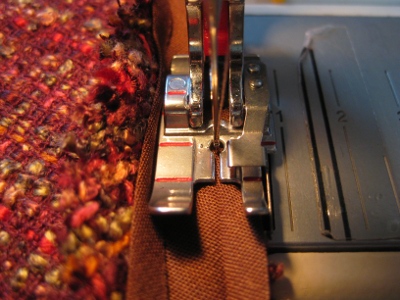
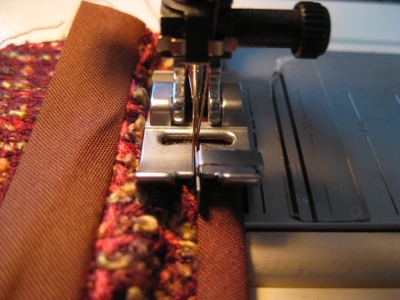
All the seams are bound with a Hong Kong finish, which lends some structural stability to a fabric that inherently has little. In order to reduce the appearance of bulk on the outside of the garment, I lightly hand-stitched the seam allowances to the body of the garment, ensuring that they would lie flat instead of bunching. For this fabric, simply pressing the seams open would have been ineffectual over the long term.
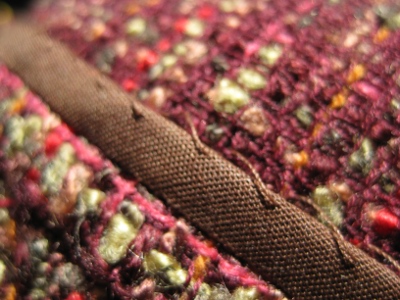
The stitches are very loose so that the seam allowance will “float” instead of pulling at the material and distorting it.
The verdict: The pattern is pretty awful, but the results quite satisfactory. I’m not sorry I bought the pattern; I just think it’s a little ridiculous that I still had to essentially re-work the whole thing in order to use it.
Feet I used to make this cape included:
the seam guide with IDT;
the quarter-inch right guide foot;
and the narrow edge foot for stitching-in-the-ditch.
I thought I’d like this cape well enough, but it turns out that I love it! However, anyone tempted to make it should be sure to check out the sizing before cutting, check the neckline (too big for me, but I suspect too small for the larger end of the size range), and beware that there is one point (marked “2” I think?) where the ends of the two pattern pieces will not meet correctly. A tissue fitting will identify all these issues, and all are easily corrected.
This is a very cool project. Your bound and catch-stitched seams are gorgeous!