
Over the weekend, my spouse and I attended a meditation class offered by the Philadelphia Buddhist Association. My top goal this year is to learn to relax, and this is one of the tools in my relaxation kit. I was a little dubious at the thought of trying meditation — let’s just say I have an intense personality — but didn’t see how it could hurt. The teacher was kind and helpful and it was a very good experience.
Most of the attendees sat on the typical zafu pillow, set on a zabuton, but I found them very uncomfortable. Our teacher suggested trying the wooden bench (below), made by a member of the Association. The legs are angled so that the bench tilts forward. It’s set with the elevated side toward the back; you tuck your knees under it, and place your seat on the top of the bench. Your knees are on a zabuton, and your tush rests on a padded cover put over the top of the bench.
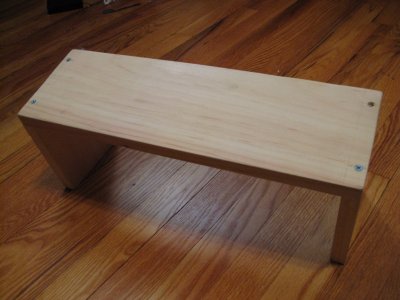
These very simple benches are made for the society by a member, and offered for a donation. It was so perfect for me that I went home with one, and immediately went to work making the pad for the bench, and a zabaton for beneath it.
Purists, you may want to stop reading here! Neither of the items I made ended up being at all traditional, but they let me use up a little bit of my stash, and allowed me to start daily meditation the next morning.
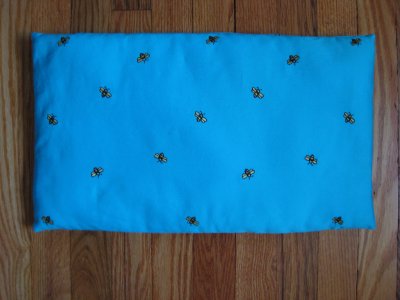
I chose a totally non-traditional fabric, a cotton-rayon blend in turquoise with embroidered bees sprinkled all over. I wanted something as bright and as inviting as my sewing room; as my spouse pointed out, feeling happy isn’t in any way incompatible with meditation! Zafu pillows are traditionally stuffed with buckwheat, which is resilient and friendly to bodily contours. For my bench pad, I chose a cotton-wool batting. It’s breathable and comfortable to sit on, and, even better, assumes body temperature within minutes of use.
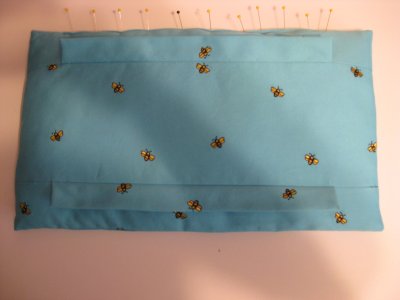
It was important to make sure that the bench pad went over the edges of the bench, so I cut the top of the cushion fabric about an inch and a half wider than the longer dimension of the bench (that includes an half-inch seam allowance) and about four inches wider than the width.
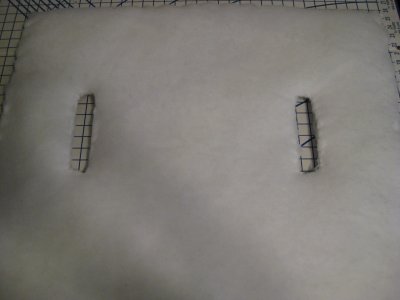
The underside of the cushion is cut in three pieces, with two inserts in the seams. I attached adhesive-backed velcro to the bottom of the bench, and sewed a matching strip to one of the inserts (the one toward the rise, or back, of the bench). Not traditional at all, but this keeps my cushion in place without distraction. I originally planned to put velcro on both inserts, but it looks as if that’s unnecessary.

The zabuton at the class were rectangular; apparently, most are square, generally about 30 inches square, like the ones in the first photo above. I liked the look of the rectangles, though, and cut mine about 30 inches by 36.
My zabuton is stuffed with many layers of polyester bat. Not so organic, but that’s what I had in my stash. Because I was concerned about the bench wobbling, I cut out all of the batting where the bench rests, and whip-stitched the edges of the batt together so that they wouldn’t slip. (I also whip-stitched the outside edges of the batting for the same reason.)
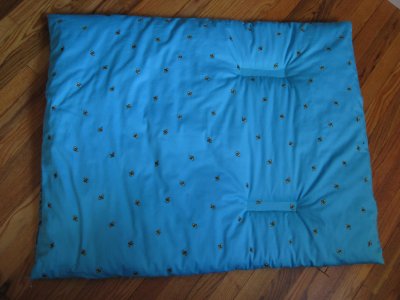
Assembling the zabuton was easy; the cover is essentially just a huge pillow case. I left most of one side open after stitching it up, and inserted my prepared batting. Then I sewed up the open seam, wrangled the whole thing under my sewing machine foot, and stitched around the cut-outs I’d prepared.
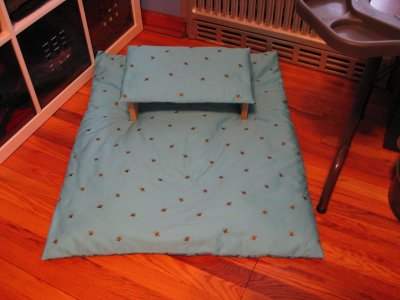
The bench and zabuton, to quote Goldilocks, are “just right”. I was sensible to cut out the slots for the bench legs; there are no stability issues as a result. My knees rest comfortably on the zabuton, and the rest of me is aligned comfortably and correctly on my padded bench.
Image of many zafu and zabuton from Zafu.net