
What could be better, for this first post at Noile.Net, than to describe my new sewing room? Over the course of the next month or so, I’ll be moving articles from my old blog to this new domain, and, of course, add new posts as I sew. But today, it’s all about my new room.
With just a little bit of work, and not too many dollars, we’ve transformed what was formerly a storage catch-all into what it was originally meant to be: a proper sewing room. Now that it’s done, I’m amazed and thrilled at how much easier it is to work in my new room.
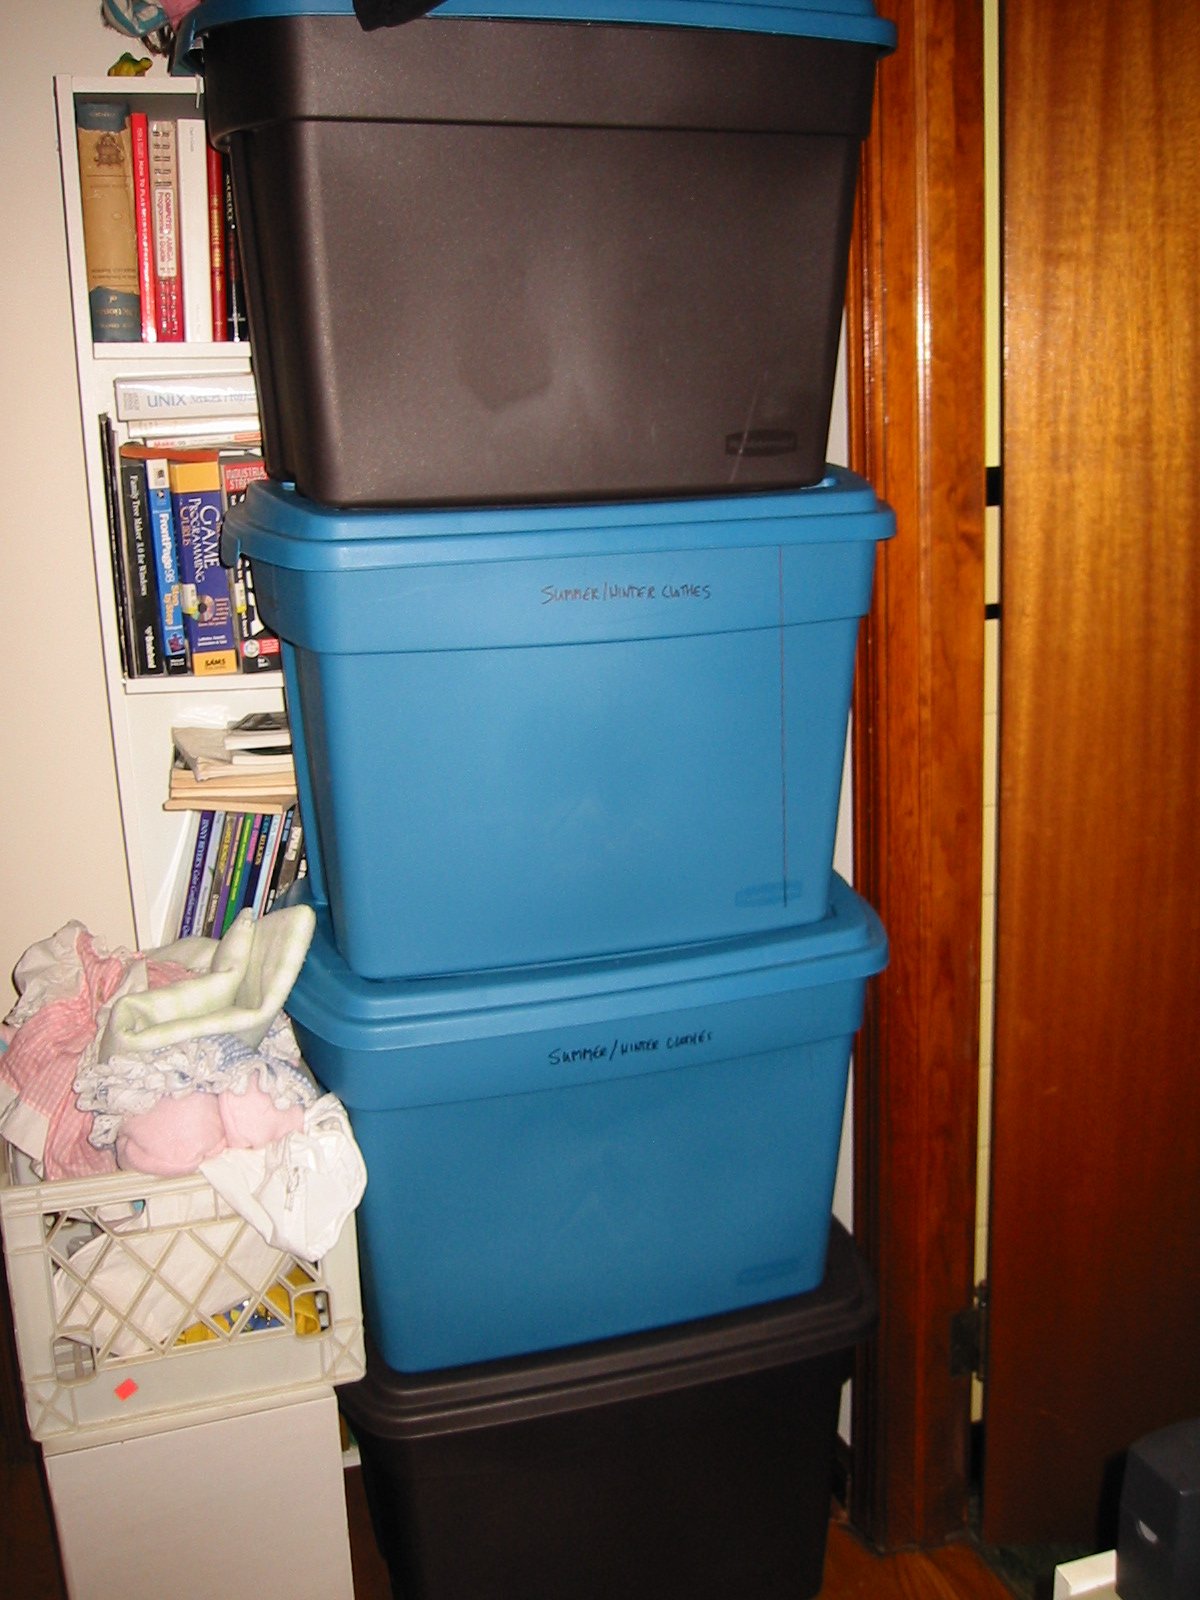 Why didn’t we do this years ago? And why were we able to do it now? Over the past few years, we’ve learned lots about goal-setting and planning — skills we have never had in any quantity (at least in our personal lives). Without a plan, my sewing room was always doomed to chaos, and to the “organization” system you see on the left. In the past decade or so, I probably spent nearly as much on opaque plastic tubs like these as we spent last week on my new room. But I got so much more for my dollars (and effort) last week. Last week, I had a plan.
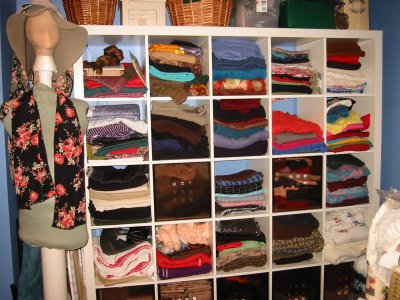 The first goal was to get my stash out where I could see it, be inspired, and know what was on hand. This Expedit “bookcase”, from IKEA ($150), was perfect for displaying yardage. I added seven Lekman boxes (at $12 a piece) to hold current patterns, scraps and smaller pieces of fabric. There’s a whole row of the Lekman boxes on the bottom of the unit in concession to the cats, and just because it seemed like a good idea.
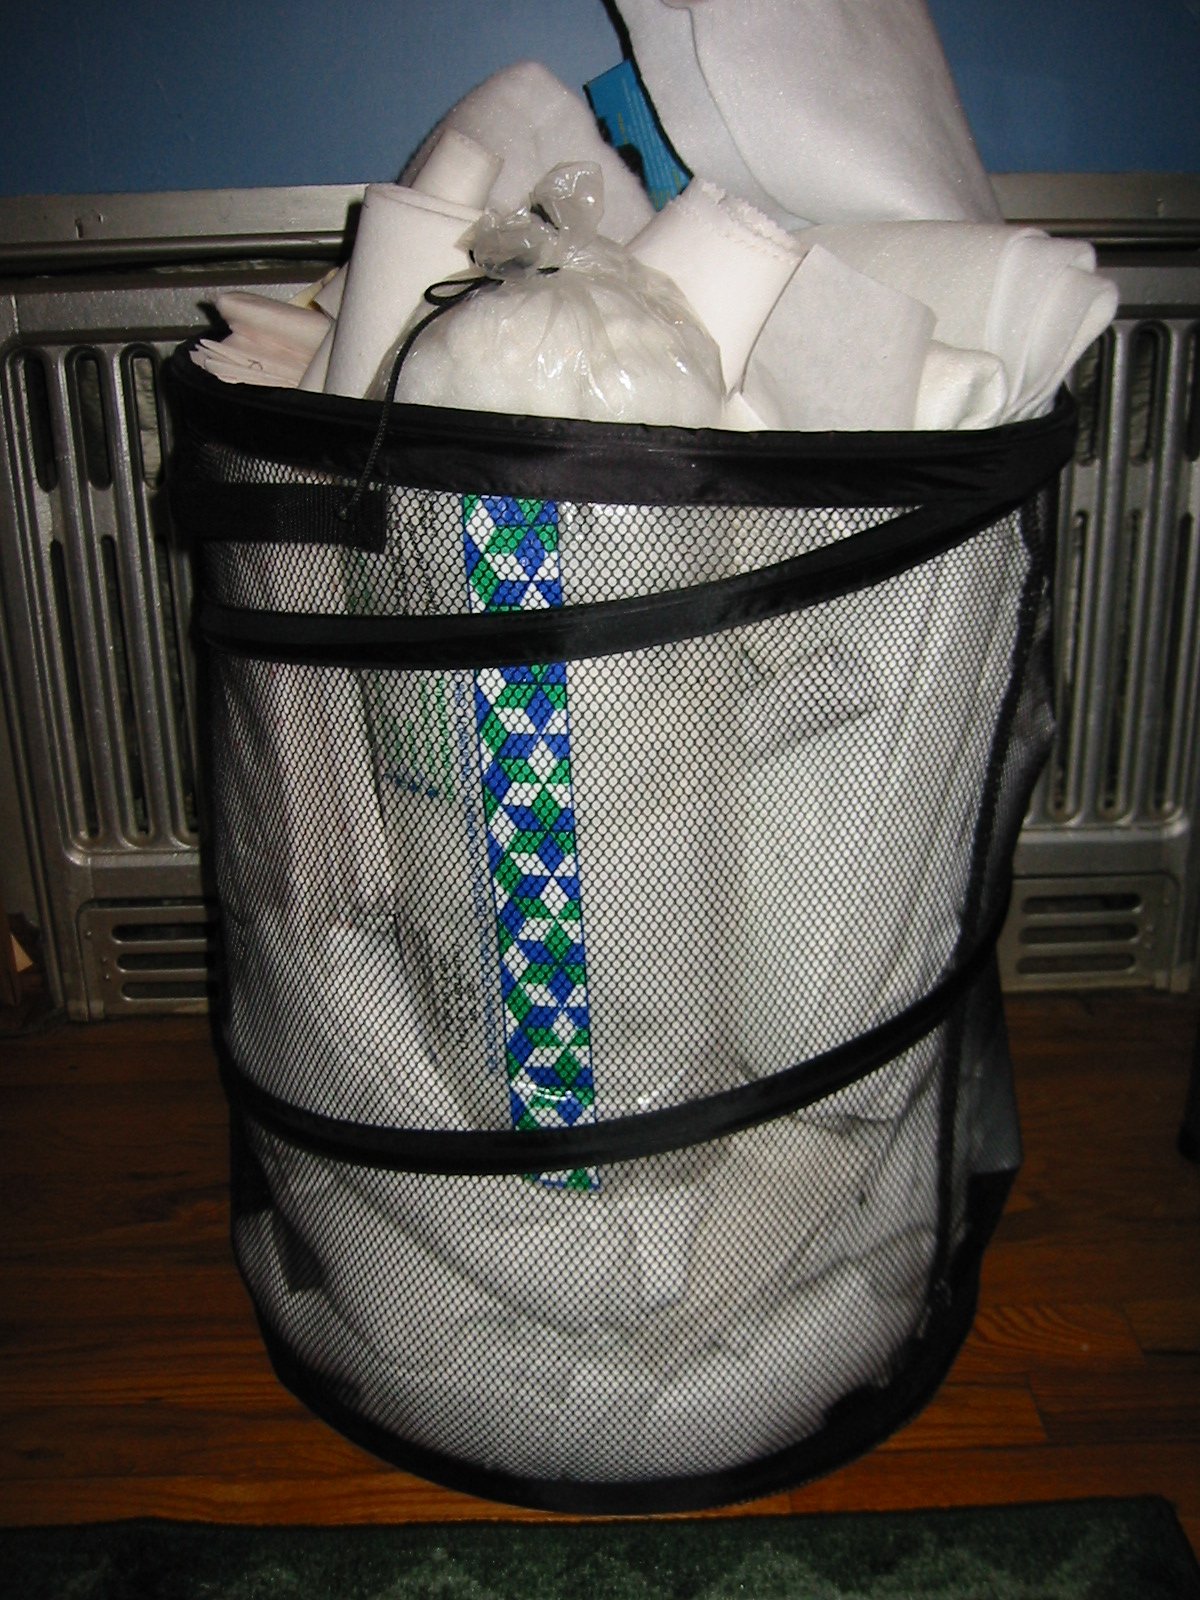 I put interfacing, batt and other items that don’t lend themselves to shelve storage in this round, mesh laundry hamper. It’s over-stuffed at the moment, but now that I know what I have, I’m expecting to see most of it disappear. The choice of this container was accidental, but inspired; there’s lots of room, and the mesh makes it easy to see anything that’s drifted to the nether regions.
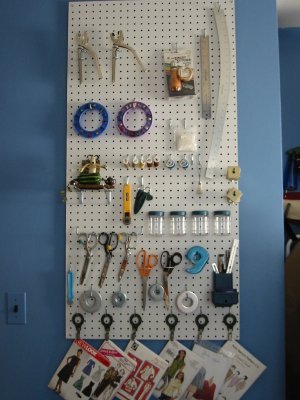 The next goal was to get the most frequently used tools out of their hiding places so that they could be used and replaced easily. This pegboard was the solution: Home Depot offered it in white (as well as the commonly found brown). They’ll cut large sheets to size for customers, but you must buy the whole sheet, which is 4 feet by 8. This pre-cut sheet was 2 feet by 4; although it wasn’t the perfect configuration, it worked fine. The pegboard, the hardware to install it, and a huge assortment of hooks (as well as several accessories you see) cost under $20.
 The patterns I’m working with are hanging from Mallen clips (3 for $2); I found them in the bathroom section at IKEA. They’ve got a rubber-like ring; there’s a peg-type gadget you can get from IKEA to hang them from, but they dangle from this peg hardware just fine and add one more bit of inspiration to the room. I’m going to enjoy changing this display as I work through my projects.
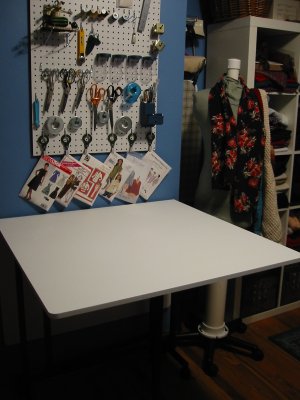 The pegboard hangs above a basic cutting table I bought at Joann ($59 — fortunately on sale last week). This is a “cheapie” version of much more expensive ones, and it’s just right for me at the moment. I’ll be writing a review of it later; overall, I’m pretty impressed with it, and it’s working well. Here it is with just one leaf unfolded; my first project in the new room is a small one. With both leaves open, there’s plenty of room for most of the projects I make; closed, it takes up very little room. Casters make moving the table and its leaves smooth and simple.
 Between the pegboard and the shelving unit are my iron and ironing board, sitting on a hanger from Joann. That was a desperation purchase, since I didn’t want to order one. It’s crude and cheaply made, and worse, uses smaller than standard screws, which weren’t included. Still, it’s doing the job until the right one comes along. There’s room below for whole bolts of fabric, or anything else bulky that doesn’t fit elsewhere. My dress form fits partly into this little nook; it’s accessible, but neatly out of the way when not needed.
 Thread storage was not a problem. I’ve been using this charming little “thread house” ever since I found it at a thrift shop many years ago. (See it closed, on the left.) Dust isn’t a major problem in most areas of the sewing room, but sometimes thread does hang around for years, and leaving it out renders it unusable if it’s not cleaned regularly. (I admit it, dusting spools of thread appeals to me not one whit.)
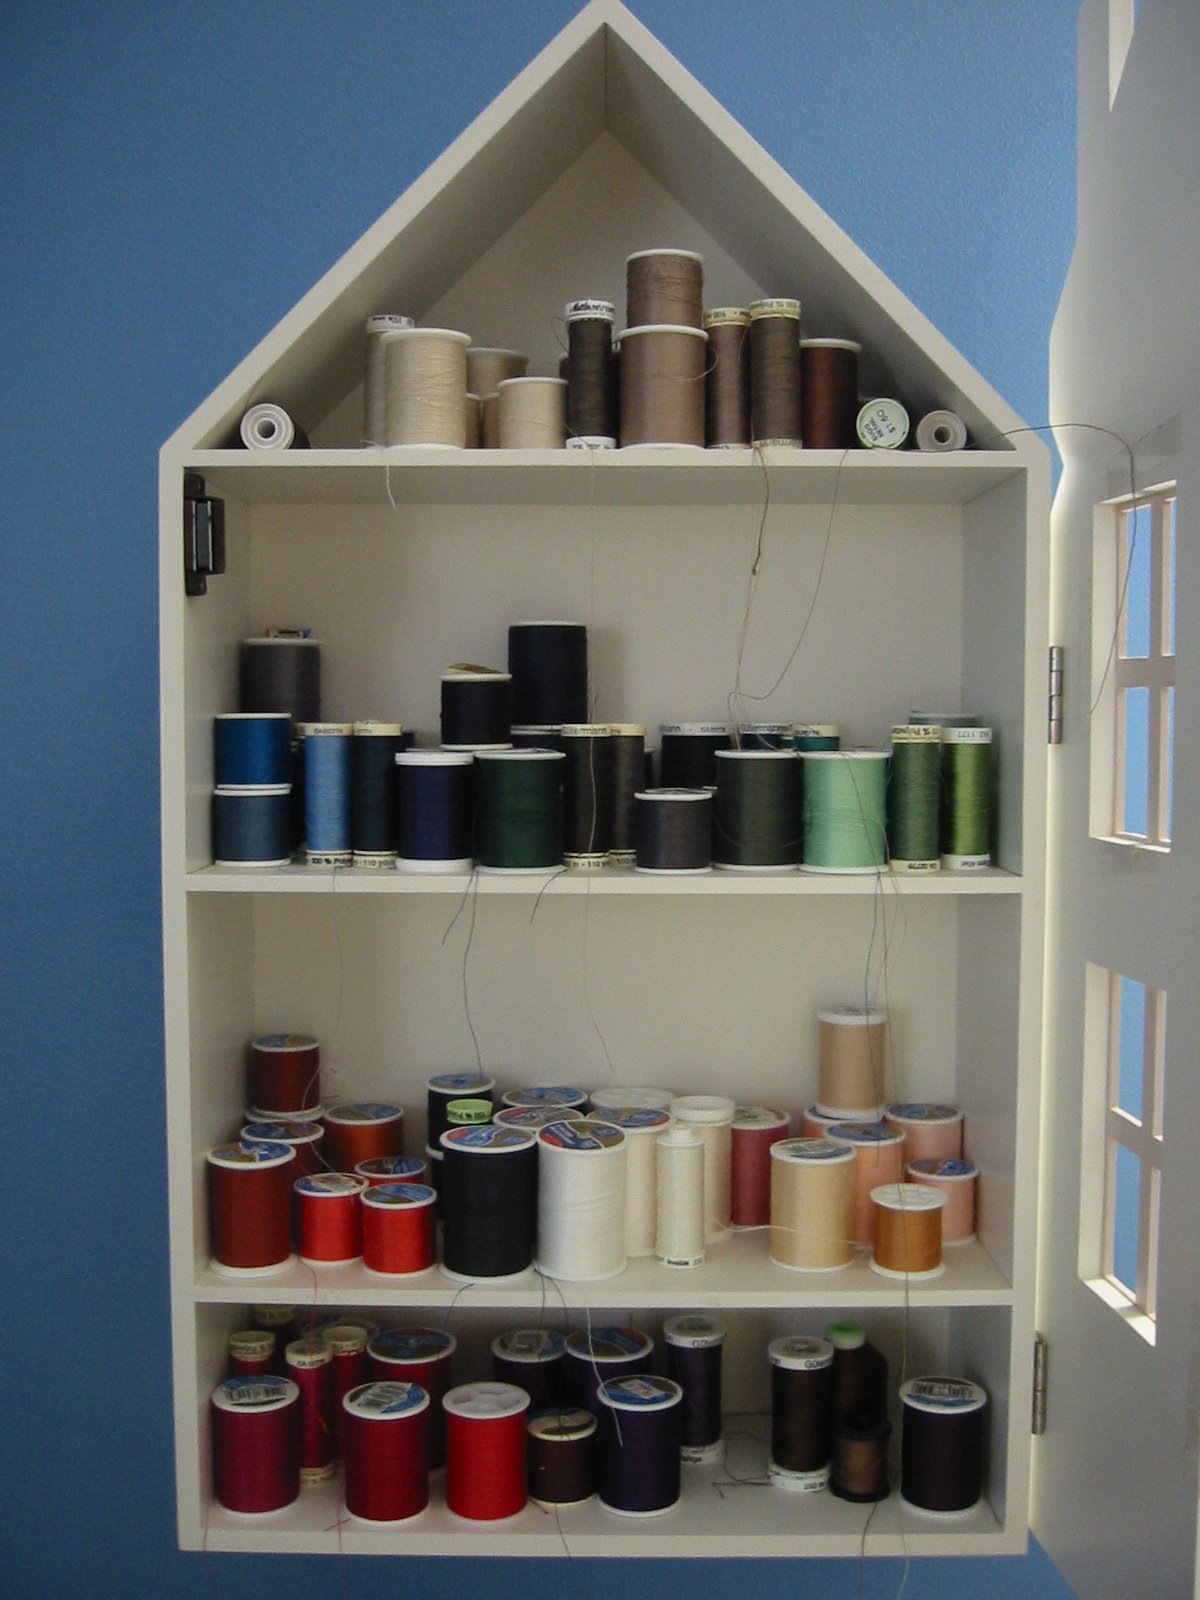 Having everything sorted by color, and completely visible, is a huge advantage, and has saved me many a last minute trip to the store. You’d think that I’d have trouble with the spools tumbling over, but it’s never been an issue. If I were really worried about it, I could string thin wires just above the shelves inside. (Thread house, open, on the right.)
My sewing table is an old folding conference table. I’m not sure it’s the best thing I could have, but it works just fine, and I’ve not yet seen anything I like better. The two machines I use most frequently fit just fine on top, and there’s enough room to do just about anything I want to.
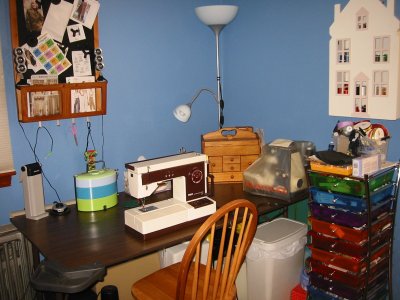
The wood organizer behind my serger holds sewing machine needles, extra pens, and pin cushions along with whatever else (not much) that doesn’t fit elsewhere. A massive surge suppressor is hidden behind it.
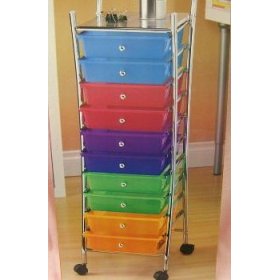
I’ve been using these rainbow organizer drawers (on the right in the picture above) for years (I got them from Costco), but this week was the first time I put absolutely everything that belonged in them in their proper places. I didn’t like this color arrangement, so I rearranged them to emphasize the array of colors a little more.
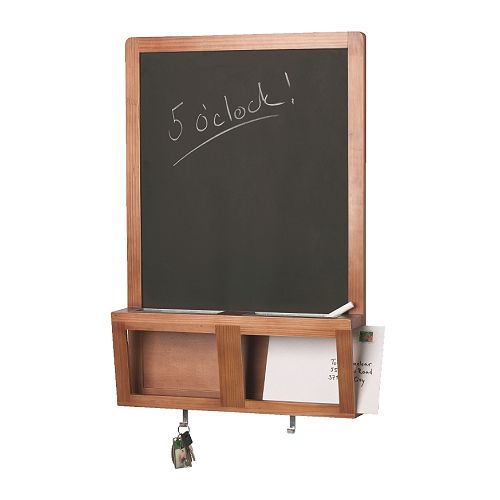 The chalkboard/organizer on the wall is Luns ($14, also IKEA). It’s a legacy item, but I think it will stay there. I post projects I’m thinking about here and keep whatever pattern(s) I’m currently working on in the front bins. There are small speakers mounted on the bins. I hang my MP3 player on one of the hooks below, and plug the speakers in — a wonderful quality-of-life add-on!
Of course, there’s an over-sized trash can under the table — with a lid, so that I’m not tossing away the wrong things.
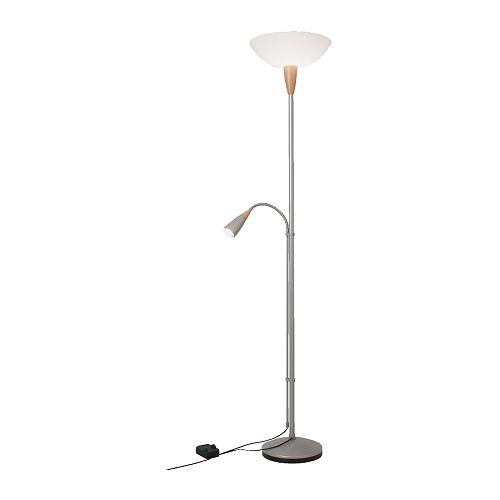
I’m not usually the whimsical type, but painting this room a bold color, and accenting it with crisp white and the “rainbow” drawers were good choices. The room is cheerful, playful and inviting. It floods with light during the day; at night the (yes, it’s IKEA) Jokel lamp, combined with the overhead light, provides plenty of illumination.Whatever choices you make for your sewing space, don’t forget how much it matters that you love being there!
It’s incredible how easy it is to work when I can put tools away as soon as I’m finished with them, and reach for them on a second’s notice. These few changes have taken the drudgery out of sewing, and make my room a true creative center.
There are still a few things left to do. My machines’ cases, and one other sewing machine, are beneath my sewing table, where they most definitely don’t belong. They’ll go into the closet as soon as we move the items we’re storing there for a family member.
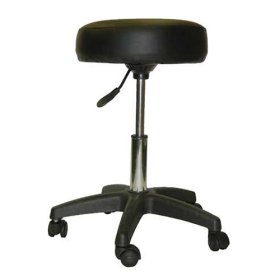 I also need a proper, rolling chair. My mother-in-law has a wonderful physician’s stool (like this picture, but cushier); she loves it, and it’s very comfortable, but I want one with a back. That’s easy enough to find, but the stumbling block has been my hardwood floor. It’s surprisingly difficult to find a rolling chair that doesn’t require a protective mat under it — especially if you don’t want to spend a fortune.
And there’s that one, last little basket on top of the organizer drawers that has a little too much miscellaneous stuff in it.
So what did this transformation cost? Shelving unit, $150, boxes, $84, pegboard and hardware, $20, iron hanger $9, cutting table $59 for a total of $322. I don’t know exactly how much money I poured into “solutions” that never made my work area a comfortable, or useful, place to be, but I’ll bet that, over the years, it came close to this. This time the money was well-spent, and it seems like a small price to pay for the transformation we’ve effected.
(The lamp and blackboard aren’t included in the tally, since they are items, like my machines, etc., that I already had.)
Image of rolling stool from Amazon.
Babe B, your set-up sounds great! I identify with the cats issue completely! The one thing wrong with my open shelves is that I do have to be careful about shades in the room — your Pax solution is probably the better one. Of course, I plan to use my stash up almost immediately, so I’m not really expecting any fading! (Right!)
Kris C., thanks for your comment, too. Isn’t it great having the stash where you can see it? It’s made a big difference for me.
Very nice! My husband just put up a bunch of shelves in my computer/sewing room a few months ago, and though it’s still a work in progress, things are much better than they used to be! All my fabric stash is on shelves, too.
You did a SUPER job organizing your new sewing room, and it’s quite pretty as well!!!
Ikea is a favorite of mine for sewing room furniture. Although my room is a work in progress, one Ikea wall is complete. I purchased three Pax 84″ wardrobe units, 2 are 19.5″ deep and 1 is 24″ deep, and two open book shelf units that are 15″ wide. I outfitted the closed door Pax units with wire pull out drawers top to bottom to house stash. All units are installed – attached to the wall – on the longest wall under an existing soffit that houses a heating/AC duct. DH installed decorative molding between units and crown molding so that the units look built in.
I decided to use units with doors because there are four windows in the room, two of which face east, and I wanted to prevent any fading issues with my fabrics PLUS we have two cats.
I wish you many happy sewing hours in your new room!!!