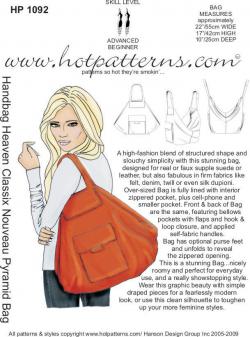
It’s the really, really big bag:
First, the good news: This really is a fun bag, in the sense that it’s got a lot of style and dash. I love it, and, although it’s not really appropriate for everyday use, it’s just perfect for certain circumstances. More on that later.
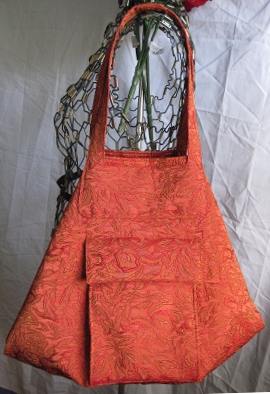
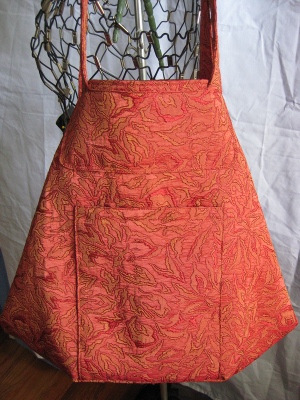
The bad news: The instructions are, well, really terrible. More on that later, too. In the meantime, here’s how mine turned out. I reduced the size — see below — and this shot gives you an idea of how it fits on me — or rather, on the me-sized Miss Bedelia:
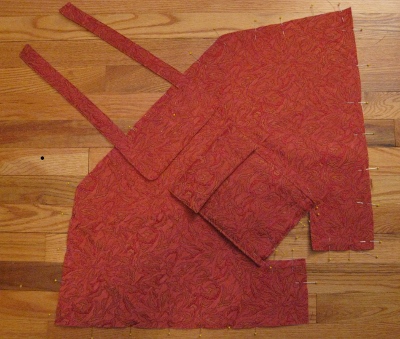
The shape of the main pattern pieces is pretty cool. See the “wings” off to the sides? You can see that the hidden part of the bag is as large as what you see when it’s assembled. You can really see the “wings” when you lay the pattern out. I thought of this as my “sting ray” bag:
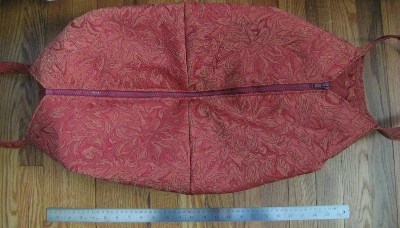
Other reviewers have commented that this bag is HUGE — and it is. I took the pattern to my local copy shop, and had them reduce it to 80% of it’s original size. (Cost: $4.00 US — bringing the price of the pattern to close to $20.00.) It’s still a big bag, but now it’s day bag, not suitcase-size. Here’s the finished bag, lying open, with a 24-inch-plus ruler next to it:
If you decide to reduce the size, keep a couple of things in mind. First, you can’t use 5/8th of an inch seam allowances, because they’ve been down-scaled, too. The new allowance works out to something a little over 1 cm; I settled for 1 cm, which worked fine, EXCEPT for the facing pieces, which meet at an angle. Too late I realized that I should have re-drafted those pieces, so I have four neat little pleats in the facings to take up the (relatively minor) slack. If I make it again, I’ll fix that.
I used a quarter-inch seam on the handles. That gave me straps just about the size of the originals. The narrow seam was a huge plus, as it simplified turning and minimized trimming.
Secondly, you’ll need a 22 inch zipper instead of a 26 inch zipper. Do yourself a favor and get a separating zipper. Do yourself an even greater favor, and get one that opens from both ends. (I didn’t, and I’m sorry. With a bag this formless, it’s a pain having to open the whole zipper to get to the far side.)
Thirdly, if you shrink the pattern, you’ll have to enlarge the handle pieces. At 80%, they wouldn’t go over my shoulder, and the width of the handles where they attach to the bag was too narrow.
I added 3 1/2 inches to the lower panel, and added 2 1/2 inches to the length of the straps. (Next time I’ll add more; the straps overlap at the top, and the slight extra padding is a nice feature. Mine don’t have enough of that.)
I customized my bag in a number of ways.
- Because I like to clip things into bags, especially deep ones, I added a couple of lightweight hooks and some D-rings inside the bag.
- I thought the Hot Patterns “small pockets” were wrong for every piece of equipment I own, so I re-configured them, and I suspect most people will get more use out of them if they design their own.
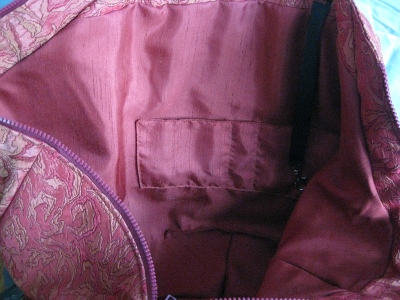
- There’s an inside zipper pocket, which I enlarged to fit my Sony e-reader.
- There’s a cargo pocket on both sides of the bag (HP calls it a “bellows” pocket), but I left out the bellows and the closing flap on the back side. I like to have an open pocket for a notebook, the mail, whatever:
- There’s a small tab on the cargo pocket flap, which I left off.
- HP has you use hook and loop fasteners to close the flap; I used purse magnets instead, one on each side, and I’m really happy with the way they work.
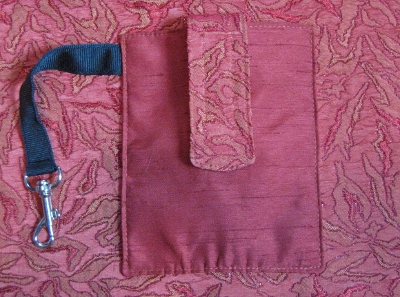
- Inside this front cargo pocket, I made a hidden phone pocket with a hook and loop strap, and added a key hook:
- I gently gathered the bottom of the phone pocket, instead of pleating it
- I interfaced and lined all the pockets; the extra support makes them easier to use, and I hate having raw edges inside my pockets
I used a square of plastic mesh to give shape to the bottom; the bag was too formless and flat without it, and having the extra stabilization helps when wrangling it. (HP recommends heavy-duty interfacing.) Because the “pyramid” is formed by the sides of the bag, which fold in between the front and the back, the shape shifts around. Stabilizing the base helps the bag to look a bit more symmetrical.
The stabilization was important for a critical reason: This isn’t a bag you can just reach into. In order to keep it shut, you have to keep the straps together; slipping one strap off your shoulder leaves you with a massive amount of fabric falling off your body. In addition, the bag is open on both ends (each end of the zipper), so, at all times, you have to be aware of the possibility of small things falling out.
Because the zipper runs crosswise from front to back, the bag needs support when you open it; because it’s so big, arms as short as mine have trouble providing that support. If I’m going to open this bag, it has to be on my lap or a table. It’s kind of a gaping cavern when the zipper is open:
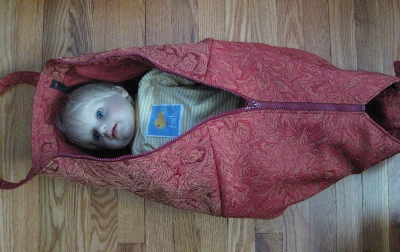
Even reduced to 80%, it’s still big enough to hold a six-month-old baby, should you decide you need an extra baby nest. (I don’t know what’s up with the color. I should learn how to take proper photos — but it’s not happening this month.)
So what’s not to love? The instructions (and too much of the pattern) are kind of an inexcusable mess. Here’s the list:
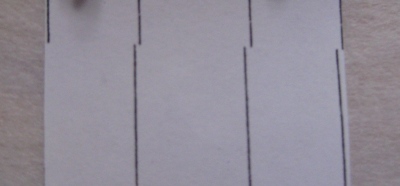
- The sloppy drafting. What’s up with this?
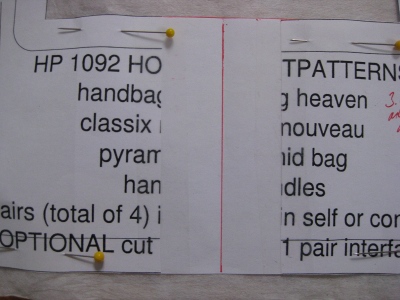
Yeah, those are the (narrow) straps. No, I didn’t cut this; this is how the pattern piece is printed. Which line am I supposed to follow? Which line matches the other side of the (symmetrical) pattern piece? Who knows? Plan to re-draw this. Call me crazy, but this is something a proof-reader should have caught, even on a bad day.
- Know how to make a “bellows” pocket? I hope so, because you’re not going to get any help here
- Several people wondered why they had so much trouble putting the zipper in. Here’s a clue: there is virtually no information explaining how to do it, and what’s there is confusing as all get-out. Did HP even test this pattern with anyone who didn’t already understand how to make it up?
- Illustrations in the instructions are inadequate or misleading
- The top strip for the zipper pocket is larger than the pocket itself, which means they don’t match, and also, not coincidentally, that the notches on both pieces don’t match up. Huh? This is basic stuff, guys.
- HP says to cut “one pair” of the zipper opening pattern piece. This is wrong; you need two pair, one pair for each side of the zipper.
- Speaking of notches, would it kill HP to use them? Would it kill HP to identify grainlines so that they’re actually noticeable? Would it kill HP to name the edges of the pattern pieces for a bag like this, which has an odd geometry? I think not.
The pattern’s labeled “advanced beginner” but I think anyone could make this bag if the instructions were, well, instructive. That’s too bad, because the Nouveau Pyramid really is a pretty cool bag; it’s too bad that the pain factor is higher than necessary.
If I make it again (and I might), I’ll seriously consider adding some way to fasten the handles together at the bag top. Oversized button(s) maybe? This bag would be easier to manage if the top edges connected.
Because it’s so ungainly, I’ll only be using it as a city bag — I’ll take it with me in fair weather when I need to carry a light sweater or wrap, which can easily hide in the cavernous mid-section. That means going to museums, etc., where I won’t be shopping or running errands and won’t need frequent access to the bag. It’s just too unwieldy to take anywhere I’d actually have to dip into it frequently. In the end, this bag is kind of high maintenance — rather like the instructions you follow to make it.

Thanks for posting about this pattern. I also have made and thought the instruction were bad. I also made the hot patterns bowling bag and felt the same way. I have made a lot of purses and thank heaven I had otherwise I wouldn’t have been able to do it.
I was glad I’d had bag experience, too, Nancy! I love the Hot Patterns sense of style, but I wish they’d get their act together!