I’m generally a fan of pacsafe bags, which have metal mesh screening inside to make them travel-safe — or at least slash-resistant — in environments where that might be a risk.
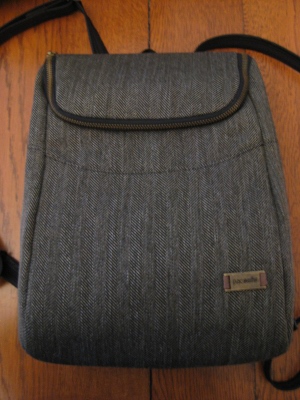
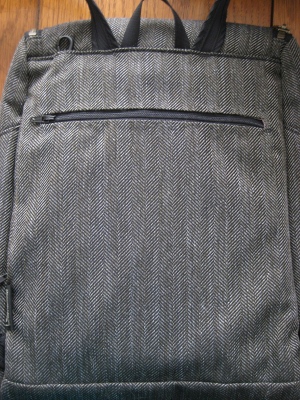
I like this bag, a citysafe 350 GII, especially, because the herringbone exterior does not scream “travel baggage”. I hope the fabric wears as well as more typical ones do; the jury’s out on that. In use, though, this bag had more than one flaw. The most serious of these is the lack of an exterior pocket, something almost every reviewer has complained about (and with good reason!).
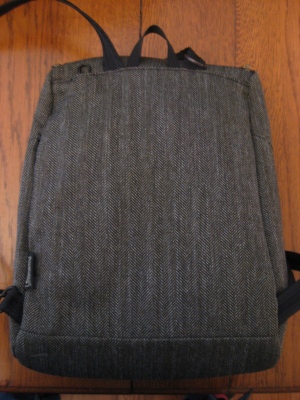
True, there is a small hidden pocket in one rear seam, but that’s not convenient for anything larger than about 4 inches by 6 inches. (And it’s got issues, too, since pacsafe calls it a “passport pocket”, but lists an RFID-blocker as a feature of the GII 350. The RFID pocket — meant to block radio frequency waves emitted by passports and financial cards — is actually inside the bag and isn’t relevant to this particular pocket.)
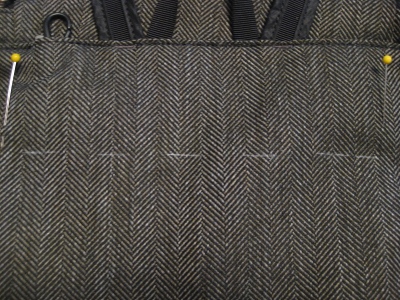
After being annoyed once too many times by my inability to stick a guide book, a subway map, an e-reader, the outgoing mail, or anything at all into an easy-to-access outer pocket, I took a brave pill or two, and cut into the bag. First I marked it carefully:
No, whoops, that’s not what I did first. First, I cut a piece of plastic quilting template into the shape I wanted for the finished pocket. Slipping the quilting template into the finished pocket keeps the pocket from riding up when it’s used. The template holds the pocket in place, but is thin and light enough to be almost unnoticeable.
(Note the round corners instead of angled ones that might have cut through the pocket.)
Then I cut two pieces of lining material for my new pocket, the same shape as the template, but with seam allowances — and forgot to photograph them. (Can you tell I haven’t had much practice, lately, at being a sewing blogger?)
Then I marked one piece of the pocket lining, and pinned it to the outside of the pacsafe bag.
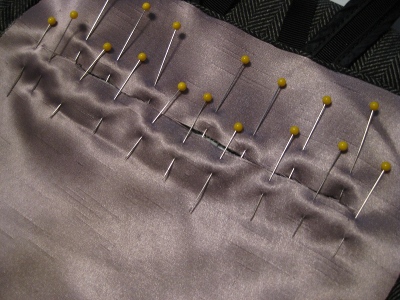
In my fantasy, I was going to be able to do this on my machine . . . that was a nice dream. Instead, I ended up sewing by hand. Happily, the herringbone helped to keep my stitches even. Once the placket was sewn (twice-stitched for strength), I blanket-stitched the edges to stabilize them, and to prevent raveling.
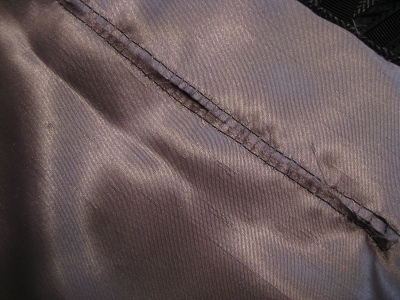 Then I turned the lining to the inside, and attached the back of the pocket to the piece that formed the placket — that was tricky, but feasible, with a little patience.
I sewed the seam around the pocket bag three times; this fabric is probably fake dupioni, and frays like crazy. Once that was done, I tucked the new pocket into place inside the bag, and hand-stitched, invisibly, all around the placket opening.
Once the placket was reinforced, I inserted the zipper. Huge improvement! I use this external pocket every single time I take this bag out: Ironically, it is the single most useful feature of the bag! With or without “anti-theft” features, a bag that is a pain to use every minute of the day isn’t really a useful bag; one external pocket changed all that.
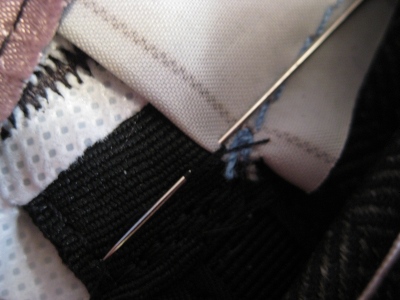
While I was inside the bag, I solved one other nagging problem: The side phone pocket wasn’t anchored at all. That meant that every time I took anything in or out of it, the lining came with it. Even worse, the lining floated out every time the zipper was opened, and regularly got stuck in the zipper coil. Really, pacsafe, you couldn’t be bothered to anchor the pocket???
It took only a stitch or two to remedy this, though anchoring the bottom edge one was tricky, since there wasn’t much room to maneuver. This is something that should have been done during construction. These bags are not inexpensive; there’s not much excuse for missing something so basic.
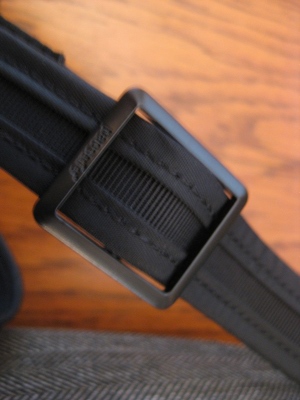
The straps on pacsafe bags tend to be quite stiff; this is really obvious on the skinnier ones. That is an inevitable result of designing them to limit the damage that might be caused by random cutting by bad guys. Sadly, the buckles pacsafe put on this bag — a backpack — are completely useless for holding the straps once they’ve been adjusted to the size the wearer prefers.
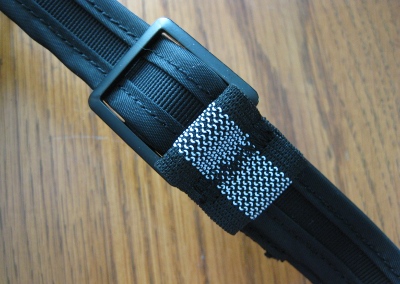
The buckles are slick, with no teeth or gripping mechanism on the underside. Even slight movement causes them to slip — it’s maddening! It’s also really dumb; buckles with teeth molded in aren’t any more expensive to make than buckles without them. Really pacsafe??? Did anybody actually test this bag before sending to market???
I sewed tabs of athletic elastic to the bottom edge of each buckle. This kind of elastic has grippers running along one side. It isn’t a perfect solution — the rubber doesn’t grip quite as effectively as the right buckles would — but it’s a whole lot better than the constant annoyance of having to readjust the straps every ten minutes.
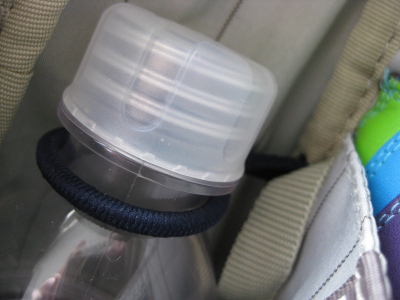
There is room in this small pack for a regular-sized water bottle, and since there are no exterior pockets for one (that’s OK with me; that’s in keeping with the more sophisticated, urban-ish look of a herringbone bag), I added an elastic loop to keep mine upright. (It’s a covered hairband, attached to the side seam.)
This really attractive bag is finally practical, and less annoying, to use, now that I’ve hacked it. At the price, though, I shouldn’t have had to do this myself.
Here’s a brief summary of the pros and cons of this bag, unmodified, pros first:
- urban appearance that doesn’t scream “travel bag”
- padded interior pocket for tablet or iPad
- “RFID” pocket which may or may not block RF waves (I’ve seen articles claiming that most don’t), and won’t do anything for financial cards even if it works, unless you just dump them in the bottom of the pocket
- key clip inside (but the clip is difficult to use and too small)
- wide, easy access opening
- zipper tabs lock with hidden clip
- locking snap hook, allowing bag to be secured to stationary object (but see “cons” below)
- “exo-mesh” on bottom of bag to thwart slashing
- wired straps, ditto
- grab strap on top
Cons:
- no exterior pockets at all, not even one in the back panel, which is almost standard in the industry
- terrible buckles on straps, which slide freely
- only one strap has a clip; the other is permanently sewn in place, which limits strap configurations and potential ways to secure bag
- hidden pocket lining gets caught in zipper, pulls out and catches in zipper when used
- only two pockets inside (why not another one, or another couple, on the other side of the lining?)
- room for a water bottle, but no way to keep it upright, which might matter if carrying electronics
These bags are not inexpensive. As sold, I’d give this bag a C — or maybe a C-minus for the awful non-adjustablity of the straps. It’s just fine, though, now that I’ve made these changes. I’m glad I sew.


Wow, that is a lot of effort into a bag that should have been perfect in the first place! You really increased the useability. I’m sure you will enjoy this bag for years to come.
It’s actually a great bag now, Trena, so I’m not sorry about all the effort. But maybe I should offer myself as a tester to pacsafe? That might save me a lot of extra work in the future!