Five or six years ago, I made a strip of pockets and used it all the time in my work totes. The idea was to have all my stuff (phone, Palm Pilot, Moleskine, business cards, etc.) in one place for quick grabbing during the morning rush. After I stopped working at an office, I tended to use bags with internal tailored pockets, so this little gadget stayed in a drawer. I’ve resurrected it for a new project, though (more about that later), and decided to post a description here.
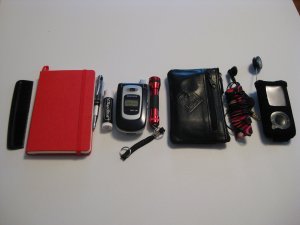
Planning was really important here. Before I cut, I laid out everything I thought I’d want to put in the pockets. I’m no longer using the same stuff, but here’s an idea of what I would put in mine now:

In this picture there’s a comb, a Moleskine datebook, lip balm, a phone, a small flashlight, a pocket wallet, earbuds, and an MP3 player. I also planned a pocket for my camera (in use at the time this picture was taken!) and another small notebook.
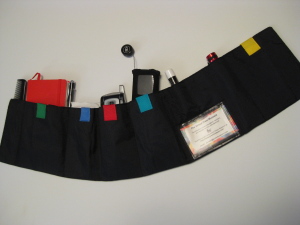
My finished strip measures 25 inches by 5 1/2 inches, so I cut two pieces of nylon ripstop that size, plus a small seam allowance, for the main fabric and the lining. I also cut a light interfacing to give the pockets some structure. I wanted an identification holder, so I figured out where it should go on the outside of the pocket strip, and stitched a clear plastic window in place before sewing the pocket strip. Then I assembled the strips right side to right side, with the interfacing against the wrong side of the fabric pieces, and stitched around three sides, leaving an opening on one short side for turning.

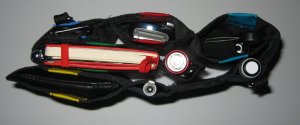
Then I turned it right side out, and, placing each item where I wanted it, defined the pockets with pins. Above the identification card I placed three narrow pockets: Lip balm goes in one and I carry a small dental brush in another (thanks to a horrible orthodontist whose talents still affect my teeth). I can’t remember what I kept in the third small slot years ago, but a digital camera battery would fit there nicely now. Here’s what the finished pockets look like, stuffed and folded up:

I like using dark ripstop or a microfiber for sport linings because it’s very lightweight but strong, shows little wear or dirt, washes up nicely and dries quickly. Because it’s a little hard to see inside a purse or bag, though, I color-coded most of the pockets after I’d decided where each one would be.
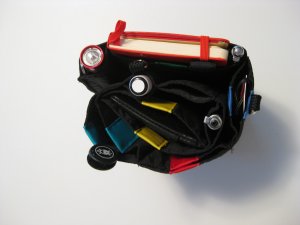
After figuring out the pocket placement, I opened the strip back out and added bright grosgrain ribbon tabs to the tops of most of the pockets . Then all that was left to do was to sew the vertical lines, and close up the side opening.
You can see the finished tabs easily when the pockets are rolled up:

I wasn’t the only one to have this neat idea. Not long after I made mine, a whole bunch of similar organizers turned up all over the place. Small wonder — they’re really useful, fun to make, and are a great gift, too! If you’re more creative than I am, yours could be really beautiful, too: Instead of ripstop, consider using silk, a set of retro prints, or maybe even chiffon and satin for evening.
