I’ve been looking for styles with easy shapes, ones that I can make from linen, and tops that will be cool and comfortable for summer. I’d been thinking about the Shapes Plus One Tunic (from Sewing Workshop) for a while, and Barbara V.’s PR review finally inspired me to make it. I’d wondered about the pattern, but decided that it was just too boxy to work for me. Then I saw Barbara’s photos (her dress looks fantastic!) and changed my mind and bought a length of a gauzy cotton-linen blend to make a muslin.
Cutting it out couldn’t have been simpler: This tunic is made from two, differently-sized rectangles. To sew it up, the side of one rectangle is offset on the other, creating a flange that drapes along the side of the finished top. (Barbara, by the way, removed this flange, and lengthened the tunic into a dress, giving it a somewhat different look.)
Although I’d marked stitching lines carefully, this simple step (attaching the two rectangles to each other) stumped me, and I had a lot of trouble visualizing exactly what I was supposed to do. (Maybe I haven’t been sewing enough lately?) The design is a little counter-intuitive, but, of course, that’s part of what I liked about it. Putting sticky notes on the right and wrong sides of my fabric (they were identical) would have been a really good move, and would have helped with the next step, which involves inverting the tunic and essentially sewing a tube.
The instructions call for a narrow turned hem which is stitched, turned and stitched again. This didn’t work for me, largely because I’d forgotten that I have two damaged fingers on my left hand, and just can’t manage such detailed work consistently any more. (That sounds ridiculous, but I prefer to think that it just means that I’ve adapted to an old injury so well that I’d forgotten all about it.)
The result was that I started off doing a narrow hem, and then realized that wasn’t going to be sustainable, and then switched to a different method — except that I didn’t think I could tear out the right seam (fabric too loosely woven and fragile; seam allowance too narrow). This meant that I ended up with a collar that has a narrow hem on the right side, and the edging I finally used everywhere else. Strangely, it doesn’t look nearly as odd as this sounds, so this won’t keep me from wearing it.
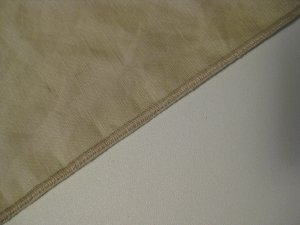
I ended up finishing the edges with a light buttonhole stitch, which, even though it sounds a little odd itself, worked out well. The collar and flange still drape, and it the top still shouldn’t disintegrate every time it’s washed.
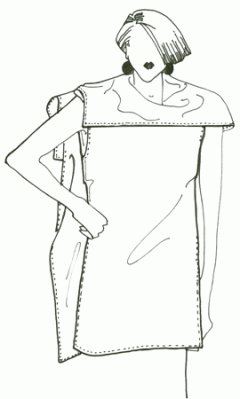
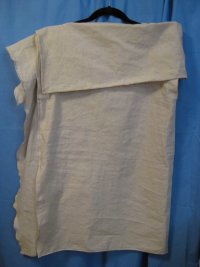
In my lightweight cotton-linen, the collar stands up dramatically, which is kind of cool, but also definitely gives me the shoulder of a linebacker, at least on the left side. The drama value ranks with Aretha Franklin’s fantastic inaugural hat, which makes it fun, but also an attention-grabbing Statement. When the event calls for it, perfect! Otherwise, it’s a bit overpowering. And I think I’m with Barbara on the flange; it’s part of what defines the tunic, but it also just looks kind of irrelevant once the top’s made. It just sort of hangs there, lacking all of the caché of the pattern sketch. Theirs:
Mine:
The collar rests a bit awkwardly, too, probably because it’s just folded back above the horizontal shoulder stitching. The topstitching and the shoulder line are sort of battling it out, and neither one is winning. Here’s the back:
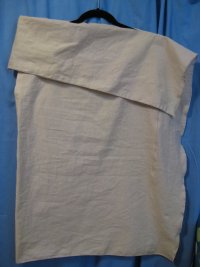
All wrinkly; I know. The sewing room’s being rearranged, and I’m not willing to haul out the iron. Besides, this is how it will look after I’ve had it on for five minutes anyway. It doesn’t bother me; I love the look of wrinkled linen!
The pattern itself is fine; the markings are clear and accurate. Will I make it again? Well, probably not. I love the clever engineering, but somehow the results didn’t seem worth the all the bother trying to figure out if I was assembling it the way I was supposed to.
On the other hand, I learned something important about the way I chose patterns. I’m drawn to boxy, rectangular, “artsy”-type clothing. That’s seems to be because, somehow, I actually believe that I’m a blonde, lean, six-foot tall Swede, with a formidable presence and long, long legs.
If you met me in the flesh, those of you with a closer grip on reality would realize that I’m blonde all right (and always have been), but I’m also 5’2″, with who-knows-what-kind-of-presence, short legs and curvy little body even when I’m very thin. Ouch!
Really, I do much better with clothes that fit my shape, rather than depending on height and long legs for style. Now I just need to remember this moment of insight the next time I’m cruising for new duds!
Verdict: This pattern really didn’t work for me, but it’s probably (mostly!) not the fault of Shapes. (Do you think Barbara is a tall, elegant Swede? Her tunic looked great!)
Ann made an interesting variation by cutting the hem asymmetrically, which you can see on her blog. I think it works really well.
For an absolutely great Sewing Workshop pattern, see their Soho Coat. I love that coat!

I enjoy your blog and wanted you to know that I chose you to receive the Kreativ Blogger award. I enjoy following your sewing escapades and like the varied types of posts you have.
Hi, Bunny — thanks so much for your comment! I’m honored that you chose me for a Kreativ Blogger award, but there are so many wonderful bloggers out there that I’d be totally stumped to pick just a few. I’m just going to say take this opportunity to say “thank you” to all you creative bloggers out there who make the internet such a wonderful place for all of us who sew! (PS — yours is one of my favorites, Bunny!)