
Dawn, the prolific sew-ist of the blog Two On, Two Off has just made a duct tape dummy, which reminded me that I’ve been meaning to get this post up forever. It’s from a small website I started a few years ago; I’m now smaller than this dummy, and need to make another. Not that I have the time, of course. One of these days. Sigh.
Using a lot of information posted by a whole bunch of people on the internet, Mr. Noile and I set out to make a duct tape dummy, or dress model, for me. I needed something to use to photograph my projects, but, even more, I have wanted a dummy for years to make fitting my projects easier.

Here’s my materials list:
* A helper! (Don’t try this alone — it may work, but you’ll go crazy and it will take forever)
* Two rolls of wide silver duct tape (bigger women will need more)
* Two plus bags of firm polyester stuffing (bigger women will need more)
* An old t-shirt, or better, an old turtleneck
I prepared for the taping by wearing my usual undergarments, which was a major mistake! I tend to wear athletic bras, which are not about shaping as much as they are about comfort. It was obvious — too late — that the athletic bra helped the duct tape to squish the area in question. The result was a dummy which resembled — frighteningly — my shape without a bra at all. We’ll be doing this again one of these days, this time with a bra with a superstructure like the ones Jane Russell wore!
Over the undergarments, I wore an old, large men’s t-shirt, to which I’d sewn an extra sleeve to cover the v-neck and my throat area. To eliminate bunching, we slit the t-shirt at the center front and back and sides — later we had to slit the sleeve tops, too. Next time, I’ll use a more closely fitting old turtleneck.
The taping itself is pretty straightforward — long tapes around the broad areas, like hips and back, and smaller pieces (some ripped lengthwise to make them skinnier) for areas requiring contour, like the waist and bust. In addition to wearing a more structured bra, next time I think we’ll take a much more detailed approach to the bust area, beginning with a narrow “x” between the breasts, and then building the bust up from the bottom, putting a lot of structure into the lower bust area (kind of like an underwire bra).
I’ve noticed that lots of people don’t take the tape all the way up the neck, but I’m glad I did. It’s been very helpful to have that additional bit of anatomy to work with.
The taping itself didn’t take us long, but now I think I know why — too little time spent on the curves. I think it was about 45 minutes total. I took everyone’s advice and made sure I wasn’t going to be hobbling off to the bathroom during the taping. The thought alone just makes me shiver.
I made a stand for my double, and then slipped the form over the stand, and proceeded to stuff it, starting at the shoulders. I used firm polyester stuffing (a little over two 20 ounce bags — I’m 5 feet 3 inches, and weigh 122 pounds), and it worked just fine. I stuffed from the shoulders down, and had to rearrange the top of the stand to make sure it stayed in place as I worked, but as soon as the shoulder area was padded, that was no longer a problem. I used a dowel to get bits of stuffing into smaller areas (through the armholes, for example) as I was refining the shaping, and making the dummy firmer.
I was worried that the stuffing might fall out as I worked, but that really wasn’t an issue — it seems to cling to itself, and the various curves help to retain it, too.
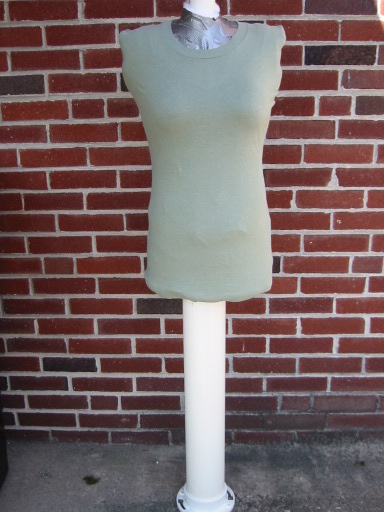
Once I was through stuffing, I checked the measurements, and made a few adjustments. At some point, we’ll re-do this project, but in the meantime, I got my bra-wearing contours back by putting the bra on the dummy, and stuffing it to my contours –a good temporary fix! The duct tape was just too flat to puff out using stuffing alone.
To make a fast, pinnable cover, I took a large men’s crew neck t-shirt and placed it, inside out, over my double. I pinned down the sides, slipped it off, and sewed each side, turned it right side out, and slipped it over the form. Voila! Many people have noted that it’s possible to pin into the duct tape, but it does make the pins gummy, and I suspect it would limit the life of the dummy. I love the thin cotton cover — it’s pinnable, washable, and easily replaced.
I will want to make a permanent base for underside of the next dummy, though, to give it a little more stability in the hip area. I haven’t decided yet whether I want to cut the base from a light plywood, or try to find a sturdy plastic for the job. In the meantime, the cover is pinned under, basically onto the open stuffing, which keeps it all together while I work.
I was shocked by my duct tape double (am I really shaped like that?!!), but all it took was a good look in the mirror, side-by-side, to realize how accurate it is. Mental note: time for some abdominal exercises! Somehow, the duct tape even captured my posture, and a little bit of asymmetry I’d never noticed. The good news is, of course, that alterations are now faster and more accurate. Hurrah!
Hi!
Great info for this… it’s going to be a part of the next craft night. my one question is this: How did you get it off? Did you cut at a specific place? Did you cut in the back and then tape it back?
Thanks for sharing this and let me know what you did to get it off!! Thanks!!
~M~
Hi, Marilyn — yes, we cut the dummy off. I’m trying to remember where — maybe up the sides? That sounds right. You’d probably get less distortion doing that than cutting up the back, for example. Although, maybe not. The trick is cutting in as straight a line as possible, and getting the shell sides back right where they’re supposed to be. And yes to taping it back in place. I think that part was pretty easy, actually.
If you can pick up a pair of bandage scissors (maybe at a large drug store?), that would make the job less perilous. Bandage scissors have a flat guard on one side. You put that next to the skin to prevent unwanted nipping. We didn’t do that, so the removal process was slow-going and a bit fraught.
I’m way overdue for a new dummy, and this next time I’m going to fill it very carefully with foam, as well as covering it with a custom-fitted, thin, muslin. We’ll see how that goes! Good luck with yours — I’ve loved mine, and it’s made a real difference in my ability to fit.