
This post is a composite, with photos, of all the tips we´ve gathered as we figured out how to best maximize our Aliner experience.
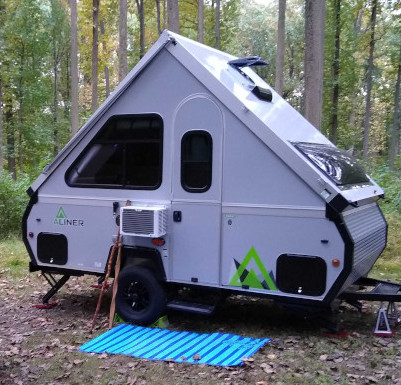
Photo of a white, triangular, camper with a high, Alpine-style, roof.
The camper is parked with woods behind, walking sticks leaning on
an air conditioner attached to the side of the trailer, and a blue
striped rug on the ground beneath the camper door.
As trailer camping newbies, we had a lot to learn. Tips below are in two sections: Organizational and Mechanical. A lot are specific to our Aliner Scout, but some may be at least a little useful to other new campers, too.
Here´s a list of what I write about here:
Organizational Tips
1. Small Hooks
2. Magnets
3. Making the sink work for us
4. Overhead Lighting
5. Shoe Storage
6. Step Stool/Whisk Broom
7. Pipe Insulation/Felt
8. Small Tubs
9. Toilet
10. Get a duvet (really!)
11. Lists
Mechanical Tips
1. You need towing mirrors.
2. Love your hand brake.
3. How to raise or fold an Aliner, for shorter people.
4. How to preserve your trailer´s electrical connector.
5. Remove the A/C cover when towing.
First, the organizational stuff.
1. Small Hooks:
There´s just enough depth below the counter top on one side of the door opening to add a few little metal Command hooks. They are tiny, but useful, and look so much better than the plastic command hooks. We both love a tall shoe horn, and swap out shoes when entering or leaving the camper, and flashlights are a must at night, so we hang those things there.
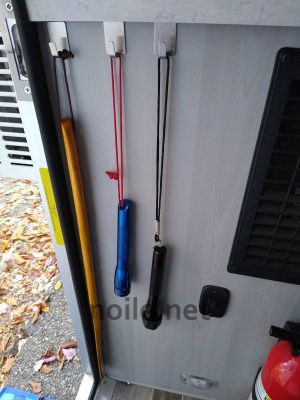
Yep, that´s a bamboo shoe horn hanging on the first of three little
metal hooks attached to the side of a cabinet, next to the open camper
door. We both love it for quick, easy, on-and-off of shoes. A small blue
and a small black flashlight hang next to the shoe horn, and part of a
small red fire extinguisher is visible in the lower right. We keep a couple
of bigger flashlights on the counter above; these are out of the way for
using the door, and for grabbing for quick use when the big ones are overkill.
Just to the right of the flashlights is a black switch for a small light. The light is that white blob below the black switch. This is a nice feature of the Aliner: It illuminates the doorstep. Handy for an exit or entrance if it´s dark, and the light is located so that it´s unlikely to awaken anyone sleeping. However, weirdly, we both tend to forget it´s there.
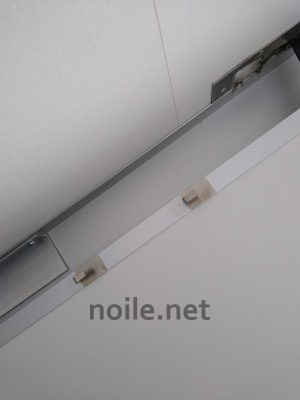
Photo shows the angled inside roof of an Aliner camper.
Two small metal hooks are attached to a metal strip which
follows the roofline at an angle.
As it happens, those hooks fit perfectly along the edge of the Aliner´s side walls — and, since they´re metal, blend in really well, looking like a built-in feature. These hooks are perfect for hanging up a washcloth to dry, or for hats or whatever.
2. Magnets
Most of the Aliner is aluminum, but several areas are steel, offering an opportunity to use magnets for additional spots for hanging storage. These came in a set of three, and are super-strong.
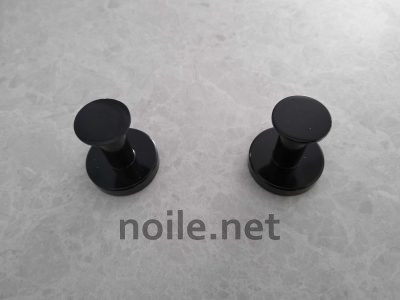
Photo of two black, knob-like magnets on a gray marble-like background.
They stick perfectly to the locking tabs. It´s critical to remove them before folding the camper up, but remembering isn´t difficult, as the magnets are the first thing you´ll contact when closing up.
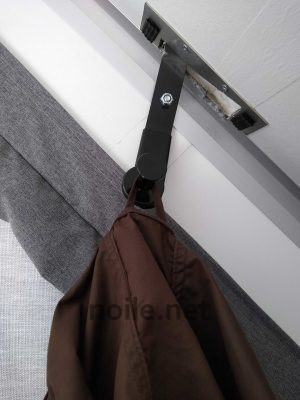
Photo of the angled roofline of the interior of an Aliner camper.
At the bottom of a black, nearly vertical handle, a black
knob-like magnet is attached. A brown vest is hanging from
the magnet by a thin loop.
3. Making the sink work for us
The Aliner Scout sink is small, shallow, and we don´t use the water hook-up, but we didn´t want to remove it. We reclaimed the counter space using a weird IKEA device: Rodeby, a completely useless bit of wood which is meant to be used as a sofa tray, but which we could never get to work on an actual sofa.

Photo showing IKEA Rodeby, which is made up of blonde wood slats
glued to a fabric backing. This one has been cut to fit our counter,
over the sink.
By cutting it to fit (easy, thanks to fabric already glued onto the back), and adding a few strips of wood to the underside, though, I was able to make a removable cover for our Scout sink. The underside bars keep the cover from shifting.

Photo showing the fabric backside of an IKEA Rodeby, with wooden
strips glued on three sides to keep it from shifting when placed over
our Aliner sink. The fourth side used to go under the foldable
faucet, but I´ve since removed the faucet and added a fourth
wooden strip to keep the cover in place..
Works a treat, and gives us a little extra counter space. I did remove the faucet. It folds down, but beware: if you forget to do that before taking the Aliner down, and the faucet is folded with the side wall, it will try to punch a hole in the curtain. You probably want to avoid that.
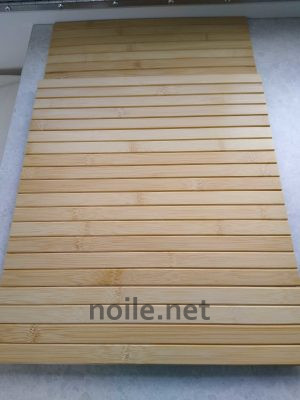
Photo of a board made of narrow bamboo slats set over
an Aliner camper sink.
4. Overhead (and other) Lighting
We added a removable shower rod above our heads, from which we suspend a lantern. The rod sits in closet rod cups which are attached to the side walls with hook and loop tabs. Suspending the lantern from an S hook lets our shorter partner reach it.
The lantern is our main light inside the camper, and the rod also gives us a place to hang jackets if we want to. Though it´s not needed, it also theoretically adds a little stability across the peak of the camper — maybe nice if it´s windy!
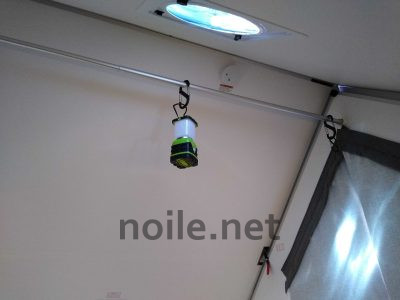
Photo of a pole stretching from side to side
in an Aliner. A green and white battery-powered lamp is suspended
from the pole on a large ´S´ hook.
That lantern looks distant — the Aliner has an 8 foot (2.4 meter) roof apex!
Reviews suggested that these lanterns might have a quality control issue, so I bought four just in case. They´ve all been great for us: we suspend the one, keep one on the counter, and keep one on the table, and still have a spare we´ve not yet needed.
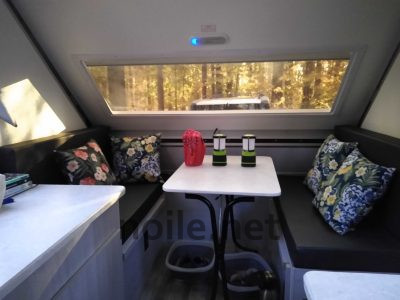
Photo of the dinette end of an Aliner Scout showing
three lamps on a table. The left-most lamp is wrapped
in a red bandana to allow use when someone
is still sleeping in the camper.
These lanterns have several settings, all quite bright. We wrap a red bandana around the one on the table, which lets the later sleeper, and the early riser, each read while the other sleeps undisturbed by light in the camper.
5. Shoe Storage
A first, we used collapsible plastic tubs, tucked under the table, for our shoes, but then I ran across this tip: suspend a shoe bag (or part of it) behind the door.
If you buy online, buy carefully. They´re all junk, but some have pockets too small for shoes, which makes them both junk and useless! It was a bit of a pain drilling down to the ones we actually got.
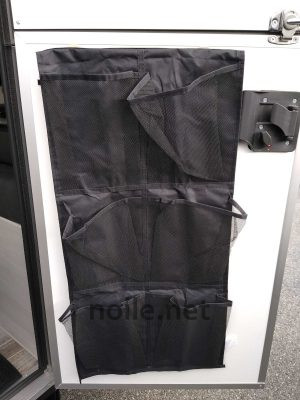
Photo shows a black mesh shoebag hanging by hidden
hooks on the back of an Aliner camper door.
6. Step Stool/Whisk Broom
That´s it, really. A small step stool for that 8 foot high ceiling, and this over-large whisk broom (bought at the RV dealer) which acts as a picnic table whisk, and a basic broom for the camper. Indispensable!
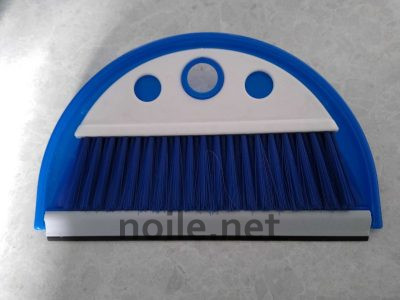
Photo of a large blue plastic dustpan. A white-handled
whisk with blue bristles is set into the dustpan.
7. Pipe Insulation/Felt
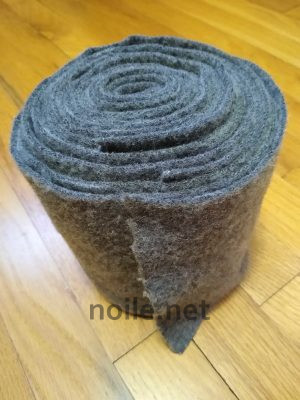
Photo of a roll of gray wool/rayon felt.
We woke up, the morning after the first time we´d used our Aliner, to find that all the metal surfaces were drenched. Our first night was spent in a thunderstorm, and the various forces outside, combined with our warm bodies inside, had created major condensation. It was a shock!
It was also easily coped with. We got home, wiped down the surfaces, and left the Aliner up until it was fully dry. Now we know that we should have left the fan slightly open while we slept, and that the Aliner is easily insulated with our felt, foam pipe insulation or pool noodles, which should solve the problem. For easier use and storage, we´re carrying a roll of wool/rayon felt to install around the problematic edges.
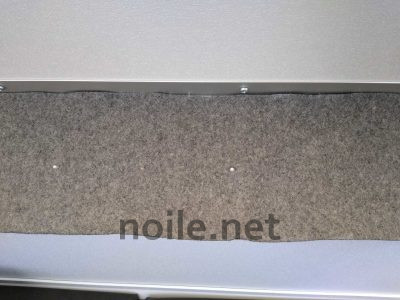
Photo of a strip of gray felt in place along a metal connection
hinge inside an Aliner camper. Small silver dots are tri-fasteners
anchored to the camper. The felt has slits cut into it to allow
the fasteners to hold the fabric strip in place.
Those barely-visible silver dots in the middle of the strip are tri-fasteners which are part of the Aliner construction — there´s a small horizontal slit in the felt where each one sits. Setting the strips up is fast and easy — the felt pops over the fasteners to hold it in place.
Don´t try using the stiff, completely synthetic felt you buy at a hobby store. It won´t absorb anything; you want something that will catch the condensation, not let it roll off onto you.
For newbies, too: Double check that the apex of your Aliner has correctly snapped into place. It might seem to have without actually having clicked that last millimeter. We´re not sure this figured into our initial issue, but it may have, so now we´re careful to be sure everything´s in place as it should be.
It´s probably overkill, but I got angled pipe insulation for the apex(es?) (ies?), cut them in half, and pop them into the upper corners in questionable weather.
Some people have gone to the extreme (imho) of attaching carpet tiles to the affected areas, but I´ve opted for felt strips which fit neatly across the broad bands front and back, and are removable for drying. But I hate carpet, so your mileage may vary.
We have the luxury, generally, of opting to not camp in rain, but we´re prepared if it comes up again, so we just have the insulation and felt handy if needed. It´s a very quick job to put either or both in place, and to remove them.
8. Small Tubs
In line with our minimalist approach, we pack our camping needs in plastic storage tubs. Light, cheap, tubs! Not only are these easier to manage than large tubs, they´re very much lighter.
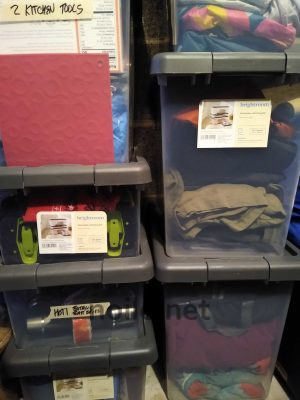
Photo of several transparent storage bins with gray covers
with various types of camping gear stored inside.
They slip under the bed for easy access in the camper, and make transporting, packing, and general loading and unloading so easy and efficient! Most just stay in the tow vehicle in camp; moving the few we use in the Aliner is quick and easy when setting up camp.
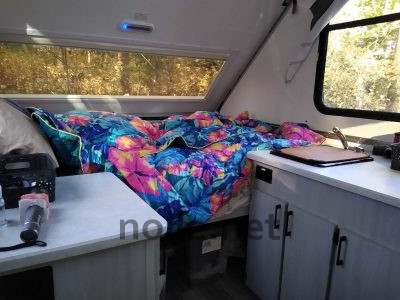
Photo showing bed end of our Aliner camper. The bed lies below
a picture window, covered with two brightly-colored duvets in blues
and tropical fuchsia, purple, and pinks. Barely-seen tubs are under
the bed; one that can just bee made out has a white label. To the
right are light-colored cabinets and a counter with a sink, which is
temporarily covered with a cutting board. To the left is another
counter, with cabinets under. Unseen is the camper door, just to
the right of the left counter.
We use eight in small and medium sizes, and take just four into the camper. Toiletries, removed from another tub, go into the upper shelf on one cabinet, and that tub, empty, goes back into our truck while we camp.
9. Toilet (and kitty litter!)
After a campsite plumbing failure last summer, we travel with a portable toilet — the simplest imaginable. It´s not glamorous, but it works. Ours is a Luggable Loo* with a new, better, toilet seat than past ones. It´s basically a construction bucket lined with plastic bags, and a toilet seat set on top. (*But, next trip, we´re trying out a Blika, which is a lot more compact.)
First crucial toilet tip: DON´T USE LINERS MADE FOR PORTABLE TOILETS. DO NOT USE COMPOST-ABLE LINERS. (Ask me how I know.) Kitchen trash bags, doubled, will work fine and are trustworthy as long as you don´t snag one. Use three if you´re really worried.
I would LOVE to use compost-able liners. Don´t, just don´t. They´re designed to fall apart. You can figure out why it matters; one try was enough for us.
Using a plain, pine, kitty litter will eliminate all odors . In fact, it will make your toilet smell as fresh as the woods outside. (For the obvious reason.) Sprinkle enough on to cover what you´ve done.
If you expect use over several days, you might want to use a urine solidifier, which theoretically makes wrapping the bag up and disposal easier, since the liquids become solids. But you might find that the pine litter works just as well, depending on volume and number of users.
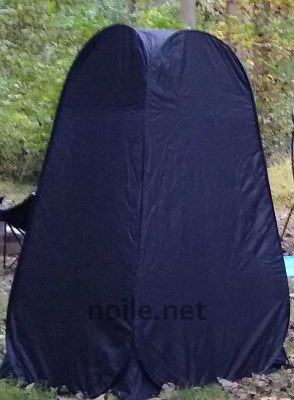
A toilet tent is a good idea, for so many reasons. Ours came with a separate floor, which means it´s easily washable. (Which won´t actually be necessary if everyone is tidy.) You need tent pegs, and not the ones which will come with the tent. Get actual tent pegs which can actually be put into earth.
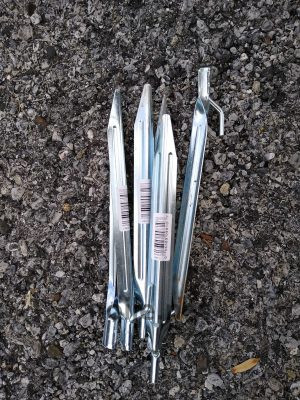
Photo of a bunch of silver metal tent stakes set on asphalt.
Pack a hammer; you´ll need it.
As noted in a previous post, pay attention to where you set up your portable toilet. You probably don´t want to be looking at it, in general, and you probably don´t want it in full view of other campers, either. Also, a light inside will make you very visible, if that concerns you. Set your flashlight on top of whatever you use for the kitty litter, and you´ll be able to see enough to make your way around the tent, but you won´t be exposed to the world at large.
There are fancier, better, portable toilets, but they are questionably reliable, messier to deal with, and weigh a lot more. We went for simple and lightweight. No regrets so far.
10. Get a duvet (or two)
Seriously. One for you, and two if there are two of you. Even if it´s full-sized, a camper bed is likely to feel a bit more cramped to use than a bed in a conventional home, and a duvet can make life much simpler. It´s not easy to make a camper bed look tidy, but a tossed duvet is a quick way to make a bed look, well, better, without spending fifteen minutes tidying up several layers of bedding.
Better still, with a duvet for each sleeper, no one is left out in the cold when the other tosses and turns. A duvet is the best defense against blanket-stealing, and a big step forward in camper sleeping comfort!
(Extra life hack: a duvet for each of you at home eliminates all bedding-stealing-temp-differences sleep hassles! They are bliss. Trust me.)
11. Lists
Ha, ha — I now have a list of lists! Seriously, nothing accelerated the learning process for these newbies more than lists: Attaching the Aliner/detaching the Aliner/Leveling the Aliner/what goes in which bin/clothes/food/everything that doesn´t go in a bin/departure/resetting the gear . . . and so on.
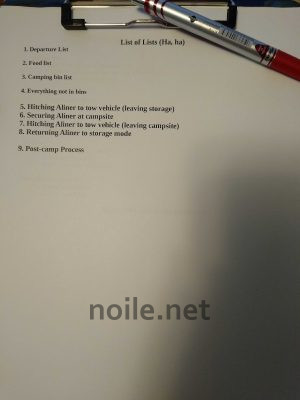
Bad photo of a partially-visible clipboard with a silver and red pen
attached and a paper titled ´List of Lists´ clipped in place.
We have to remember to use them, but, after about a dozen edits, we have a really useful set of lists attached to a clipboard, with a red pen, on which we tick off everything as we complete each item.
Lists: The best efficiency tool ever. Just ask Atul Gawande, surgeon and author of The Checklist Manifesto.
Also: Five incredibly helpful mechanical tips.
Mechanical Tips
1. You need towing mirrors, if your vehicle doesn´t have them.
Our folded Aliner is high enough that our rear view mirror is useless. And our side view mirrors don´t extend or adjust sufficiently to allow the driver to see around the vehicle. These clip-ons work really well for us: If we´d had them for the long drive home from the dealer, we would have felt (and been) a lot safer.
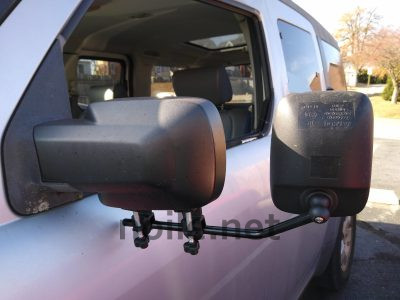
Photo shows a large, black, removable mirror clamped
onto the driver´s side of our tow vehicle.
They are rock-solid when put in place, but one of the set does tend to loosen a little bit over time. We check them every time we start out; better safe than mirror-less!
2. Love your handbrake.
If you´re a trailer-towing newbie, try using your hand brake to stop and start your tow vehicle when you´re lining up the hitch. We discovered that we had a lot more control using it than we do using our car´s automatic brakes! The hand brake stops the vehicle without any lurching or jumps; the car stays exactly where it´s put!
Critical, though: Release the handbrake when finished, or, at a minimum, when starting out to leave! Probably very few people use handbrakes these days; remember to release it when you begin driving the vehicle, or your brakes will be toast.
3. How to raise or fold an Aliner, for shorter people.
Dean in Milwaukee posted the most sensible, easiest-to-implement tip for raising an Aliner roof, ever. Undo the exterior clips, begin to raise the roof as usual, then, as soon as the roof is just high enough, open the lower part of the door, step inside, and suddenly all the height most people would need to raise the roof fully is available!
Stepping inside allows about eighteen inches more of reach . . . genius!
4. How to preserve your trailer´s electrical connector.
Ruthtrips bought a used Aliner which the sellers delivered to her without realizing that the electrical connector between their vehicle and the trailer had disconnected — and been destroyed by its journey bumping along the pavement.
OK, I thought, no problem, they were probably distracted, soon to leave camping behind, it was a natural mistake. Sort of.
But then I saw that Slim Potatohead had the same problem. At that point, I decided we´d be wrapping our connection.
The wrap is elastic and Velcro. It seems to work, and it gets wrapped around the hitch and plug while we tow, so it gets remembered.
4. Remove the A/C cover when towing.
Aliner posts are full of sad stories involving the loss of the A/C cover as the camper blithely travels. Replacement is inconvenient and expensive. (Someone used to make custom covers, which looked great, but apparently they no longer do. And, of course, they weren´t cheap, being, as they were, handmade.) Spare yourself the grief!
Related:
Camping 1: We Buy an Aliner Scout
Camping 2: Why We Bought an Aliner/Weight Considerations