Recently, I bought a lightweight synthetic Columbia vest at a discount outlet. Although it has some of the hallmarks of a more expensive Columbia garment, my guess is that this one was made for the secondary outlet market: It has the YKK zipper (but only one-way); external pockets (but very shallow ones, without zippers or closures); it has no internal pockets; and, though the styling is decent, it´s very lightly padded and almost flimsy-feeling.
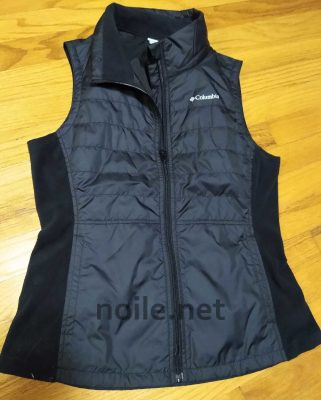
Photo of a black nylon (or possibly polyester) sleeveless outdoor
vest with a zipper front and black stretch side panels.
Not quite the Columbia quality I´m used to seeing. (Or maybe this is just post-Covid Columbia?)
All of which was OK for the very, very low, theoretically heavily-discounted, price. After all, I wanted a light and much thinner-than-average vest, and I think this one is well-made enough to survive the life I plan for it. BUT. No inner pockets? Mais non!
Here´s where any reasonable manufacturer would have automatically added an internal pocket, right in the lower front of the inside of the vest, against the lining:
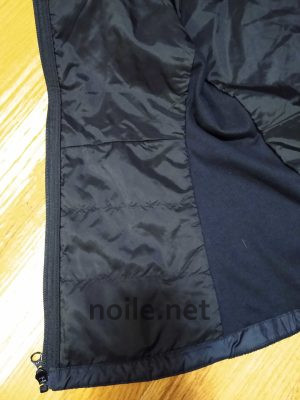
Photo of the inside of a black outerwear vest showing
the lower front lining.
This section just called for internal pockets! I took the shape from the lower front panel, which happened to be perfect for whatever I might carry in a vest on a quick trip somewhere. I added seam allowances to the pattern, and cut nylon ripstop with a fold at the top of the pattern to make a two-layer pocket.
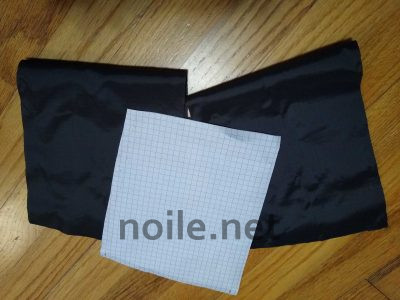
Photo of a pattern made of grid paper on top of
two black nylon pocket pieces cut according to the pattern.
Normally, when making pockets, I´d always put a fold at the bottom, for an extra secure cache, because I´d be making a pocket bag. In this case, though, the pocket was going to be made of these two layers treated as one: the pocket itself is between my insert and the vest. Each one is essentially a patch pocket, rather than an inserted one.
To reinforce the upper edge (where the fold is), I added an internal layer of grosgrain ribbon to the wrong sides of the ripstop. Interfacing would have worked, too, but the grosgrain was scrap, and handy. (No extra cutting!) Then I stitched around three sides, wrong sides together, leaving a small opening to turn each one.
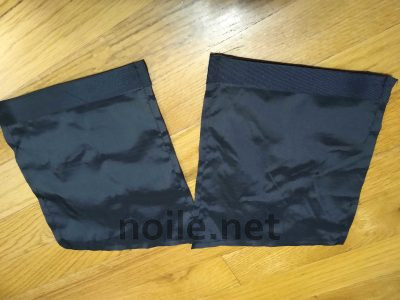
Photo of two black ripstop pocket panels showing the wrong
side with black grosgrain ribbon attached to the upper edge.
Once the pockets were turned, I edge-stitched around three sides, and then stitched the top — which would become the opening — catching the inner grosgrain at its upper edge, and then again near the lower grosgrain edge, inside the pocket layers. That, of course, was to ensure the grosgrain wouldn´t shift.
Then I stitched each finished pocket layer to the vest along the side seam, along the lower hem, and along the edge of the zipper placement. A more diligent person might have machine-sewn the pockets from the front of the vest, along existing stitching lines, but I lack the patience to make that work, and wanted a faster solution.
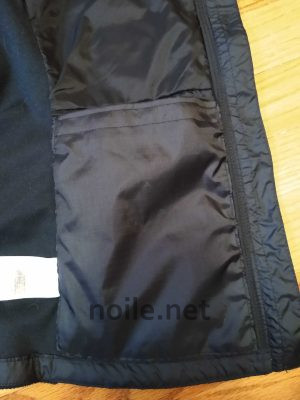
Photo of an inner pocket panel made of ripstop fabric
attached to the inner lining of a black outerwear vest.
The pocket panel is open at the top, and has been
attached to the zipper fly edge on the right, to the
hem at the bottom and to the side seam panel to the left.
Even so, setting the pockets took a bit of time: to make sure they were as strong as possible, I used tiny stitches, and stitched each twice in place, with extra reinforcement at the upper corners. Because my hands are finicky these days, this was a bit time-consuming, but the result seems more than hardy enough to stand up to rough use, so this was time and effort well spent. And now my vest is fully-functional!
Well, almost. Once I´d finished, I went to hang it up and noted another cost-cutting measure: No hanging loop. I mean, really? That´s essential, but it´s on the table for another day.

We must have pockets!!! Good move and a good job.
Thanks, Charlotte!