This pattern doesn´t seem to get any love, and I´m not sure why it doesn´t. The paper bag version isn´t particularly interesting — it´s a pair of paper-bag-topped trousers, and there are lots of those around, all of them meh (in my humble opinion). But the pleated front version has (at least to my eyes) a lot to offer.
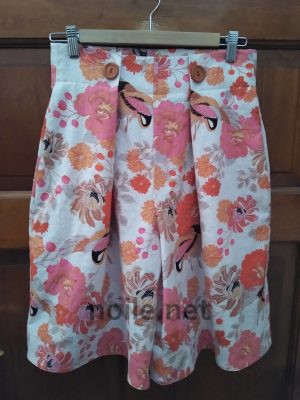
Photo of culottes made in a patterned linen in
colorsof pink, red, orange with a touch of black
on an off-white background.
For one thing, they´re a breeze to sew. For another, the fit is entirely forgiving, so there´s also no fussing on that end. And they´re so comfortable to wear! But . . . Burda´s instructions call for snaps in front, which are used to form the pleats.
And there´s no way snaps, no matter how large or strong, are going to hold those pleats in place without making them look super sloppy. There are issues here, but I think I have more or less resolved them.
But first, a little about the actual garment. I used a lightweight linen that I found at JoAnn. I don´t often find interesting fabric at JoAnn, and I´m (reasonably) suspicious of the quality of the JoAnn fabrics I do check out. But I loved the colors and print of this one, so I bought the piece that was left, quite a while ago now.
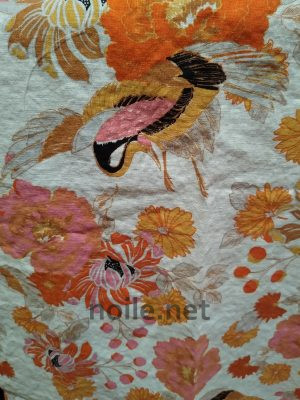
Photo of linen fabric with flowers and cranes in pinks, oranges,
and reds with touches of black on an off-white background.
Yep, it´s not ironed, so the texture of the linen is obvious.
I do iron as I sew, but I love linen best when it´s wrinkled!
There wasn´t a lot of yardage remaining when I discovered it, and I meant to make a top of some sort. However, neither these colors nor the pale background do my coloring any favors, so I resigned myself to making trousers.
Although I was hoping to make mid-calf pants, I had just enough fabric to cut out a version which just reaches to the top of my knees. It´s a one-way design, so I felt fortunate to have managed even that.
But I had no choice about pattern placement, which was too bad — cranes gone wild! — but I´m prepared to live with that, too. And I did have to face the hem, because there just wasn´t enough length to manage anything else. However, the facing gives the hem a nice weight, so that turned out to be a plus!
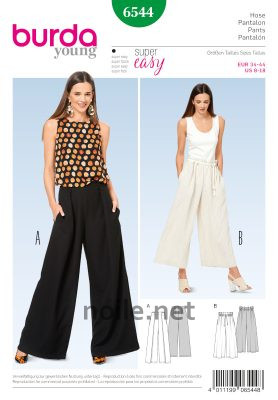
Photo of pattern envelope for Burda 6544,
showing versions of culotte pants.
Burda directions are famously sparse, but anyone with even a little sewing experience will not have trouble putting these pants together. The pattern is very well-drafted, with appropriate curves at the hip and waist. It also features very deep pockets (hurray!), also drafted to accommodate the hip curve.
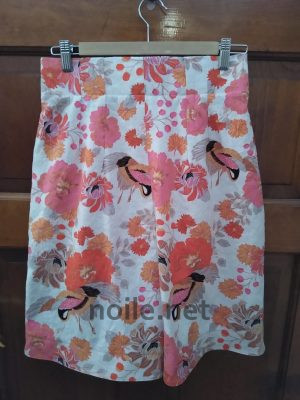
Photo of the back of linen culottes.
The facings are cut-in-one with the main pattern pieces, so it´s a matter of sewing the darts in back, attaching the pockets, sewing the side seams, folding down the facings, attaching some sort of fastening to form the pleats, hemming, and that´s it.
Except . . . as noted above, a couple of snaps are never going to result in tidy pleats here. To remedy this, I changed a few things.
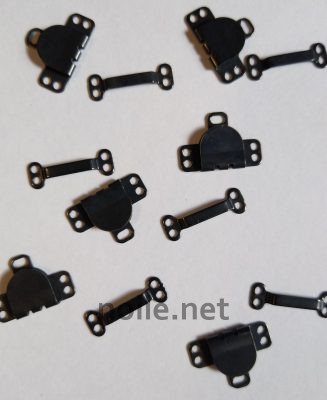
I added interfacing to the waist, using a fairly stiff one for the back waist, and a very thin one for the front. I knew I´d mind if the waist were too floppy, and I wanted the top of the pleats to keep their shape without any fuss. I used flat hooks for closures, and wanted able to anchor them in a way that kept them as invisible as possible.
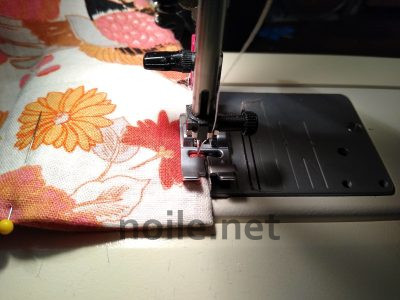
Photo of a sewing machine edge-stitching foot
aligned with the edge of a linen waistband.
To keep the edges of the pleats crisp at the waistband, I edge-stitched the folded edge. Then, using invisible stitches, I quilted the area under where the buttons would go, stabilizing the two layers of the pleat to anchor the hooks.
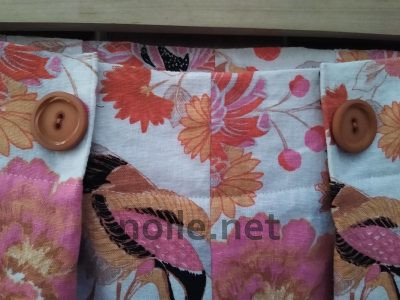
Photo of the front waist of culottes made from Burda 6544
showing closed pleats and decorative buttons.
I offset the hooks so that they were not easily visible at the edge of the pleats, and I added another hook on the inside fold of the pleat to keep the waistband stable while worn. The decorative buttons on top camouflage the support stitching I added, and add just a little more stability to the area where the hooks are attached.
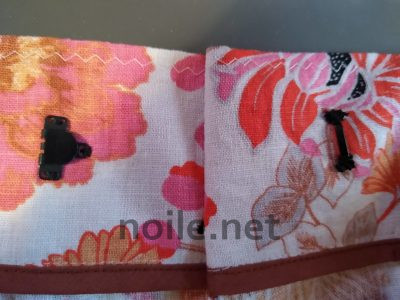
Photo of the inside waist of Burda 6544 showing placement of retaining
hooks and bars which hold pleats in place on the inside of the culottes.
I´m not completely thrilled with the result, though I think it´s probably just fine; I´d rather the hooks never show any part of their admittedly discreet little edges. Mr. Noile listened to my objections to the barely-visible hooks, and said ´why not add a tab with buttonholes?´. Brilliant! So I did:
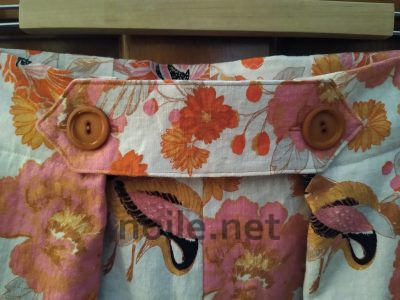
Photo of a short linen tab, made of the same linen as the
culottes, with angled ends and burnt-orange decorative
buttons, buttoned onto the front of the culottes.
I might not need or always wear this solution; it changes the look of the culottes. (Mr. Noile pointed out that it gives them a rather vintage-y look, which I love!) Admittedly, the tab does get somewhat lost in the print, but it is still rather nice, and does solve the dilemma of how to handle the visibility of the hooks. We´ll see . . .
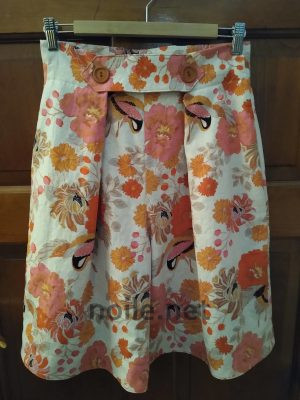
Photo of linen culottes with button tab
over pleat folds at waistline.
Another fix could be to put buttonholes on each side of the pleat, and button through them, using small snaps to ensure the pleat edge stays in place. I´ll be making at least one more pair of these culottes; they´re a joy to wear, and very quick to assemble, so there will be opportunities for more experimentation.

Don’t you love when you make something you like so much that you make more than one of it? I like the tab on front also.
Yes — the best patterns are the ones that beg to be used again and again. Not to mention that that makes for faster and better informed sewing! Thanks for your comment, Charlotte.