Once I’d fit the jacket, and cut out the interlining, it was time to tackle the “exterior” fabric: the wool the world would see.
This pattern calls for “serge” or “”twill” (it’s not clear to this English reader which) for either the inside or outside of the hood and the band that extends down the front of the jacket (they’re cut all-in-one). My French isn’t good enough to figure out exactly which piece was which, although I think it would be pretty obvious once it came time to do the final assembly. I’d decided, though, that I wanted two layers of my main fabric for the hood, so that’s what I did instead of using the contrast.
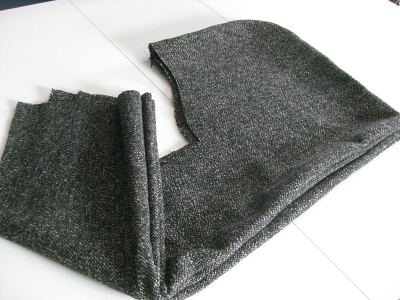 Here’s the hood, assembled, with the front edges of the hood and the front of the jacket bands to the right. The bands are folded back because this is one looong piece.
Because I wasn’t sure exactly how this section was going to attach to the rest of the jacket, I probably made the front band a little longer than necessary; I won’t know for sure until the final assembly. At this point, I’m supposed to have closed the bottom seam, and topstitched all around, but that’s waiting until I confirm this piece’s true size. I think I’d have wanted to do that topstitching last, in any case, after the jacket’s all together.
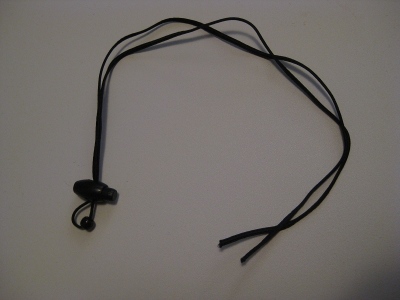
The hood has an elastic drawstring, with which I did battle for hours. I can’t even imaging what all went wrong: Attack of the stupids, maybe? I did make life a little difficult for myself when I insisted on putting a protective bead on the elastic. , inserted the elastic all wrong, forgot the bead and toggle . . . and so on. Here’s what the set-up looked like:
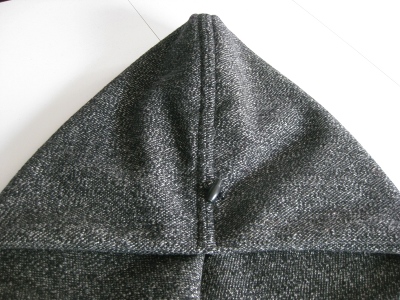
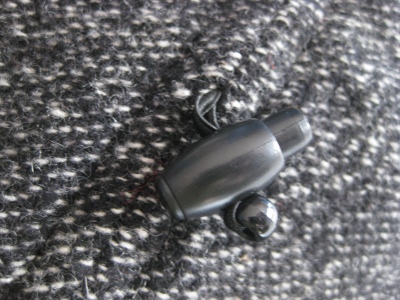
There’s the elastic (I cut it to the precise length of the part of the hood that holds the drawstring, so the hood, which also forms an over-sized collar, could be worn without any cinching at all), the lock toggle, and the bead. The casing is along the hood seam; I’m not sure exactly how ABdPM meant it to be made, but I just topstitched on either side of the hood seam, forming a channel.
The problem is that the elastic doesn’t go the whole length of the hood; it begins in the middle of the hood’s curve, goes along the top, and then exits through a buttonhole a few inches from the hood’s front edge. I did every dumb thing possible while trying to thread this elastic. The first issue was classic: There are four layers of wool forming this channel, and I laboriously threaded the elastic up through one that didn’t open out through the buttonhole. D’oh! And it got worse after that . . .
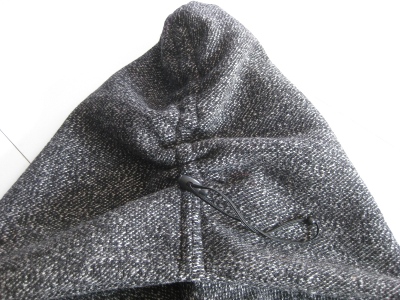
I don’t even remember how I solved this problem in the end, but it involved making an opening in the hood lining seam, knotting the ends of the elastic (but not so much that it couldn’t be pulled through the channel), and somehow resulted in having the bead and toggle where they belonged on the outside of the hood, and the ends of the elastic stitched to the seam allowance in the inner hood, and with the seam closed up neatly. Wool is so forgiving!
I love using this bead, because there’s no chance the toggle will be lost. This means, I hope, that I’ll never have to think about this process again.
ABdPM marks the buttonhole perpendicular to the hood’s edge, but, instead, I set it over, and parallel to, the hood seam (only on the outside hood, of course, and before I assembled the pieces), and then just opened the seam where the buttonhole was centered. This made a lot more sense to me, and was much easier to do over the thick wool layers. I made it as small as possible, and it turned out to be quite neat and tidy.
I did not interline or interface the hood or front bands. I was sure the doubled wool would be the right weight, and I wanted the front bands to drape a bit. They appear to lie over the front of the jacket, so they shouldn’t need extra support.
Cutting both the hood and the hood lining meant that I needed almost three yards of wool; mine was 62 inches wide. It would have been a pretty tight fit, but probably still possible, to get everything from 60 inches, but less width might have gotten problematic. The hood/front band pattern piece, with my +/- 3 inch alteration was 40 inches inches long. That’s one big hood!
ABdPH calls for far less fabric (even allowing for the major change I made); maybe they’re a lot more clever at layout than I am, though my layout sure looked economical. No layouts are included, though, so their scheme remains a mystery.
Related:
ABdPM 20013: Fit and Interlining

I’ve been consciously avoiding even looking at these patterns- but you are wearing me down fast! The jacket is looking great already!
Heh, heh, blame it on Shams, Connie! This jacket has been soooo much fun; I’m already planning my next ABdPM project. Resistance is futile!
LOL. This is such an adventure, Noile! I love how you are solving the little challenges, one at a time. 😀