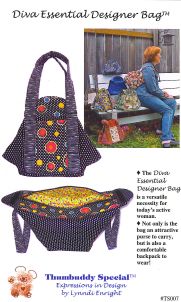
I found this pattern last month at Renee’s House of Quilting, just outside of Traverse City, Michigan. Well, that’s not quite accurate: Mr. Noile’s mother, Trilby, found both Renee’s and this Diva Essential Designer Bag pattern. Neither one of us would have looked twice at the envelope if we’d seen it first, but Trilby spied a fantastic version of the bag on display at Renee’s, and we both were sold on the spot. Here’s the envelope:
I’m afraid the main bag featured here doesn’t do anything at all for me. However, the bag has a whole bunch of pockets on the inside, a huge wide (hidden) mouth to stuff things into, pockets on the outside, and straps that allow it to be worn as a back pack if you like. Not to mention that it offers the opportunity to combine different fabric combinations for a fun, kooky or just really individual look.
Not that I’m taking advantage of the latter. My first version of the Diva is going to be boring: I need a lightweight travel bag with serious capacity in basic black. To compensate a little, I chose a chrome yellow nylon for the lining, and jumbo black rickrack to spiff up the pockets.
Renee sells the correct zipper size for the Diva in a set along with color-coordinated velcro — meaning that Trilby’s velcro and zip coordinate really well with her fabric.
The envelope includes only four pattern pieces, printed on durable, heavy paper. The designer, Lynndi Enright, has you measure and cut all of the remaining pieces directly on the fabric. She’s done a clever job of making the instructions clear, and even includes cutting layouts for all three sections: the main fabric, the lining, and the batting. Watch your math when you cut or draw — I somehow ended up with an extra 2 1/2 inches on my strap batting. (Caught in time, thank goodness.)
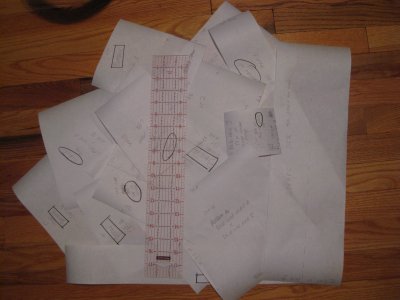
Since I plan to make a less-dull version of this bag later, I decided to make paper pattern pieces instead of cutting directly from the fabric. Using freezer paper, I drew every single piece on the roll, labeled each carefully, and then cut them out:
Although I half-dreaded doing this, it went surprisingly quickly. All the pieces are either rectangular or square, and using a clear, three inch wide quilting ruler made the job go quickly. You end up with quite a pile of paper, and, eventually, fabric. There are sixteen pieces to cut for the lining alone.
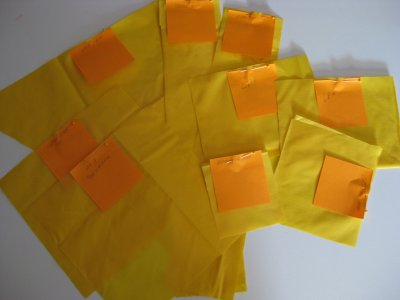
Enright says you should take a pile of stickies and label every piece as you cut it, and she’s absolutely right about that. I went one better and also marked “top” on each piece — she’s very clear about where you need to do this — and also pinned the stickies in place in the narrow seam allowance (1/4 inch).
Because my fabric is nylon ripstop, I needed to seal every edge. To do this, I light a candle in a well-ventilated area, and, holding each fabric edge taut, I run it quickly near (not touching) the base of the candle flame. This melts the nylon edge just a little bit, and prevents it from disintegrating over time. Nothing, but nothing, unravels like the unprotected edge of cut nylon.
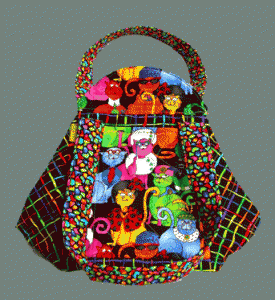
The lining gets assembled first, and that will be the subject of my next post. In the meantime, to inspire you, here are a couple of other views of the Diva. This first one’s from Heart to Hand:
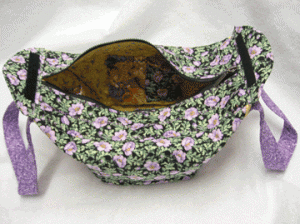
And so is this one, in a completely different flavor, showing the interior:
Batiks by Design has this one, in browns and burgundy:
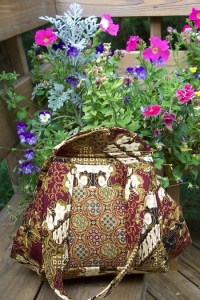
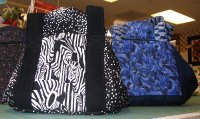
And, finally, a black and white version (and a deep blue companion) from Fabric-Etc’s Blog (where they offer a Diva-making class in Bellingham, Washington):
Lots of possibilities, wouldn’t you say?
Next — Diva Bag: The Lining

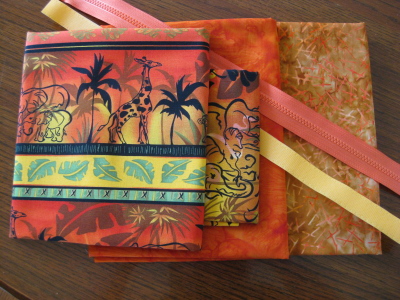
I want to know exactly where you found your fabric for the next to the last pic on this page? Plus pattern??? I love both!!!
Hi, Melanie — Thanks for your comment! You can find the Diva bag pattern at Thumbuddy Special. I’m not sure which fabrics you’re asking about, since I’m not sure how long the “page” is in your browser, so I can’t be really helpful there. I think you could find similar prints at most reasonably large quilting stores, though. That’s where I’m seeing the greatest (and most interesting!) variety of cotton prints these days. Good luck! The Diva is lots of fun to make!
this is incredibly done! amazing job. is it terribly difficult? i’m a moderate sewer, got here from patternreview.com. just WOWed over your work!
Thanks, Kerri! No, I wouldn’t say that the bag is difficult, but it isn’t a quick project by any means. On the other hand, the steps are laid out really well in the instructions, so if you just follow them carefully, you’ll do fine.
But definitely label all of your fabric and interfacing pieces! That’s really the key. I hope you make one; it’s a lot of fun to construct and use.
Your bag is beautiful, Shirley! And inspirational . . . I’ll bet your quilts are fantastic, too. So glad you spotted this, and saw much you impressed others with your work!
WOOHooo! I’m the one who made the Diva Bag for Batiks by Design. I’m impressed to see my bag on someone else’s site! Thanks for the uplift for today…Ok I’m back to making quilts for Christmas – 6 down 3 to go! Do you think I’ll make it?
HUGS from Shirley
Seeing YOUR fabrics makes me want to go out ASAP and choose some really interesting stuff for the next one!
Wow, seeing my fabrics on your post inspired me to take them out of the bag and prewash them. Alas, no time to start the bag until next week!